Notice: This Wiki is now read only and edits are no longer possible. Please see: https://gitlab.eclipse.org/eclipsefdn/helpdesk/-/wikis/Wiki-shutdown-plan for the plan.
Configuring a Descriptor (ELUG)
Contents
- 1 Configuring Common Descriptor Options
- 2 Configuring Primary Keys
- 3 Configuring Read-Only Descriptors
- 4 Configuring Unit of Work Conforming at the Descriptor Level
- 5 Configuring Descriptor Alias
- 6 Configuring Descriptor Comments
- 7 Configuring Named Queries at the Descriptor Level
- 7.1 How to Configure Named Queries at the Descriptor Level Using Workbench
- 7.1.1 Configuring Named Query Type and Parameters
- 7.1.2 Configuring Named Query Selection Criteria
- 7.1.3 Configuring Read All Query Order
- 7.1.4 Configuring Named Query Optimization
- 7.1.5 Configuring Named Query Attributes
- 7.1.6 Configuring Named Query Group/Order Options
- 7.1.7 Creating an EIS Interaction for a Named Query
- 7.1.8 Configuring Named Query Options
- 7.1.9 Configuring Named Query Advanced Options
- 7.2 How to Configure Named Queries at the Descriptor Level Using Java
- 7.1 How to Configure Named Queries at the Descriptor Level Using Workbench
- 8 Configuring Query Timeout at the Descriptor Level
- 9 Configuring Cache Refreshing
- 10 Configuring Query Keys
- 11 Configuring Interface Query Keys
- 12 Configuring Cache Type and Size at the Descriptor Level
- 13 Configuring Cache Isolation at the Descriptor Level
- 14 Configuring Unit of Work Cache Isolation at the Descriptor Level
- 15 Configuring Cache Coordination Change Propagation at the Descriptor Level
- 16 Configuring Cache Expiration at the Descriptor Level
- 17 Configuring Cache Existence Checking at the Descriptor Level
- 18 Configuring Reading Subclasses on Queries
- 19 Configuring Inheritance for a Child (Branch or Leaf) Class Descriptor
- 20 Configuring Inheritance for a Parent (Root) Descriptor
- 21 Configuring Inheritance Expressions for a Parent (Root) Class Descriptor
- 22 Configuring Inherited Attribute Mapping in a Subclass
- 23 Configuring a Domain Object Method as an Event Handler
- 24 Configuring a Descriptor Event Listener as an Event Handler
- 25 Configuring Locking Policy
- 26 Configuring Returning Policy
- 27 Configuring Instantiation Policy
- 28 Configuring Copy Policy
- 29 Configuring Change Policy
- 30 Configuring a History Policy
- 31 Configuring Wrapper Policy
- 32 Configuring Fetch Groups
- 33 Configuring a Descriptor Customizer Class
- 34 Configuring Amendment Methods
The following table lists the types of EclipseLink descriptors that you can configure and provides a cross-reference to the type-specific chapter that lists the configurable options supported by that type.
| If you are creating... | See... |
|---|---|
The Common Descriptor Options table lists the configurable options shared by two or more EclipseLink descriptor types.
For more information, see:
Configuring Common Descriptor Options
This table lists the configurable options shared by two or more EclipseLink descriptor types. In addition to the configurable options described here, you must also configure the options described for the specific Descriptor Types, as shown in the Configuring EclipseLink Descriptor table.
| Option to Configure | EclipseLink Workbench | Java |
|---|---|---|
Configuring Primary Keys
A primary key is a unique identifier (made up of one or more persistent attributes) that distinguishes one instance of a class from all other instances of the same type. You use primary keys to define relationships and to define queries.
For the descriptors shown in the Descriptor Support for Primary Keys table, you must configure a primary key and you must ensure that your class contains one or more persistent fields suitable for this purpose.
This table summarizes which descriptors support primary keys.
| Descriptor | Using the Workbench |
Using Java |
|---|---|---|
|
Relational Descriptors 1 |
||
|
Object-Relational Data Type Descriptors |
||
|
EIS Descriptors 2 |
||
|
XML Descriptors |
1 Relational class descriptors only.
2 EIS root descriptors only.
For a relational class (non-aggregate) descriptor, choose any unique database field or set of unique database fields from the descriptor's associated table.
For an EIS root descriptor, choose any unique attribute or text node or set of unique attributes or text nodes from the descriptor's schema context.
How to Configure Primary Keys Using Workbench
To associate a descriptor with one or more primary keys, use this procedure:
- Select a descriptor in the Navigator. Its properties appear in the Editor.
- Click the Descriptor Info tab. The Descriptor Info tab appears.
Descriptor Info Tab, Primary Key Options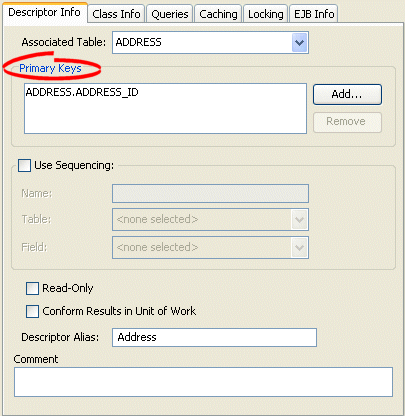
- Complete the Primary Keys options on the tab.
Use this table to enter data in Primary Keys field on the descriptor's Descriptor Info tab to specify the primary key(s):
| Field | Description |
|---|---|
| Primary Keys |
To specify the primary keys for the table, click Add in order to do the following:
To remove a primary key, select the key and click Remove. |
How to Configure Primary Keys Using Java
You can use Java to configure primary keys for the following:
Relational Projects
Use ClassDescriptor method addPrimaryKeyFieldName to specify the primary key field of the descriptor's table. This should be called for each field that makes up the primary key of the table.
If the descriptor has more than one table, and all other tables have the same primary key, use the ClassDescriptor method addPrimaryKeyFieldName to specify the the primary key in the first table.
If the descriptor has more than one table, and each table has a different primary key, use ClassDescriptor method addForeignKeyFieldNameForMultipleTable to map the source foreign key field name to target primary key field name.
EIS Projects
Use EISDescriptor method addPrimaryKeyFieldName to specify the primary key field of the descriptor's class. Call this method for each field that makes up the primary key.
Configuring Read-Only Descriptors
You can configure a relational class or EIS root descriptor as read-only. This indicates that instances of the reference class will never be modified.
Read-only descriptors are usually used within a unit of work as a performance gain, because there is no need to register, clone, and merge the read-only classes. For more information, see Introduction to EclipseLink Transactions.
This table summarizes which descriptors support read-only configuration.
| Descriptor | Using the Workbench |
Using Java |
|---|---|---|
|
Relational Descriptors 1 |
||
|
Object-Relational Data Type Descriptors |
||
|
EIS Descriptor 2 |
||
|
XML Descriptors |
1 Relational class descriptors only.
2 EIS root descriptors only.
|
Note: Relational aggregate and EIS composite descriptors get their read-only setting from their owner. |
How to Configure Read-Only Descriptors Using Workbench
To configure a descriptor as read-only use this procedure:
- Select a descriptor in the Navigator. Its properties appear in the Editor.
- Click the Descriptor Info tab. The Descriptor Info tab appears.
Descriptor Info Tab, Read Only Option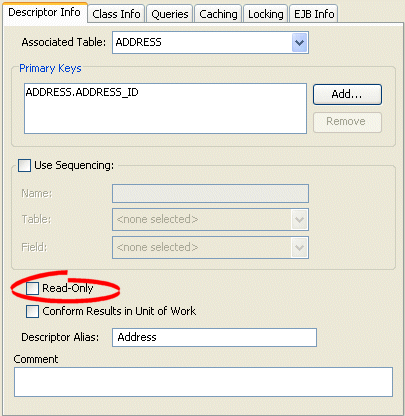
- Select the Read-Only option on the tab. Specify whether this descriptor is read-only or not.
See Also
How to Configure Read-Only Descriptors Using Java
Use ClassDescriptor method setReadOnly.
Configuring Unit of Work Conforming at the Descriptor Level
Conforming is a query feature that lets you include new, changed, or deleted objects in queries within a unit of work prior to committing the transaction. This feature enables you to query against your relative logical or transaction view of a data source.
This table summarizes which descriptors support descriptor level unit of work conforming.
| Descriptor | Using the Workbench |
Using Java |
|---|---|---|
|
Relational Descriptors 1 |
||
|
Object-Relational Data Type Descriptors |
||
|
EIS Descriptors 2 |
||
|
XML Descriptors |
1 Relational Class Descriptors only.
2 EIS Root Descriptors only.
When you configure a descriptor to conform results in a unit of work, when you execute a query in the unit of work, EclipseLink filters the data source result set to the changes currently made in the unit of work. EclipseLink adds new or changed objects that correspond to the query's selection criteria and removes changed objects that no longer correspond to the query's selection criteria.
|
Note: For EIS root descriptors, only deleted objects would be filtered, not new or changed objects. |
Conforming can reduce performance. Before you enable a descriptor for conforming, be aware of its limitations (see How to Use Conforming) and make sure that conforming is actually necessary.
For examples, see the following:
- Using Conforming Queries and Descriptors
- What You May Need to Know About Conforming Query Alternatives
How to Configure Unit of Work Conforming at the Descriptor Level Using Workbench
To conform a descriptor's results in a unit of work, use this procedure:
- Select a descriptor in the Navigator. Its properties appear in the Editor.
- Click the Descriptor Info tab. The Descriptor Info tab appears.
Descriptor Info Tab, Conform Results in Unit of Work Option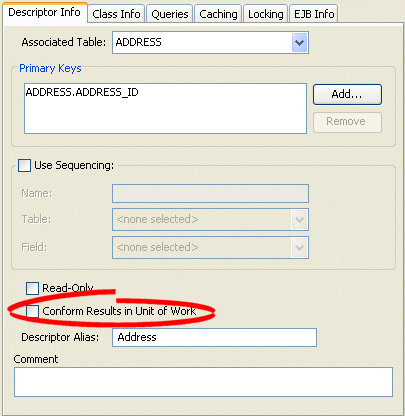
- Select the Conform Results in Unit of Work option on the tab.
Enable or disable conforming: when enabled, this feature ensures that any queries for this descriptor will conform the data source result with the current changes in the unit of work. For more information, see How to Use Conforming.
See Also
How to Configure Unit of Work Conforming at the Descriptor Level Using Java
Use ClassDescriptor method setShouldAlwaysConformResultsInUnitOfWork(true).
Configuring Descriptor Alias
This table summarizes which descriptors support descriptor alias configuration.
| Descriptor | Using the Workbench |
Using Java |
|---|---|---|
|
Relational Descriptors |
||
|
Object-Relational Data Type Descriptors |
||
|
EIS Descriptors 1 |
||
|
XML Descriptors |
1 EIS Root Descriptors only.
|
Note: The alias is also used in JPA – it is the entity name. This is the logical name referenced in JP QL queries. It defaults to the class name without a path information. For more information, see Introduction to Java Persistence API |
How to Configure Descriptor Alias Using Workbench
To specify a descriptor alias, use this procedure:
- In the Navigator, select a descriptor.
- Click the Descriptor Info tab in the Property window.
Descriptor Info Tab, Descriptor Alias Field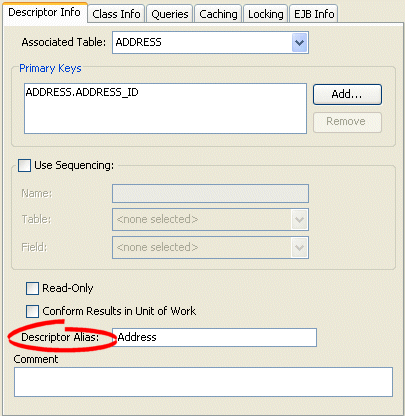
- In the Descriptor Alias field, enter an alias for this descriptor. The default is the class name.
How to Configure Descriptor Alias Using Java
Use ClassDescriptor method setAlias passing in the descriptor alias as a String. The descriptor alias defaults to the class name.
Configuring Descriptor Comments
You can define a free-form textual comment for each descriptor. You can use these comments however you whish: for example, to record important project implementation details such as the purpose or importance of a descriptor.
Comments are stored in the Workbench project, in the EclipseLink deployment XML file. There is no Java API for this feature.
This table summarizes which descriptors support descriptor comment configuration.
| Descriptor | Using the Workbench |
How to Use Java |
|---|---|---|
|
Relational Descriptors |
||
|
Object-Relational Data Type Descriptors |
||
|
EIS Descriptors |
||
|
XML Descriptors |
How to Configure Descriptor Comments Using Workbench
To create a comment for a descriptor, use this procedure:
- In the Navigator, select a descriptor.
- Click the Descriptor Info tab in the Property window.
Descriptor Info Tab, Comment Field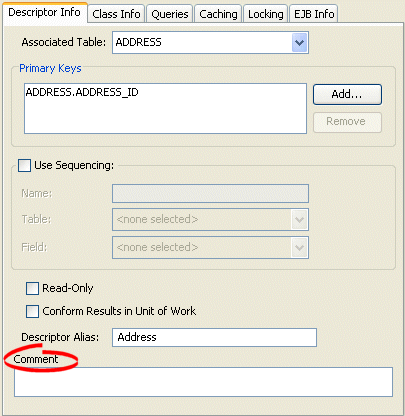
- In the Comment field, enter a description of this descriptor.
Configuring Named Queries at the Descriptor Level
A named query is an EclipseLink query that you create and store, by name, in a descriptor's DescriptorQueryManager for later retrieval and execution. Named queries improve application performance because they are prepared once and they (and all their associated supporting objects) can be efficiently reused thereafter making them well suited for frequently executed operations.
If a named query is global to a Class, configure it at the descriptor level. Alternatively, you can configure a named query at the session level.
Use named queries to specify SQL or EclipseLink Expression queries to access your data source.
|
Note: You can use named queries in JPA (see Using EclipseLink JPA Extensions for Stored Procedure Query). Because the scope of JPA named queries is global to the session, ensure that each named query has a unique name. |
Using the Workbench, you can configure named queries for a subset of query types and store them in a descriptor's DescriptorQueryManager.
Using Java, you can create named queries for all query types and store them in a descriptor's DescriptorQueryManager.
This table summarizes which descriptors support named query configuration.
| Descriptor | Using the Workbench |
Using Java |
|---|---|---|
|
Relational Descriptors 1 |
||
|
Object-Relational Data Type Descriptors |
||
|
EIS Descriptor 2 |
||
|
XML Descriptors |
1 Relational Class Descriptors only.
2 EIS Root Descriptors only.
After you create a named query, you can execute it by name and class on the EclipseLink session (see Using Named Queries).
For more information about named queries, see Named Queries.
How to Configure Named Queries at the Descriptor Level Using Workbench
To create a named query, use this procedure
- In the Navigator, select a descriptor. Its properties appear in the Editor.
- Click the Queries tab in the Editor. The Queries tab appear with three additional tabs.
- Click the Named Queries tab in the Queries tab. The Named Queries tab appears.
Queries Tab – Named Queries Subtab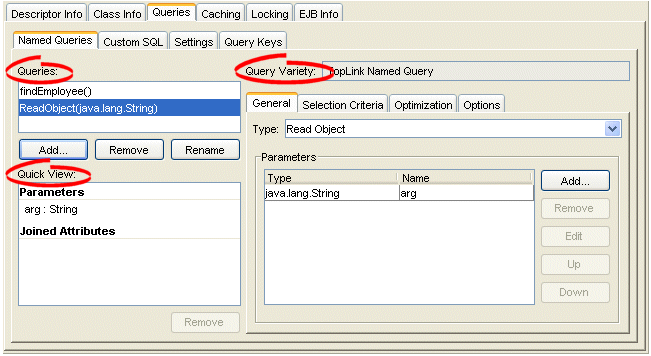
- Complete each field on the Named Queries tab.
Use the following information to complete each field on this tab:
| Field | Description |
|---|---|
| Queries |
Lists the existing queries for this descriptor.
|
| Query Variety |
Displays the variety of the currently selected query (see Adding Named Queries). |
| Quick View |
Lists the parameters and joined attributes defined for the query. Clicking on a heading in the Quick View area selects the corresponding subtab. You can also remove parameters or attributes from the Quick View area by selecting the item and clicking Remove. |
The Named Queries tab includes the following subtabs:
- General – See Configuring Named Query Type and Parameters.
- Selection Criteria – See Configuring Named Query Selection Criteria.
- Order – This tab appears for ReadAllQuery queries only. See Configuring Read All Query Order.
- Optimization – See Configuring Named Query Optimization.
- Attributes – This tab appears for ReportQuery queries only. See Configuring Named Query Attributes.
- Group/Order – This tab appears for ReportQuery queries only. Configuring Named Query Group/Order Options.
- Calls – This tab appears for EIS root descriptors only (for ReadAllQuery and ReadObjectQuery queries). See Creating an EIS Interaction for a Named Query.
- Options – See Configuring Named Query Options.
See Also
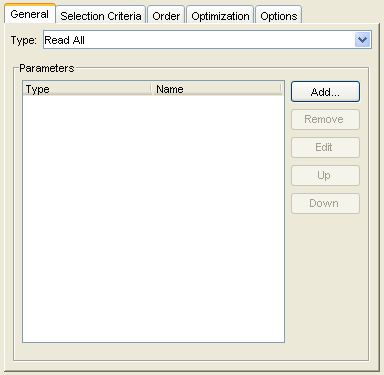
Configuring Named Query Type and Parameters
Use this tab to select the query type and add or remove parameters.
Named Queries, General Tab
Use the following information to complete each field on this tab:
| Field | Description |
|---|---|
| Type |
Select the type of query from the list. You can create any of the following query types:
To create other types of query, you must use Java. When you change the type of an existing query, Workbench preserves any configuration that is common between the old and new type and warns you if changing the type will result in the loss of configuration that is not shared by the new type. |
| Parameters |
For queries that take parameters, specify the parameters:
|
| Type | Select the class of the parameter's type. |
| Name | Enter the name of the parameter. |
1 Relational descriptors only.
See Also
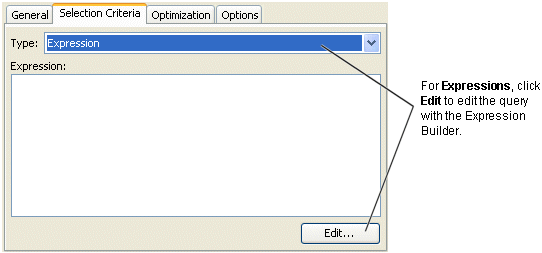
Configuring Named Query Selection Criteria
Use this tab to specify the format of the named query and enter the query string.
Named Queries, Selection Criteria Tab
Use the following information to complete each field on this tab:
| Field | Description |
|---|---|
| Type | Specify if query uses an EclipseLink Expression, SQL, or EJB QL. |
| Expression or Query String |
If the Type is SQL or EJB QL, enter the query string (either SQL or EJB QL). Workbench does not validate the query string. |
|
Note: Use a combination of an escape character and a double-quote ( \" ) instead of just a double-quote ( " ) when defining your query using SQL or EJB QL. For example: SELECT OBJECT(employee) FROM Employee employee WHERE employee.name = \"Bob\" If you fail to do so, the generated Java code would look as follows: query.setEJBQLString("SELECT OBJECT(employee) FROM Employee employee WHERE employee.name = "Bob"");
The preceding code produces an error at compile time.If you define your query using the correct syntax, the generated Java code will contain no errors and be similar to the following: query.setEJBQLString("SELECT OBJECT(employee) FROM Employee employee WHERE employee.name = \"Bob\"");
|
See Also
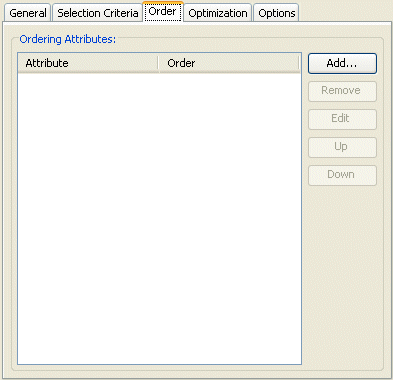
Configuring Read All Query Order
Use this tab to specify how the results of a read all query should be ordered by attribute name.
Named Queries, Order Tab
Select one of the following actions:
- To add a new attribute by which to order query results, click Add. The Add Ordering Attribute dialog box appears. Select the mapped attribute to order by, specify ascending or descending order, and then click OK.
- To change the order of the order attributes, select an existing attribute and click Up or Down.
- To modify an existing order attribute's ordering options, select an existing attribute and click Edit.
- To remove an order attribute, select an existing attribute and click Remove.
Configuring Named Query Optimization
You can optimize a named query by configuring batch (ReadAllQuery only) or joining (ReadAllQuery and ReadObjectyQuery) attributes.
For more information on using batch reading, see Optimizing Queries, Reading Case 2: Batch Reading Objects, and Using Batch Reading.
For more information on joining, see Join Reading and Object-Level Read Queries and Using Join Reading with ObjectLevelReadQuery.
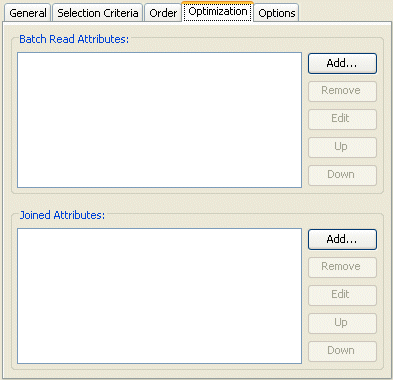
Use this tab to specify batch reading and joining attributes.
Named Queries, Optimization Tab
Select one of the following actions for Batch Read Attributes (ReadAllQuery only):
- To add a new batch read attribute, click Add. The Add Batch Read Attribute dialog box appears. Select the mapped attribute and click OK.
- To change the order of the batch read attributes, select an existing attribute and click Up or Down.
- To modify an existing batch read attribute's options, select an existing attribute and click Edit.
- To remove a batch read attribute, select an existing attribute and click Remove.
Select one of the following actions for Joined Attributes (ReadAllQuery and ReadObjectQuery):
- To add a new joined attribute, click Add. The Add Joined Attribute dialog box appears.
Add Joined Attribute Dialog Box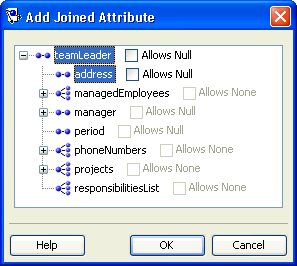
Select the mapped attribute. Optionally, enable or disable Allows Null or, for a Collection attribute, Allows None. Click OK. - To change the order of the joined attributes, select an existing attribute and click Up or Down.
- To modify an existing joined attribute's options, select an existing attribute and click Edit.
- To remove a joined attribute, select an existing attribute and click Remove.
Configuring Named Query Attributes
For ReportQuery queries only, you can configure report query functions to apply to one or more attributes.
For more information, see Report Query.
Use this tab to configure report query attributes.
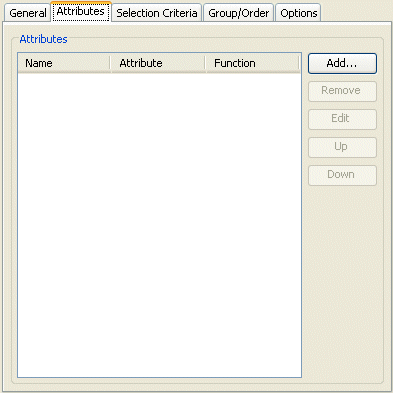
Named Queries, Attributes Tab
Select one of the following actions for Attributes (ReportQuery only):
- To add a new report query attribute, click Add. The Add Joined Attribute dialog box appears. Continue with Adding Report Query Attributes.
- To change the order of the report query attribute attributes, select an existing attribute and click Up or Down.
- To modify an existing report query attribute's options, select an existing attribute and click Edit.
- To remove a report query attribute, select an existing attribute and click Remove.
|
Note: You can only choose attributes that are configured with a direct mapping (converters included) or a user-defined query key. |
Adding Report Query Attributes
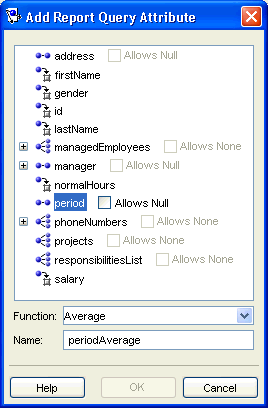
Use this dialog box to add a report query attribute.
Add Report Query Attribute Dialog Box
Select the attribute you want in this report query and use the following table to complete the dialog box and add the report query attribute:
| Option | 'Description |
|---|---|
| Allows None or Allows Null |
Use the Allows Null and Allows None options to define an expression with an outer join. Check the Allows Null option to use the ExpressionBuilder method getAllowingNull. Check the Allows None option for Collection attributes to use the ExpressionBuilder method anyOfAllowingNone. |
| Function |
Select from the list of report query functions that EclipseLink provides. This function will be applied to the specified attribute. You must select an attribute for all functions, except Count. Alternatively, you can enter the name of a custom function that you implement in your database. For more information, see Expression method getFunction in the EclipseLink API Reference. |
| Name | The name associated with the calculated value. By default, the name is <AttributeName><FunctionName>. |
Enter the necessary information and click OK. Workbench adds the report query attribute to the list of attributes in the Attribute tab.
Configuring Named Query Group/Order Options
For ReportQuery queries only, you can configure grouping and ordering attributes.
For more information, see Report Query.
Use this tab to specify grouping and ordering attributes.
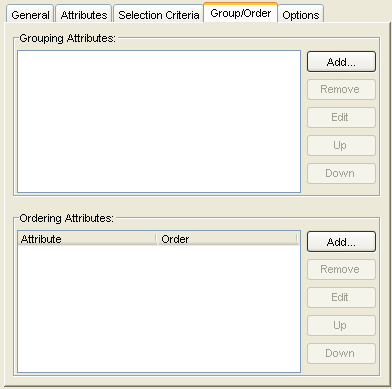
Named Queries, Group/Order Tab
Select one of the following actions for Grouping Attributes (ReportQuery only):
- To add a new grouping attribute, click Add. The Add Grouping Attribute dialog appears. Select the desired mapped attribute and click OK.
- To change the order of the grouping attributes, select an existing attribute and click Up or Down.
- To modify an existing grouping attribute's options, select an existing attribute and click Edit.
- To remove a grouping attribute, select an existing attribute and click Remove.
Select one of the four following actions for Ordering Attributes (ReportQuery only):
- To add a new ordering attribute, click Add. The Add Ordering Attribute dialog box appears. Continue with Adding Ordering Attributes.
- To change the order of the ordering attributes, select an existing attribute and click Up or Down.
- To modify an existing ordering attribute's options, select an existing attribute and click Edit.
- To remove an ordering attribute, select an existing attribute and click Remove.
Adding Ordering Attributes
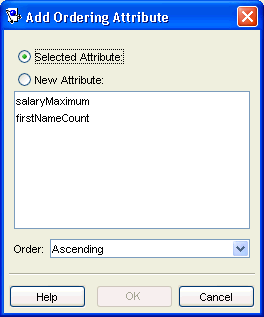
Use this dialog box to add a report query ordering attribute.
Add Ordering Attribute Dialog Box
Use the following information to complete the fields on the dialog box and add an ordering attribute:
| Option | Description |
|---|---|
| Selected Attribute |
Select this option to view a list of the report query attributes you added (see Configuring Named Query Attributes). Select an attribute and choose its ordering option in the Order field. |
| New Attribute |
Select this option to view a list of all class attributes. Select an attribute and choose its ordering option in the Order field. |
| Order | Select ascending or descending. |
Enter the necessary information and click OK. Workbench adds the report query attribute to the list of attributes in the Attribute tab.
See Also
Creating an EIS Interaction for a Named Query
For an EIS root descriptor, you can define EIS interactions to invoke methods on an EIS.
You can use EclipseLink to define an interaction as a named query for read object and read all object queries, as described here. These queries are not called for basic persistence operations (Configuring Custom EIS Interactions for Basic Persistence Operations); you can call these additional queries by name in your application for special purposes.
Use this tab to define an interaction as a named query for read object and read all object queries.
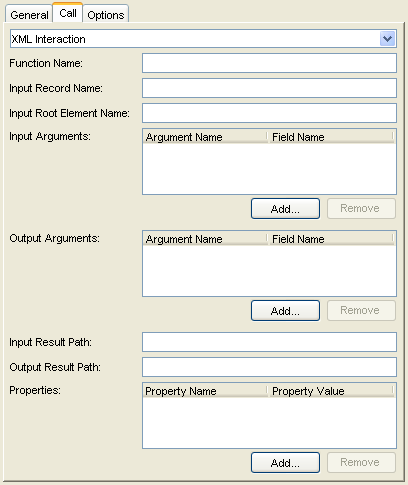
Call Tab
Use the following information to complete each field on the tab:
| Field | Description |
|---|---|
| Interaction Type | Using Workbench, you can only use XML Interactions. You cannot change this field. |
| Function Name | Specify the name of the EIS function that this call type (Read Object or Read All) invokes on the EIS. |
| Input Record Name | Specify the name passed to the JCA adapter when creating the input record. |
| Input Root Element | Specify the root element name to use for the input DOM. |
| Input Arguments |
Specify the query argument name to map to the interaction field or XPath nodes in the argument record. For example, if you are using XML records, use this option to map input argument name to the XPath name/first-name. |
| Output Arguments |
Specify the result record field or XPath nodes to map the correct nodes in the record used by the descriptor's mappings. For example, if you are using XML records, use this option to map the output fname to name/first-name. Output arguments are not required if the interaction returns an XML result that matches the descriptor's mappings. |
| Input Result Path |
Use this option if the EIS interaction expects the interaction arguments to be nested in the XML record. For example, specify arguments, if the arguments were to be nested under the root element exec-find-order, then under an arguments element. |
| Output Result Path |
Use this option if the EIS interaction result record contains the XML data that maps to the objects in a nested structure. For example, specify order, if the results were return under a root element results, then under an order element. |
| Properties | Specify any properties required by your EIS platform. For example, property name operation (from AQPlatform.QUEUE_OPERATION) and property value enqueue (from AQPlatform.ENQUEUE). |
Configuring Named Query Options
Use this tab to configure additional options for the query.
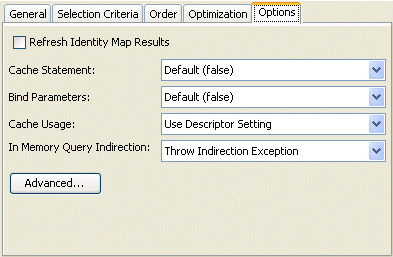
Named Queries, Options Tab
Use the following information to complete each field on the tab:
| Field | Description |
|---|---|
|
Refresh Identity Map Results 2 |
Refreshes the attributes of the object(s) resulting from the query. If cascading is used, the private parts of the objects will also be refreshed. |
|
Cache Statement 1 |
Caches the prepared statements. This requires full parameter binding as well (see Bind Parameters). |
|
Bind Parameters 1 |
By default, EclipseLink binds all of the query's parameters. Deselect this option to disable binding. |
|
Cache Usage 2 |
Selects how EclipseLink should use the session cache when a query is executed:
|
|
In Memory Query Indirection 2 |
Selects how EclipseLink should handle indirection (lazy loading) when an in-memory or conforming query is executed:
For more information, see the following: |
|
Return Choice 3 |
Selects how EclipseLink should handle ReportQuery results:
For more information, see Collection Query Results. |
|
Retrieve Primary Keys 3 |
Selects whether or not EclipseLink retrieves the primary key values within each result. You can use the primary keys to retrieve the real objects.
|
1 For more information, see How to Use Parameterized SQL (Parameter Binding) and Prepared Statement Caching for Optimization.
2 For ReadObjectQuery and ReadAllQuery queries only.
3 For ReportQuery queries only.
Click Advanced to configure additional options. See Configuring Named Query Advanced Options.
See Also
Configuring Named Query Advanced Options
To configure additional advanced query options, use this procedure.
- From the Named Queries – Options tab, click Advanced. The Advanced Query Options dialog box appears.From the Named Queries – Options tab, click Advanced. The Advanced Query Options dialog box appears.
Advanced Query Options Dialog Box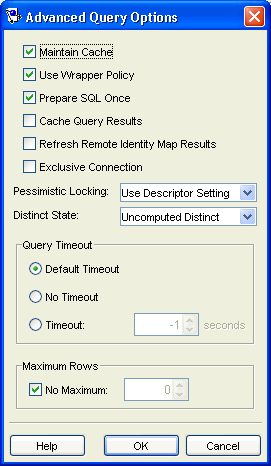
- Complete each field in the Advanced Query Options dialog box.
Use the following information to enter data in each field and click OK:
| Field | Description |
|---|---|
| Maintain Cache |
Specify whether to use the cache for the query or to build objects directly from the database result. You should only use this option if you are executing a Partial Object Query, whose results cannot be cached. For more information, see How to Disable the Identity Map Cache Update During a Read Query. |
| Use Wrapper Policy |
Specify whether or not the named query will use the wrapper policy configured for this descriptor. For more information, see Configuring Wrapper Policy. |
| Prepare SQL Once |
Specify the setShouldPrepare() for the named query. By default, EclipseLink optimizes queries to generate their SQL only once. You may need to disable this option for certain types of queries that require dynamic SQL based on their arguments, such as the following:
|
| Cache Query Results |
Specify the cacheQueryResults method for the query. The query will only access the database the first time it is executed. Subsequent execution will return exactly the original result. For more information, see How to Cache Results in a ReadQuery. |
| Refresh Remote Identity Map Results | Specify the refreshRemoteIdentityMapResult method for the query. EclipseLink can refresh the attributes of the object(s) resulting from the query. With cascading, EclipseLink will also refresh the private parts of the object(s). |
| Exclusive Connection |
Specify whether or not the named query will use an exclusive connection. You can also configure exclusive connection acquisition at the session level (see Configuring Connection Policy. |
| Pessimistic Locking | Specify the specific pessimistic locking policy for the query or use the locking policy from the descriptor. |
| Distinct State | Specify if EclipseLink prints the DISTINCT clause, if a distinct has been set. The DISTINCT clause allows you to remove duplicates from the result set. |
| Query Timeout | Specify if the query will time out (or abort) after a specified number of seconds. |
| Maximum Rows | Specify if the query will limit the results to a specified number of rows. Use this to option for queries that could return an excessive number of objects. |
See Also
How to Configure Named Queries at the Descriptor Level Using Java
To configure named queries in Java, Use a descriptor amendment method. The Creating a Named Query with an Amendment Method example illustrates an amendment method that creates a named query and adds it to the DescriptorQueryManager.
Creating a Named Query with an Amendment Method
public class EmployeeAmmendmentMethodClass {
....
    // Create named query with Employee as its reference class

    public static void createEmployeeQuery(ClassDescriptor descriptor) {
        ReadObjectQuery query = new ReadObjectQuery(Employee.class);
        ExpressionBuilder emp = query.getExpressionBuilder();
        Expression firstNameExpression =
            emp.get("firstName").equal(emp.getParameter("firstName"));
        query.setSelectionCriteria(firstNameExpression);
        query.addArgument("firstName");

        descriptor.getQueryManager().addQuery(
                            "employeeReadByFirstName", query);
    }
}
Configuring Query Timeout at the Descriptor Level
You can specify how the EclipseLink runtime handles the duration of queries on a descriptor's reference class. Specifying a query timeout at the descriptor level applies to all queries on the descriptor's reference class. A query timeout ensures that your application does not block forever over a hung or lengthy query that does not return in a timely fashion.
This table summarizes which descriptors support query timeout configuration.
| Descriptor | Using the Workbench |
Using Java |
|---|---|---|
|
Relational Descriptors 1 |
||
|
Object-Relational Data Type Descriptors |
||
|
EIS Descriptor |
||
|
XML Descriptors |
1 Relational Class Descriptors only.
You can also configure a timeout on a per-query basis. For more information, see the following:
How to Configure Query Timeout at the Descriptor Level Workbench
To configure how EclipseLink handles the duration of queries to this descriptor, use this procedure:
- Select a descriptor in the Navigator. Its properties appear in the Editor.
- Click the Queries tab. The Queries tab appears.
- Click the Settings tab. The Settings tab appears.
Descriptor Queries Settings Tab, Query Timeout Options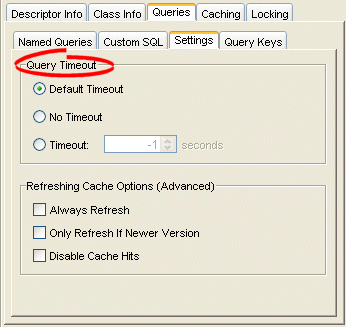
- Select the Query Timeout options on the tab.
Use the following table to enter data in the fields on the descriptor's Settings tab to specify how EclipseLink handles query duration:
| Field | Description |
|---|---|
| Default Timeout | EclipseLink throws a DatabaseException if a query on this descriptor does not return within the timeout period you configure on the parent descriptor. If there is no parent descriptor, the query timeout defaults to No Timeout. |
| No Timeout | EclipseLink blocks until a query on this descriptor returns. |
| Timeout | Enter the timeout period in seconds. EclipseLink throws a DatabaseException if a query on this descriptor does not return within this time. |
See Also
How to Configure Query Timeout at the Descriptor Level Java
Use DescriptorQueryManager method setQueryTimeout passing in the timeout value as a number of milliseconds.
Configuring Cache Refreshing
By default, EclipseLink caches objects read from a data source (see Introduction to Cache). Subsequent queries for these objects will access the cache and thus improve performance by reducing data source access and avoiding the cost of rebuilding object's and their relationships. Even if a query, such as a read-all query, accesses the data source, if the objects corresponding to the records returned are in the cache, EclipseLink will use the cache objects.
This can lead to stale data in the application. Although using an appropriate locking policy is the only way to ensure that stale or conflicting data does not get committed to the data source, sometimes certain data in the application changes so frequently that it is desirable to always refresh the data, instead of only refreshing the data when a conflict is detected.
You can specify how the EclipseLink runtime handles cache refreshing for all queries on a descriptor's reference class.
This table summarizes which descriptors support query cache refresh configuration.
| Descriptor | Using the Workbench |
Using Java |
|---|---|---|
|
Relational Descriptors 1 |
||
|
Object-Relational Data Type Descriptors |
||
|
EIS Descriptor 2 |
||
|
XML Descriptors |
1 Relational Class Descriptors only.
2 EIS Root Descriptors only.
Configuring descriptor-level cache refresh may affect performance. As an alternative, consider configuring the following:
For more information, see Optimizing Cache.
How to Configure Cache Refreshing Using Workbench
To configure how EclipseLink refreshes the cache for queries to this descriptor, use this procedure:
- Select a descriptor in the Navigator. Its properties appear in the Editor.
- Click the Queries tab. The Queries tab appears.
- Click the Settings tab. The Settings tab appears.
Descriptor Queries Settings Tab, Cache Refreshing Options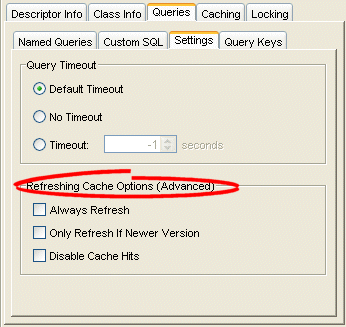
- Select the Refreshing Cache options on the tab.
Use the following table to enter data in the fields on the descriptor's Settings tab to specify how EclipseLink will refresh the cache for queries:
| Field | Description |
|---|---|
| Always Refresh |
Refreshes the cache on all queries. Avoids stale data by ensuring that any query that accesses the data source will refresh the resulting objects in the cache. This has no effect on queries that get a cache hit and never access the data source, such as read-object primary key queries or in-memory queries. Configuring descriptor level cache refresh may affect performance. As an alternative, consider configuring: |
| Only Refresh If Newer Version |
Refreshes the cache only if the object in the database is newer than the object in the cache (as determined by the Optimistic Locking field). See Configuring Locking Policy for more information. Improves performance by avoiding unnecessary refreshing of an object if its version matches the data source version. This option does not cause refreshing on its own: you must use it in combination with Always Refresh, query refreshing, or cache expiration. |
| Disable Cache Hits |
When selected, EclipseLink bypasses the cache and goes to the database for read object queries based on primary key. Using this option in conjunction with Always Refresh ensures that EclipseLink always goes to the database. This option ensures that all queries including read-object primary key queries will always access the data source. This option does not cause refreshing on its own: you must use it in combination with Always Refresh. This option can cause a serious performance issue: avoid whenever possible. |
|
Caution: Use the Always Refresh and Disable Cache Hits properties with caution as they may lead to poor performance. As an alternative, consider configuring cache refresh on a query-by-query basis or configuring cache expiration. For more information, see Optimizing Cache. |
How to Configure Cache Refreshing Using Java
Configure cache refresh options using the following ClassDescriptor methods:
- setShouldAlwaysRefreshCache
- setShouldAlwaysRefreshCacheOnRemote
- setShouldDisableCacheHits
- setShouldDisableCacheHitsOnRemote
- setShouldOnlyRefreshCacheIfNewerVersion
Use these methods in a descriptor amendment method, as this example illustrates.
Configuring Remote Refreshing
public void addToDescriptor(ClassDescriptor descriptor) {
    descriptor.setShouldRefreshCacheOnRemote(true);
    descriptor.setShouldDisableCacheHitsOnRemote(true);
}
Configuring Query Keys
A query key is a schema-independent alias for a database field name. For example, consider a class Employee with attribute firstName mapped directly to a database field F_NAME in database table EMPLOYEE. Without a query key, when you create a query or expression that involves Employee attribute firstName, you must use the database management system-specific field name F_NAME. This makes it more difficult to build a query and ties the query to the schema. With a query key, you can refer to this field using a schema-independent alias, such as firstName.
This table summarizes which descriptors support query keys.
| Descriptor | Using the Workbench |
Using Java |
|---|---|---|
|
Relational Descriptors |
||
|
Object-Relational Data Type Descriptors |
||
|
EIS Descriptors |
||
|
XML Descriptors |
Using query keys offers the following advantages:
- Enhances code readability in EclipseLink expressions and simplifies expression development. You can compose expressions entirely within the context of your object model.
- Increases portability by making code independent of the database schema. If you rename a field in your schema, you can redefine the query key without changing any code that uses it.
- Query keys used with interface descriptors allow the implementor descriptor's tables to have different field names.
Query keys are automatically generated for all mapped attributes. The name of the query key is the name of the class attribute specified in your object model.
For information on how to use query keys in queries and expressions, see Query Keys.
When query keys are generated and how you can add or modify query keys depends on the type of mapping or descriptor involved:
Direct Mappings
Workbench automatically generates query keys for all direct mappings at the time you create the mapping.
Workbench provides support for adding or modifying query keys for simple unmapped attributes that could be mapped by a direct mapping: for example, the version field used for optimistic locking or the type field used for inheritance. You cannot modify or remove automatically generated query keys.
Relationship Mappings
EclipseLink automatically generates query keys for all relationship mappings at run time.
For example, if you have a class Customer with attribute orders mapped in a one-to-many relationship to class PurchaseOrders, then the EclipseLink runtime will generate a query key named orders for this Customer attribute.
The Workbench does not currently support adding or modifying the query keys for relationship mappings. If you must add or modify such a query key, you must do so in Java code, using a descriptor amendment method.
Interface Descriptors
Interface descriptors define only the query keys that are shared among their implementors. In the descriptor for an interface, only the name of the query key is specified.
Workbench provides support for choosing the implementors of an interface that share at least one common automatically generated query key.
How to Configure Query Keys Using Workbench
To add query keys to simple unmapped fields and to view the query keys automatically generated for directly mapped attributes, use this procedure:
- Select a descriptor in the Navigator. Its properties appear in the Editor.
- Click the Query Keys tab in the Editor.
Queries, Query Keys Tab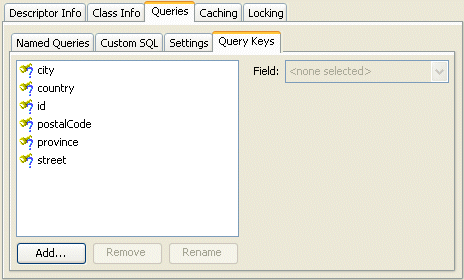
To add a new query key, click Add.
To delete an existing query key, select the query key and click Remove.
To rename an existing query key, select the query key and click Rename.
Use the Field list to select the field in the table associated with the query key.
How to Configure Query Keys Using Java
To manually create a relationship query key, implement a descriptor amendment method that uses one of the following ClassDescriptor methods to register the query keys:
- addQueryKey – specify a query key using an instance of QueryKey such as DirectQueryKey, DirectCollectionQueryKey, ManyToManyQueryKey, OneToManyQueryKey, or OneToOneQueryKey.
- addDirectQueryKey – add a query key that maps directly to the given database field.
- addAbstractQueryKey – add an abstract query key to an interface descriptor. Any implementors of that interface must define the query key defined by this abstract query key.
The Defining a Query Key, Defining a One-to-Many Query Key, and Defining a Many-to-Many Query Key examples illustrate how to define a query key in Java code.
Defining a Query Key
// Add a query key for the foreign key field using the direct method
descriptor.addDirectQueryKey("managerId", "MANAGER_ID");

// The same query key can also be added through the addQueryKey method
DirectQueryKey directQueryKey = new DirectQueryKey();
directQueryKey.setName("managerId");
directQueryKey.setFieldName("MANAGER_ID");
descriptor.addQueryKey(directQueryKey);

// Add a one-to-one query key for the large project of which the
// employee is a leader (this assumes only one project)
OneToOneQueryKey projectQueryKey = new OneToOneQueryKey();
projectQueryKey.setName("managedLargeProject");
projectQueryKey.setReferenceClass(LargeProject.class);
ExpressionBuilder builder = new ExpressionBuilder();
projectQueryKey.setJoinCriteria(builder.getField(
    "PROJECT.LEADER_ID").equal(builder.getParameter("EMPLOYEE.EMP_ID")));
descriptor.addQueryKey(projectQueryKey);
Defining a One-to-Many Query Key
// Add a one-to-many query key for the projects where the employee
// manages multiple projects
OneToManyQueryKey projectsQueryKey = new OneToManyQueryKey();
projectsQueryKey.setName("managedProjects");
projectsQueryKey.setReferenceClass(Project.class);
ExpressionBuilder builder = new ExpressionBuilder();
projectsQueryKey.setJoinCriteria(builder.getField(
    "PROJECT.LEADER_ID").equal(builder.getParameter("EMPLOYEE.EMP_ID")));
descriptor.addQueryKey(projectsQueryKey);
Defining a Many-to-Many Query Key
// Add a many-to-many query key to an employee project that uses a join table
ManyToManyQueryKey projectsQueryKey = new ManyToManyQueryKey();
projectsQueryKey.setName("projects");
projectsQueryKey.setReferenceClass(Project.class);
ExpressionBuilder builder = new ExpressionBuilder();
projectsQueryKey.setJoinCriteria(
    (builder.getParameter("EMPLOYEE.EMP_ID").equal(
    builder.getTable("EMP_PROJ").getField("EMP_ID")).and(
    builder.getTable("EMP_PROJ").getField("PROJ_ID").equal(
    builder.getField("PROJECT.PROJ_ID")))));
descriptor.addQueryKey(projectsQueryKey);
The Defining a One-to-One Query Key with an Amendment Method example illustrates how to implement a Descriptor amendment method to define a one-to-one query key. In this example, the object model for the Address class does not include a reference to its owner, an Employee object. You can amend the Address class descriptor to add a query key named owner to make up for this deficiency. At run time, you can compose expressions that select Address objects based on this owner query key.
Defining a One-to-One Query Key with an Amendment Method
// Static amendment method in Address class, addresses do not know
// their owners in the object model, however you can still
// query on their owner if a user-defined query key is defined
public static void addToDescriptor(Descriptor descriptor) {
    OneToOneQueryKey ownerQueryKey = new OneToOneQueryKey();
    ownerQueryKey.setName("owner");
    ownerQueryKey.setReferenceClass(Employee.class);
    ExpressionBuilder builder = new ExpressionBuilder();
    ownerQueryKey.setJoinCriteria(
        builder.getField("EMPLOYEE.ADDRESS_ID").equal(
        builder.getParameter("ADDRESS.ADDRESS_ID")));
    descriptor.addQueryKey(ownerQueryKey);
}
Configuring Interface Query Keys
A query key is a schema independent alias for a database field name. For more information about query keys, see Configuring Query Keys.
Interface descriptors are defined only with query keys that are shared among their implementors. In the descriptor for an interface, only the name of the query key is specified.
In each implementor descriptor, the key must be defined with the appropriate field from one of the implementor descriptor's tables.
This allows queries and relationship mappings to be defined on the interface using the query key names.
Interface query keys are supported in relational database projects only.
This table summarizes which descriptors support interface query keys.
| Descriptor | Using the Workbench |
Using Java |
|---|---|---|
|
Relational Descriptors |
||
|
Object-Relational Data Type Descriptors |
||
|
EIS Descriptors |
||
|
XML Descriptors |
Consider an Employee that contains a contact of type Contact. The Contact class is an interface with two implementors: Phone and Email. The Phone class has attributes id and number. The Email class has attributes id and address. This figure illustrates the generated keys:
Automatically Generated Query Keys for Phone and Email
Both classes have an attribute, id, that is directly mapped to fields that have different names. However, a query key is generated for this attribute. For the Contact interface descriptor, you must indicate that the id query key must be defined for each of the implementors.
If either of the implementor classes did not have the id query key defined the Workbench would flag that descriptor as deficient.
Now that a descriptor with a commonly shared query key has been defined for Contact, you can use it as the reference class for a variable one-to-one mapping (see Using Queries on Variable One-to-One Mappings).
For example, you can now create a variable one-to-one mapping for the contact attribute of Employee. When you edit the foreign key field information for the mapping, you must match the Employee descriptor's tables to query keys from the Contact interface descriptor.
How to Configure Interface Query Keys Using Workbench
To choose the implementors of an interface that share at least one common automatically generated query key, use this procedure.
- Select an interface descriptor in the Navigator. Its properties appear in the Editor.
Interface Descriptor Editor Window
Interface Descriptor Editor Window
To choose an implementor of the selected interface that shares at least one common query key, click Add.
To remove an implementor of the selected interface, select the implementor and click Remove.
How to Configure Interface Query Keys Using Java
This example shows how to define the Contact interface and Email and Phone implementors in Java.
Defining Interface Query Keys
Descriptor contactInterfaceDescriptor = new Descriptor();
contactInterfaceDescriptor.setJavaInterface(Contact.class);
contactInterfaceDescriptor.addAbstractQueryKey("id");

Descriptor emailClassDescriptor = new Descriptor();
emailClassDescriptor.setJavaClass(Email.class);
emailClassDescriptor.addDirectQueryKey("id", "E_ID");
emailClassDescriptor.getInterfacePolicy().addParentInterface(Contact.class);
emailClassDescriptor.setTableName("INT_EML");
emailClassDescriptor.setPrimaryKeyFieldName("E_ID");
emailClassDescriptor.setSequenceNumberName("SEQ");
emailClassDescriptor.setSequenceNumberFieldName("E_ID");
emailClassDescriptor.addDirectMapping("emailID", "E_ID");
emailClassDescriptor.addDirectMapping("address", "ADDR");

Descriptor phoneClassDescriptor = new Descriptor();
phoneClassDescriptor.setJavaClass(Phone.class);
phoneClassDescriptor.getInterfacePolicy().addParentInterface(Contact.class);
phoneClassDescriptor.addDirectQueryKey("id", "P_ID");
phoneClassDescriptor.setTableName("INT_PHN");
phoneClassDescriptor.setPrimaryKeyFieldName("P_ID");
phoneClassDescriptor.setSequenceNumberName("SEQ");
phoneClassDescriptor.setSequenceNumberFieldName("P_ID");
phoneClassDescriptor.addDirectMapping("phoneID", "P_ID");
phoneClassDescriptor.addDirectMapping("number", "P_NUM");
Configuring Cache Type and Size at the Descriptor Level
The EclipseLink cache is an in-memory repository that stores recently read or written objects based on class and primary key values. EclipseLink uses the cache to do the following:
- improve performance by holding recently read or written objects and accessing them in-memory to minimize database access;
- manage locking and isolation level;
- manage object identity.
This table summarizes which descriptors support identity map configuration.
| Descriptor | Using the Workbench |
Using Java |
|---|---|---|
|
Relational Descriptors 1 |
||
|
Object-Relational Data Type Descriptors |
||
|
EIS Descriptors 2 |
||
|
XML Descriptors |
1 Relational Class Descriptors only.
2 EIS Root Descriptors only.
This configuration overrides the default identity map configuration defined at the project level.
For detailed information on caching and object identity, and the recommended settings to maximize EclipseLink performance, see to Cache Type and Object Identity.
For more information, see Introduction to Cache.
How to Configure Cache Type and Size at the Descriptor Level Using Workbench
To specify the identity map information for a descriptor, use this procedure:
- Select the descriptor in the Navigator.
- Select the Caching tab in the Editor. The Caching tab appears.
Caching Tab, Identity Map Options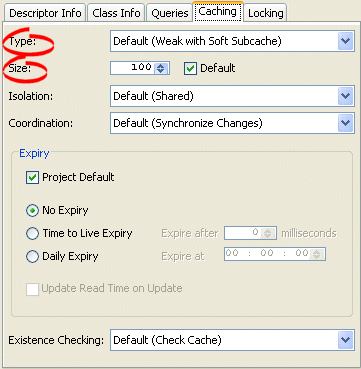
- Complete the fields on theCaching tab to specify the default identity map for the selected descriptor.
Use the following table to enter data in following fields on the Caching tab:
| Field | Description |
|---|---|
|
Type 1 |
Use the Type list to choose the identity map as follows:
For more information, see Cache Type and Object Identity. Changing the project's default identity map does not affect descriptors that already exist in the project. |
|
Size 1 |
Specify the size of the cache as follows:
|
| Default | When you enter a cache size, the Default check box is cleared. To reset the size to the default for the selected cache type, check the Default check box. |
1 If a descriptor is a child in an inheritance hierarchy, EclipseLink makes this field read only and displays the options from the parent root descriptor.
How to Configure Cache Type and Size at the Descriptor Level Using Java
Use one of the following ClassDescriptor methods to configure the descriptor to use the appropriate type of identity map:
- useFullIdentitMap
- useWeakIdentityMap
- useSoftIdentityMap
- useSoftCacheWeakIdentityMap
- useHardCacheWeakIdentityMap
- useNoIdentityMap
Use the ClassDescriptor method setIdentityMapSize to configure the size of the identity map.
Configuring Cache Isolation at the Descriptor Level
If you plan to use isolated sessions, you must configure descriptors as isolated for any object that you want confined to an isolated session cache.
Configuring a descriptor to be isolated means that EclipseLink will not store the object in the shared session cache and the object will not be shared across client sessions. Each client will have their own object read directly from the database. Objects in an isolated client session cache can reference objects in their parent server session's shared session cache, but no objects in the shared session cache can reference objects in an isolated client session cache. Isolation is required when using Oracle Database Virtual Private Database (VPD) support or database user-based read security. Isolation can also be used if caching is not desired across client sessions.
This table summarizes which descriptors support cache isolation configuration.
| Descriptor | Using the Workbench |
Using Java |
|---|---|---|
|
Relational Descriptors 1 |
||
|
Object-Relational Data Type Descriptors |
||
|
EIS Descriptors 2 |
||
|
XML Descriptors |
1 Relational Class Descriptors only.
2 EIS Root Descriptors only.
This configuration overrides the default cache isolation configuration defined at the project level.
|
Note: If you configure a descriptor as isolated, it cannot participate in a coordinated cache (see Configuring Cache Coordination Change Propagation at the Descriptor Level). |
How to Configure Cache Isolation at the Descriptor Level Using Workbench
To specify the cache isolation options, use this procedure:
- Select the descriptor in the Navigator.
- Select the Caching tab in the Editor. The Caching tab appears.
Caching Tab, Isolation Options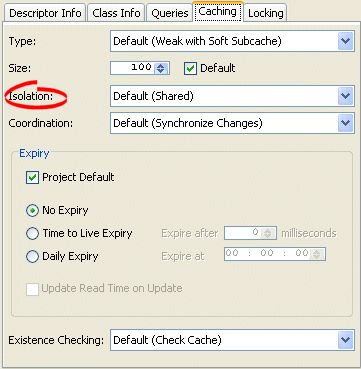
- Complete the Isolation options on the Caching tab.
Use the Isolation list to choose one of the following:
- Isolated – if you want all objects confined to an isolated client session cache. For more information, see Cache Isolation.
- Shared – if you want all objects visible in the shared session cache (default).
How to Configure Cache Isolation at the Descriptor Level Using Java
To specify that a class is isolated, Use a descriptor amendment method to call ClassDescriptor method setIsIsolated, passing in a boolean of true.
Configuring Unit of Work Cache Isolation at the Descriptor Level
Use this policy to determine how a unit of work uses a session cache for a specific class. This table lists the unit of work cache isolation options.
| Option | Description |
|---|---|
|
Using the Session Cache After the Transaction |
USE_SESSION_CACHE_AFTER_TRANSACTION Objects built from new data accessed after a unit of work early transaction are stored in the session cache.This options is the most efficient as it allows the cache to be used after an early transaction. |
|
Isolating New Data After the Transaction |
ISOLATE_NEW_DATA_AFTER_TRANSACTION (default) Objects built from new data accessed after a unit of work early transaction are only stored in the unit of work. This still allows previously cached objects to be accessed in the unit of work after an early transaction, while ensuring that uncommitted data will never be put in the session cache by storing any object built from new data only in the unit of work |
|
Isolating the Cache after the Transaction |
ISOLATE_CACHE_AFTER_TRANSACTIONAfter a unit of work early transaction the session cache is no longer used for this class. Objects are directly built from the database data and only stored in the unit of work, even if previously cached. Note: This option may affect performance because you are bypassing the session cache after an early transaction. |
|
Always Isolating the Cache |
ISOLATE_CACHE_ALWAYS The session cache will never be used for the class. Objects are directly built from the database data and only stored in the unit of work. New objects and changes will never be merged into the session cache. Note: This option my affect performance because you are bypassing the session cache. However if this class is isolated or pessimistic locked and always accessed in a transaction, this can avoid having to build two copies of the object. |
Most of these options apply only to a unit of work in an early transaction, such as the following:
- A unit of work that was flushed (write changes).
- Issued a modify query.
- Acquired a pessimistic lock.
How to Configure Unit of Work Cache Isolation at the Descriptor Level Using Java
To specify that a class is isolated, use a descriptor amendment method to call ClassDescriptor method setUnitOfWorkCacheIsolationLevel.
Configuring Cache Coordination Change Propagation at the Descriptor Level
If you plan to use a coordinated cache, you can configure how, and under what conditions, a coordinated cache propagates changes for a given descriptor.
This table summarizes which descriptors support cache isolation configuration.
| Descriptor | Using the Workbench |
Using Java |
|---|---|---|
|
Relational Descriptors 1 |
||
|
Object-Relational Data Type Descriptors |
||
|
EIS Descriptors 2 |
||
|
XML Descriptors |
1 Relational Class Descriptors only.
2 EIS Root Descriptors only.
This configuration overrides the default cache coordination change propagation configuration defined at the project level (see Configuring Cache Coordination Change Propagation at the Project Level).
To complete your coordinated cache configuration, see Configuring a Coordinated Cache.
|
Note: If you configure a descriptor as isolated (see Configuring Cache Isolation at the Descriptor Level), it cannot participate in a coordinated cache. |
How to Configure Cache Coordination Change Propagation at the Descriptor Level Using Workbench
To specify the coordinated cache change propagation options, use this procedure:
- Select the descriptor in the Navigator.
- Select the Caching tab in the Editor. The Caching tab appears.
Caching Tab, Coordination Options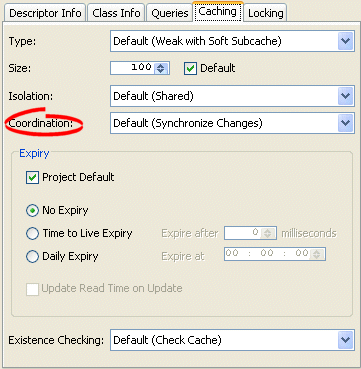
- Complete the Coordination options on the Caching tab.
Use the following information to enter data in the Coordination field:
| Coordination Option | Description | When to Use |
|---|---|---|
| None | For both existing and new instances, do not propagate a change notification. | Infrequently read or changed objects. |
| Synchronize Changes |
For an existing instance, propagate a change notification that contains each changed attribute. For a new instance, propagate an object creation (along with all the new instance's attributes) only if the new instance is related to other existing objects that are also configured with this change propagation option. |
Frequently read or changed objects that contain few attributes or in cases where only a few attributes are frequently changed. Objects that have many or complex relationships. |
| Synchronize Changes and New Objects |
For an existing instance, propagate a change notification that contains each changed attribute. For a new instance, propagate an object creation (along with all the new instance's attributes). |
Frequently read or changed objects that contain few attributes or in cases where only a few attributes are frequently changed. Objects that have few or simple relationships. |
| Invalidate Changed Objects |
For an existing instance, propagate an object invalidation that marks the object as invalid in all other sessions. This tells other sessions that they must update their cache from the data source the next time this object is read. For a new instance, no change notification is propagated. |
Frequently read or changed objects that contain many attributes in cases where many of the attributes are frequently changed. |
See Also
- Configuring Cache Coordination Change Propagation at the Descriptor Level
- Configuring Cache Coordination Change Propagation at the Project Level
- Introduction to Cache
How to Configure Cache Coordination Change Propagation at the Descriptor Level Using Java
Use a descriptor amendment method to invoke ClassDescriptor method setCacheSynchronizationType passing in one of the following parameters:
- ClassDescriptor.DO_NOT_SEND_CHANGES
- ClassDescriptor.SEND_OBJECT_CHANGES
- ClassDescriptor.SEND_NEW_OBJECTS_WITH_CHANGES
- ClassDescriptor.INVALIDATE_CHANGED_OBJECTS
Configuring Cache Expiration at the Descriptor Level
By default, objects remain in the cache until they are explicitly deleted (see Deleting Objects) or garbage-collected when using a weak identity map (see Configuring Cache Isolation at the Project Level). Alternatively, you can configure an object with a CacheInvalidationPolicy that allows you to specify, either automatically or manually, that an object is invalid: when any query attempts to read an invalid object, EclipseLink will go to the data source for the most up-to-date version of that object and update the cache with this information.
Using cache invalidation ensures that your application does not use stale data. It provides a better performing alternative to always refreshing (see Configuring Cache Refreshing).
This table summarizes which descriptors support a cache invalidation policy.
| Descriptor | Using the Workbench |
Using Java |
|---|---|---|
|
Relational Descriptors 1 |
||
|
Object-Relational Data Type Descriptors |
||
|
EIS Descriptors 2 |
||
|
XML Descriptors |
1 Relational Class Descriptors only.
2 EIS Root Descriptors only.
You can override the project-level cache invalidation configuration (see Configuring Cache Expiration at the Project Level) by defining cache invalidation at the descriptor or query level (see How to Configure Cache Expiration at the Query Level).
You can customize how EclipseLink communicates the fact that an object has been declared invalid to improve efficiency, if you are using a coordinated cache. For more information, see Configuring Cache Coordination Change Propagation at the Descriptor Level.
For more information, see Cache Invalidation.
How to Configure Cache Expiration at the Descriptor Level Using Workbench
To specify the cache invalidation information for a descriptor, use this procedure:
- Select the descriptor in the Navigator.
- Select the Caching tab in the Editor. The Caching tab appears.
Caching Tab, Expiration Options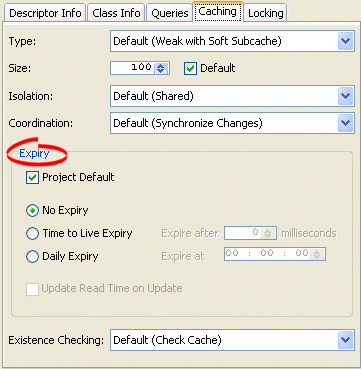
- Complete the Cache Expiry options on the tab.
Use this table to enter data in the following fields on the Caching tab to specify the cache invalidation policy for the descriptors.
| Field | Description |
|---|---|
| Project Default |
Use the project's cache expiration options for this descriptor. See Configuring Cache Expiration at the Project Level for more information. |
| No Expiry | Specify that objects in the cache do not expire. |
| Time to Live Expiry | Specify that objects in the cache will expire after a specified amount of time. Use the Expire After field to indicate the time (in milliseconds) after which the objects will expire. |
| Daily Expiry | Specify that objects in the cache will expire at a specific time each day. Use the Expire At field to indicate the exact time to the second (using a 24-hour clock) at which the objects will expire. |
| Update Read Time on Update | Specify if EclipseLink should reset the cached object's expiry time after the EclipseLink successfully updates the object. |
|
Note: These options apply per descriptor. See Configuring Cache Expiration at the Project Level for information on configuring project-level options. |
See Also
- Configuring Cache Expiration at the Descriptor Level
- Configuring Cache Expiration at the Project Level
How to Configure Cache Expiration at the Descriptor Level Using Java
Use ClassDescriptor method setCacheInvalidationPolicy to set an appropriate instance of CacheInvalidationPolicy.
Configuring Cache Existence Checking at the Descriptor Level
When EclipseLink writes an object to the database, EclipseLink runs an existence check to determine whether to perform an insert or an update.
When using JPA, EclipseLink checks against the database by default. When using the EclipseLink Native API it checks against the cache by default. We recommend that you use the default existence check option for most applications.
This table summarizes which descriptors support existence checking.
| Descriptor | Using the Workbench |
Using Java |
|---|---|---|
|
Relational Descriptors 1 |
||
|
Object-Relational Data Type Descriptors |
||
|
EIS Descriptors 2 |
||
|
XML Descriptors |
1 Relational Class Descriptors only.
2 EIS Root Descriptors only.
You can configure existence checking at the descriptor level to override the project level configuration (see Configuring Existence Checking at the Project Level).
For more information see the following:
How to Configure Cache Existence Checking at the Descriptor Level Using Workbench
To specify the existence checking information for a descriptor, use this procedure:
- Select the descriptor in the Navigator.
- Select the Caching tab in the Editor. The Caching tab appears.
Caching Tab, Existence Checking Options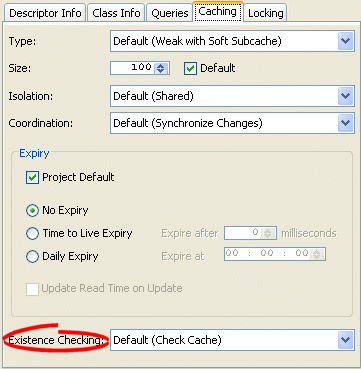
- Complete the Existence Checking options on the tab.
Use this table to enter data in the following fields of the tab to specify the existence checking options for newly created descriptors:
| Field | Description |
|---|---|
| Check Cache | Check the session cache. If the object is not in the cache, assume that the object does not exist (do an insert). If the object is in the cache, assume that the object exists (do an update). We recommend using this option for most applications. |
| Check Cache then Database |
If an object is not in the cache, query the database to determine if the object exists. If the object exists, do an update. Otherwise, do an insert. Selecting this option may negatively impact performance. For more information, see Using Check Database. |
| Assume Existence |
Always assume objects exist: always do an update (never do an insert). For more information, see Using Assume Existence. |
| Assume Non-Existence |
Always assume objects do not exist: always do an insert (never do an update). For more information, see Using Assume Nonexistence. |
How to Configure Cache Existence Checking at the Descriptor Level Using Java
To configure existence checking at the descriptor level using Java, use ClassDescriptor method getQueryManager to acquire the DescriptorQueryManager from the descriptor and then use one of the following DescriptorQueryManager methods (see the Configuring Existence Checking Using Java example):
- checkCacheForDoesExist – check the session cache. If the object is not in the cache, assume that the object does not exist (do an insert). If the object is in the cache, assume that the object exists (do an update). We recommend using this option for most applications.
- checkDatabaseForDoesExist – if an object is not in the cache, query the database to determine if the object exists. If the object exists, do an update. Otherwise, do an insert. Selecting this option may negatively impact performance. For more information, see Using Check Database.
- assumeExistenceForDoesExist – always assume objects exist: always do an update (never do an insert). For more information, see Using Assume Existence.
- assumeNonExistenceForDoesExist – always assume objects do not exist: always do an insert (never do an update). For more information, see Using Assume Nonexistence.
Configuring Existence Checking Using Java
descriptor.getQueryManager().checkCacehForDoesExist();
Configuring Reading Subclasses on Queries
If you are mapping an inheritance hierarchy, by default, queries on root or branch classes return instances of the root class and their subclasses.
Alternatively, you can configure a root or branch class descriptor to do the following:
- not include subclasses when the root or branch class is queried;
- outer-join subclasses when the root or branch class is queried.
You can also specify a database view to optimize the reading of subclasses. The view can be used to optimize queries for root or branch classes that have subclasses spanning multiple tables. The view must apply an outer-join or union all of the subclass tables.
Do not configure this option for leaf classes.
This table summarizes which descriptors support inherited attribute mapping configuration.
| Descriptor | Using the Workbench |
Using Java |
|---|---|---|
|
Relational Descriptors |
||
|
Object-Relational Data Type Descriptors |
||
|
EIS Descriptors |
||
|
XML Descriptors |
For more information, see Descriptors and Inheritance.
How to Configure Reading Subclasses on Queries Using Workbench
To configure reading classes on subqueries, use this procedure:
- In the Navigator, select a root or branch descriptor.If the Inheritance advanced property is not visible for the descriptor, right-click the descriptor and choose Select Advanced Properties > Inheritance from context menu or from the Selected menu.
- Click the Inheritance tab.
Inheritance Tab, Read Subclasses on Query Option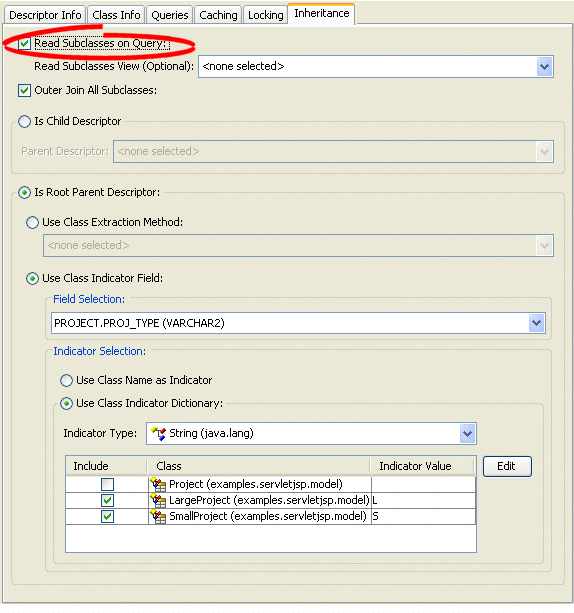
- Enter data in the Read Subclasses on Query section on the Inheritance tab.
Use the following information to enter data in Read Subclasses on Query and Read Subclasses View fields of the tab:
| Field | Description |
|---|---|
| Read Subclasses on Query | Select this option to configure the root class descriptor to instantiate a subclass when the root class is queried. |
| Read Subclasses View | Optionally select a database view to use for reading subclasses. |
| Outer Join All Subclasses | Optionally use the outerJoinAllSubclsses option to optimize the query. |
See Also
How to Configure Reading Subclasses on Queries Using Java
Create a descriptor amendment method to customize the root or branch class descriptor's InheritancePolicy.
This example shows an amendment method for the Person class. In this example, you use the InheritancePolicy method dontReadSubclassesOnQueries to configure the descriptor so that subclasses are not read on queries.
Configuring Reading Subclasses on Queries
...
public static void addToPersonDescriptor(Descriptor descriptor) {
    descriptor.getInheritancePolicy().dontReadSubclassesOnQueries();
}
...
This example shows an amendment method for the Person class. In this example, you use the InheritancePolicy method setReadAllSubclassesViewName to optimize multiple table inheritance queries.
Configuring Reading Subclasses on Queries Using a View Name
...
public static void addToPersonDescriptor(Descriptor descriptor) {
    descriptor.getInheritancePolicy().setReadAllSubclassesViewName(myView);
}
...
This example shows an amendment method for the Person class. In this example, you use the InheritancePolicy method setShouldOuterJoinSubclasses to configure the descriptor so that subclasses are outer-joined on queries.
Configuring Outer-Joining Subclasses on Queries
...
public static void addToPersonDescriptor(Descriptor descriptor) {
    descriptor.getInheritancePolicy().setShouldOuterJoinSubclasses(true);
}
...
Configuring Inheritance for a Child (Branch or Leaf) Class Descriptor
Inheritance describes how a derived (child) class inherits the characteristics of its superclass (parent). When you designate a class as a child, you must also specify the descriptor that represents the child's parent in your inheritance hierarchy.
This table summarizes which descriptors support child inheritance configuration.
| Descriptor | Using the Workbench |
Using Java |
|---|---|---|
|
Relational Descriptors |
||
|
Object-Relational Data Type Descriptors |
||
|
EIS Descriptors |
||
|
XML Descriptors |
For more information about inheritance, see Descriptors and Inheritance.
For more information about configuring inheritance for a parent (root) class descriptor, see Configuring Inheritance for a Parent (Root) Descriptor.
How to Configure Inheritance for a Child (Branch or Leaf) Class Descriptor Using Workbench
To create a child (branch or leaf class) for an inheritance, use this procedure.
- In the Navigator, select the descriptor you wish to specify as a child.
- Choose the Inheritance tab in the Property window.If the Inheritance tab is not visible, right-click the descriptor and choose Select Advanced Properties > Inheritance.
- Select the Is Child Descriptor option to specify this descriptor is a child class. The Parent Descriptor list is now enabled and the class indicator information is disabled.
Inheritance Tab, Child Descriptor Option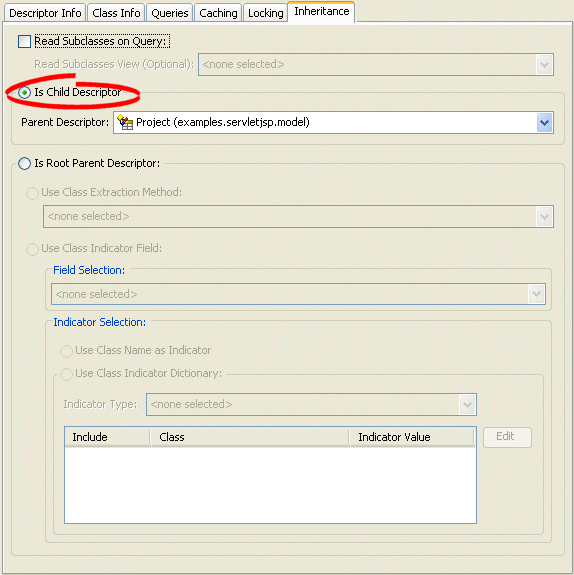
- Complete each child descriptor option on the Inheritance tab.
Use the following information to enter data in each child descriptor field on the tab:
| Field | Description |
|---|---|
| Is Child Descriptor | Specify that this descriptor is a child class to be used in a branch or leaf. |
| Parent Descriptor |
Use the list to select the parent of this descriptor. See Descriptors and Inheritance for more information. |
See Also
- Configuring Inheritance for a Child (Branch or Leaf) Class DescriptorConfiguring Inheritance for a Child (Branch or Leaf) Class Descriptor
- Descriptors and Inheritance
How to Configure Inheritance for a Child (Branch or Leaf) Class Descriptor Using Java
Using Java, you can configure an inheritance child descriptor using InheritancePolicy method setParentClass, as this example shows.
Configuring an Inheritance Child Descriptor
descriptor.getInheritancePolicy().setParentClass(ChildClass.class);
Configuring Inheritance for a Parent (Root) Descriptor
Inheritance describes how a derived (child) class inherits the characteristics of its superclass (parent). When you designate a class as a parent, you can configure how EclipseLink handles the class's inheritance hierarchy.
The following table summarizes which descriptors support parent inheritance configuration.
| Descriptor | Using the Workbench |
Using Java |
|---|---|---|
|
Relational Descriptors |
||
|
Object-Relational Data Type Descriptors |
||
|
EIS Descriptors |
||
|
XML Descriptors |
For more information about configuring inheritance for a child (branch or leaf) class descriptor, see Configuring Inheritance for a Child (Branch or Leaf) Class Descriptor.
For more information, see Descriptors and Inheritance.
How to Configure Inheritance for a Parent (Root) Descriptor Using Workbench
To create a root class for an inheritance, use this procedure.
- In the Navigator, select the descriptor you wish to specify as the root.
- Choose the Inheritance tab in the Property window.If the Inheritance tab is not visible, right-click the descriptor and choose Select Advanced Properties > Inheritance.
- Select the Is Root Parent Descriptor option to specify this descriptor is a root class.
Inheritance Tab, Configuring Inheritance for a Root Descriptor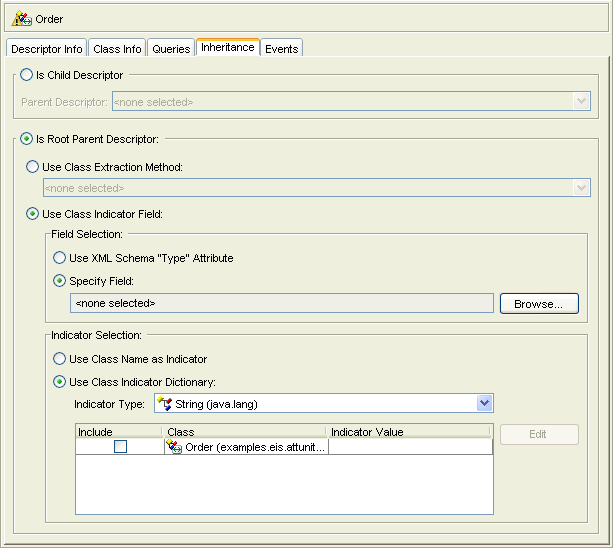
- Complete each root descriptor option on the Inheritance tab.
Use this table to complete the following root descriptor field on the Inheritance tab:
| Field | Description |
|---|---|
| Is Root Parent Descriptor | Select this option to specify this descriptor as the root (parent) of the inheritance hierarchy. |
| Use Class Extraction Method |
Choose this option to specify a class indicator using a class extraction method, and select your static class extraction method from the list. For more information, see Using Class Extraction Methods. |
| Use Class Indicator Field |
Choose this option to specify a class indicator using a class indicator field. For more information, see Using Class Indicator Fields. |
| Field Selection | Choose the field to use as the class indicator field. |
|
Use XML Schema "Type" Attribute 1 |
Select this option to use the type attribute specified in the XML schema for this descriptor's reference class. |
| Specify Field |
For a relational descriptor, select the field of the database table associated with this descriptor (see Configuring Associated Tables). For an EIS root descriptor (using XML records) or an XML descriptor, click Browse to select an element attribute or text node. |
| Indicator Selection | Choose between using a class name as the class indicator field value or specifying specific class indicator field values for each (nonabstract) child class. |
| Use Class Name as Indicator | Choose this option to use class names as the class indicator field value. |
| Use Class Indicator Dictionary |
Choose this option to specify specific class indicator field values for each (nonabstract) child class. When you choose this option, you must specify the data type of the class indicator field and the specific class indicator field values for each (nonabstract) child class. |
| Indicator Type |
Select the data type from the list to specify the data type of the class indicator field. To specify the specific class indicator field values for each (nonabstract) child class, click Edit and enter the appropriate value for each child class. |
1 EIS root (see EIS Root Descriptors) or XML descriptors (see XML Descriptor Concepts) only.
How to Configure Inheritance for a Parent (Root) Descriptor Using Java
Create a descriptor amendment method to customize the root class descriptor's inheritance policy using InheritancePolicy methods setParentClass, setClassIndicatorFieldName, addClassIndicator, useClassNameAsIndicator and setClassExtractionMethodName, as required.
The following example shows amendment methods for the Person and Student classes where Student extends Person in a relational project. In this example, a class indicator field is used (see Using Class Indicator Fields).
Configuring Inheritance for a Relational Root Class
...
public static void addToPersonDescriptor(Descriptor descriptor) {
    descriptor.getInheritancePolicy().setClassIndicatorFieldName("CLIENT_TYPE");
    descriptor.getInheritancePolicy().addClassIndicator(Student.class, indicator);
}

public static void addToStudentDescriptor(Descriptor descriptor) {
    descriptor.getInheritancePolicy().setParentClass(Person.class);
}
...
If you are using a class-extraction method (see Using Class Extraction Methods), you may also need to use InheritancePolicy methods setOnlyInstancesExpression and setWithAllSubclassesExpression (see Configuring Inheritance Expressions for a Parent (Root) Class Descriptor).
The following example shows amendment methods for the Person and Student classes where Student extends Person in an EIS project using XML records. In this example, a class indicator field is used (see Using Class Indicator Fields).
Configuring Inheritance for an EIS Root Class
...
public static void addToPersonDescriptor(Descriptor descriptor) {
    descriptor.getInheritancePolicy().setClassIndicatorField(new XMLField("@CLIENT_TYPE"));
    descriptor.getInheritancePolicy().addClassIndicator(Student.class, indicator);
}

public static void addToStudentDescriptor(Descriptor descriptor) {
    descriptor.getInheritancePolicy().setParentClass(Person.class);
    descriptor.getInheritancePolicy().setClassIndicatorField(new XMLField("@CLIENT_TYPE"));
}
...
Configuring Inheritance Expressions for a Parent (Root) Class Descriptor
If your class uses inheritance (see Descriptors and Inheritance) with a class extraction method (see Using Class Extraction Methods) you must provide EclipseLink with expressions to correctly filter sibling instances for all classes that share a common table.
This table summarizes which descriptors support inheritance expression configuration.
| Descriptor | How to Use Workbench | Using Java |
|---|---|---|
|
Relational Descriptors |
||
|
Object-Relational Data Type Descriptors |
||
|
EIS Descriptors |
||
|
XML Descriptors |
The Example Inheritance Hierarchy figure shows a typical inheritance hierarchy. In this example, instances of both Person and Student are stored in the same PERSON table, as the PERSON Table figure shows: an instance of Person has a null value for STUDENT_NUMBER. Instances of Company are stored in a separate COMPANY table.
Example Inheritance Hierarchy
PERSON Table
Queries on inheritance classes that share a common table, such as Person and Student, must filter out their sibling instances. EclipseLink performs this filtering using the Expression instances returned by the descriptor's InheritancePolicy methods getOnlyInstancesExpression and getWithAllSubclassesExpression.
Queries on a class that has its own table for its specific data, such as Company, and does not share this table with any sibling classes, do not require these expressions.
If you use a class indicator type field (see Using Class Indicator Fields), EclipseLink automatically generates the required expressions.
If you use a class extraction method (see Using Class Extraction Methods), you must provide EclipseLink with an expressions to correctly filter sibling instances for all classes that share a common table.
For concrete classes, you must define an only- instances expression.
For branch classes, you must define a with-all-subclasses expression.
When EclipseLink queries for a leaf class, it uses the only- instances expression to filter out any sibling classes.
When EclipseLink queries for a root or branch class whose subclasses do not define their own tables, it uses the with-all-subclasses expression. This is also the case when a subclass view is used (see Configuring Reading Subclasses on Queries).
When querying for a root or branch class that has subclasses that span multiple tables, a query is performed for each concrete class in the inheritance hierarchy using the only- instances expression to filter sibling classes.
When a class extraction method is used the only-instances expression is used to determine if a class is concrete. If a class does not require an only instances expression, do not enable reading subclasses on queries (see Configuring Reading Subclasses on Queries), otherwise EclipseLink will assume that the class has no instances and it will skip that class on queries.
For more information about inheritance expressions, see Specifying Expressions for Only-Instances and With-All-Subclasses.
How to Configure Inheritance Expressions for a Parent (Root) Class Descriptor Using Java
Create a descriptor amendment method to customize the root class descriptor's InheritancePolicy using InheritancePolicy methods setOnlyInstancesExpression and setWithAllSubclassesExpression, as required.
This example shows amendment methods for the Person and Student descriptors based on the class hierarchy shown in the Example Inheritance Hierarchy figure and the database table shown in the PERSON Table figure.
Configuring Only-Instances Expressions
...
// Only-instances expression for Person
public static void addToPersonDescriptor(Descriptor descriptor) {
    ExpressionBuilder builder = new ExpressionBuilder();
    descriptor.getInheritancePolicy().setOnlyInstancesExpression(
                              builder.getField("STUDENT_NUMBER").isNull());
}

// Only-instances expression for Student
public static void addToStudentDescriptor(Descriptor descriptor) {
    ExpressionBuilder builder = new ExpressionBuilder();
    descriptor.getInheritancePolicy().setOnlyInstancesExpression(
                              builder.getField("STUDENT_NUMBER").notNull());
}
...
The Configuring Only-Instances and With-All-Subclasses Expressions example shows amendment methods for the Bicycle and NonFueledVehicle descriptors based on the class hierarchy shown in Figure 14-1 if the vehicle hierarchy stored all of the classes in a single vehicle table, and there was not a class indicator, but a class extraction method instead.
Configuring Only-Instances and With-All-Subclasses Expressions
// Bicycle amemndment
public static void addToBicycleDescriptor(Descriptor descriptor) {
    ExpressionBuilder builder = new ExpressionBuilder();
    descriptor.getInheritancePolicy().setOnlyInstancesExpression(
                              builder.getField("BICYCLE_DESCR").notNull());
}

// NonFueldVehicle ammendment
public static void addToNonFueledVehicleDescriptor(Descriptor descriptor) {
    ExpressionBuilder builder = new ExpressionBuilder();
    descriptor.getInheritancePolicy().setWithAllSubclassesExpression(
                                    builder.getField("FUEL_TYPE").isNull());
}
Configuring Inherited Attribute Mapping in a Subclass
If you are defining the descriptor for a class that inherits attributes from another class, then you can create mappings for those attributes. If you remap an attribute that was already mapped in the superclass, then the new mapping applies to the subclass only. Any other siblings that inherit the attribute are unaffected.
If you leave inherited attributes unmapped, EclipseLink uses the mapping (if any) from the superclass if the superclass's descriptor has been designated as the parent descriptor.
This table summarizes which descriptors support inherited attribute mapping configuration.
Descriptor Support for Inherited Attribute Mapping Configuration
| Descriptor | Using the Workbench |
Using Java |
|---|---|---|
|
Relational Descriptors |
||
|
Object-Relational Data Type Descriptors |
||
|
EIS Descriptors |
||
|
XML Descriptors |
For more information, see Descriptors and Inheritance.
How to Configure Inherited Attribute Mapping in a Subclass Using Workbench
To map inherited attributes, use this procedure:
- In the Navigator, right-click a descriptor and choose Map Inherited Attributes > selected class from the context menu or choose Selected > Map Inherited Attributes from the menu.The mappings list now includes all the attributes from the superclass of this class.
- Map any desired attributes. See Creating a Mapping for more information.
How to Configure Inherited Attribute Mapping in a Subclass Using Java
Using Java, attributes inherited by a subclass from a superclass will be visible and you can always create a mapping to these inherited attributes.
Configuring a Domain Object Method as an Event Handler
You can associate a domain object method with any of the descriptor events shown in the Descriptor Events table. You can register any domain object method that complies with the following criteria:
- Is public.
- Returns void.
- Takes a single parameter of type DescriptorEvent
This table summarizes which descriptors support domain object method event handler configuration.
Descriptor Support for Domain Object Method Event Handler Configuration
| Descriptor | Using the Workbench |
Using Java |
|---|---|---|
|
Relational Descriptors |
||
|
Object-Relational Data Type Descriptors |
||
|
EIS Descriptors |
||
|
XML Descriptors |
For example, you can add a method handlePostDelete (that is public, returns void, and takes a single parameter of type DescriptorEvent) to your Employee object to handle PostDeleteEvent descriptor events. After you register that method with the DescriptorEventManager owned by the Employee object's descriptor as the handler for PostDeleteEvent descriptor events, whenever the EclipseLink runtime performs a post-delete operation on an instance of the Employee object, the runtime dispatches a PostDeleteEvent to the handlePostDelete method on the instance of the Employee object associated with that PostDeleteEvent.
The Descriptor Event ID column in the Descriptor Events table lists the DescriptorEventManager field name used to identify a particular event. The DescriptorEvent method getEventCode returns this value. For example:
if (descriptorEvent.getEventCode() == DescriptorEventManager.PreUpdateEvent) {
    // descriptorEvent represents a pre-update event
}
Descriptor Events
| Category | Descriptor Event ID | Description |
|---|---|---|
|
Delete |
PreDeleteEvent |
Occurs before an object is deleted from the data source. |
| |
AboutToDeleteEvent |
Occurs when an object is deleted from the data source. |
| |
PostDeleteEvent |
Occurs after an object is deleted from the data source. |
|
Insert |
PreInsertEvent |
Occurs before an object is inserted in the data source. |
| |
AboutToInsertEvent |
Occurs when an object is inserted in the data source. |
| |
PostInsertEvent |
Occurs after an object is inserted into the data source. |
|
Post-X |
PostBuildEvent |
Occurs after an object is built from the data source. |
| |
PostCloneEvent |
Occurs after an object has been cloned into a unit of work. |
| |
PostMergeEvent |
Occurs after an object has been merged from a unit of work. |
| |
PostRefreshEvent |
Occurs after an object is refreshed from the data source. |
|
Update |
PreUpdateEvent |
Occurs before an object is updated in the data source. This may be called in a unit of work even if the object has no changes and does not require updating. |
| |
AboutToUpdateEvent |
Occurs when an object is updated in the data source. This method is called only if the object has changes in the unit of work. |
| |
PostUpdateEvent |
Occurs after an object is updated in the data source. |
|
Write |
PreWriteEvent |
Occurs before an object is inserted or updated in the data source. This occurs before PreInsertEvent and PreUpdateEvent. |
| |
PostWriteEvent |
Occurs after an object is inserted or updated in the data source. This occurs after PostInsertEvent and PostUpdateEvent. |
Alternatively, you can configure a descriptor event listener as an event handler (see Configuring a Descriptor Event Listener as an Event Handler).
How to Configure a Domain Object Method as an Event Handler Using Workbench
To select event methods, use this procedure:
- Select a descriptor in the Navigator. Its properties appear in the Editor.If the Events advanced property is not visible for the descriptor, then right-click the descriptor and choose Select Advanced Properties > Events from context menu or from the Selected menu.
- Click the Event tab in the Editor.
Events Tab
Description of follows - Select the appropriate method category from the list on the left.
- Choose the appropriate domain object method for each method in that category.
Use this table to enter data in the following fields to select the appropriate domain object method:
| Category | Option | Description |
|---|---|---|
| Deleting Methods | Pre | Select the domain object method that is invoked on an instance of its reference class before the instance is deleted from the data source. |
| |
Post | Select the domain object method that is invoked on an instance of its reference class after the instance is deleted from the data source. |
| Inserting Methods | Pre | Select the domain object method that is invoked on an instance of its reference class before the instance is inserted in the data source. |
| |
About To | Select the domain object method that is invoked on an instance of its reference class when the instance is inserted in the data source. |
| |
Post | Select the domain object method that is invoked on an instance of its reference class after the instance is inserted into the data source. |
| Post-X Methods | Build | Select the domain object method that is invoked on an instance of its reference class after the instance is built from the data source. |
| |
Clone | Select the domain object method that is invoked on an instance of its reference class after the instance is cloned into a unit of work. |
| |
Merge | Select the domain object method that is invoked on an instance of its reference class after the instance is merged from a unit of work. |
| |
Refresh | Select the domain object method that is invoked on an instance of its reference class after the instance is refreshed from the data source. |
| Updating Methods | Pre | Select the domain object method that is invoked on an instance of its reference class before the instance is updated in the data source. This may be called in a unit of work even if the object has no changes and does not require updating. |
| |
About to | Select the domain object method that is invoked on an instance of its reference class when the instance is updated in the data source. This method is called only if the object has changes in the unit of work. |
| |
Post | Select the domain object method that is invoked on an instance of its reference class after the instance is updated in the data source. |
| Writing Methods | Pre |
Select the domain object method that is invoked on an instance of its reference class before the instance is inserted or updated in the data source. Note: This occurs before Pre-Insert and Pre-Update event methods are invoked. |
| |
Post |
Select the domain object method that is invoked on an instance of its reference class after the instance is inserted or updated in the data source. Note: This occurs after Post-Insert or Post-Update event methods are invoked. |
How to Configure a Domain Object Method as an Event Handler Using Java
The Domain Object Method as a Descriptor Event Handler example shows a domain object class with method handlePostDelete defined to handle PostDeleteEvent descriptor events. The Registering a Domain Object Method as a Descriptor Event Handler example shows how to register this method as the PostDeleteEvent event handler. Whenever the EclipseLink runtime performs a post-delete operation on an instance of Employee, the runtime will dispatch a PostDeleteEvent to the DescriptorEventManager owned by the Employee object's descriptor. The DescriptorEventManager will then invoke the handlePostDelete method on the instance of Employee associated with that PostDeleteEvent.
Domain Object Method as a Descriptor Event Handler
public class Employee {
    // domain object methods
    ...
    public void handlePostDelete(DescriptorEvent event) {
        // handler implementation
    }
}
Registering a Domain Object Method as a Descriptor Event Handler
employeeDescriptor.getEventManager().setPostDeleteSelector("handlePostDelete");
Configuring a Descriptor Event Listener as an Event Handler
You can create your own DescriptorEventListner and register it with a DescriptorEventManager in a descriptor amendment method. You can also configure a DescriptorEventListner to be notified of events through the Java event model.
You can register any object that implements the DescriptorEventListener interface with the DescriptorEventManager owned by a domain object's descriptor to handle any descriptor event type (see the Descriptor Events table). To quickly implement this interface, you can extend abstract class DescriptorEventAdapter and override only the methods for the events you are interested in.
This table summarizes which descriptors support descriptor event listener configuration.
Descriptor Support for Descriptor Event Listener Configuration
| Descriptor | Using the Workbench |
Using Java |
|---|---|---|
|
Relational Descriptors |
||
|
Object-Relational Data Type Descriptors |
||
|
EIS Descriptors |
||
|
XML Descriptors |
For example, you create a DescriptorEventListener to handle PostBuildEvent descriptor events for Employee objects. After you register this DescriptorEventListener with the DescriptorEventManager owned by the Employee object's descriptor, whenever the EclipseLink runtime performs a post-build operation on an instance of Employee, the runtime dispatches a PostBuilEvent to the event listener's postBuild method.
The Descriptor Events table lists the DescriptorEventListener methods associated with each descriptor event. The Descriptor Event Listener Method column lists the DescriptorEventListener methods associated with each DescriptorEvent.
Descriptor Events
| Category | Descriptor Event Listener Method | Description |
|---|---|---|
|
Delete |
preDelete |
Occurs before an object is deleted from the data source. |
| |
aboutToDelete |
Occurs when an object is deleted from the data source. |
| |
postDelete |
Occurs after an object is deleted from the data source. |
|
Insert |
preInsert |
Occurs before an object is inserted in the data source. |
| |
aboutToInsert |
Occurs when an object is inserted in the data source. |
| |
postInsert |
Occurs after an object is inserted into the data source. |
|
Post-X |
postBuild |
Occurs after an object is built from the data source. |
| |
postClone |
Occurs after an object has been cloned into a unit of work. |
| |
postMerge |
Occurs after an object has been merged from a unit of work. |
| |
postRefresh |
Occurs after an object is refreshed from the data source. |
|
Update |
preUpdate |
Occurs before an object is updated in the data source. This may be called in a unit of work even if the object has no changes and does not require updating. |
| |
aboutToUpdate |
Occurs when an object is updated in the data source. This method is called only if the object has changes in the unit of work. |
| |
postUpdate |
Occurs after an object is updated in the data source. |
|
Write |
preWrite |
Occurs before an object is inserted or updated in the data source. This occurs before PreInsertEvent and PreUpdateEvent. |
| |
postWrite |
Occurs after an object is inserted or updated in the data source. This occurs after PostInsertEvent and PostUpdateEvent. |
Alternatively, you can configure a domain object method as an event handler (see Configuring a Domain Object Method as an Event Handler).
How to Configure a Descriptor Event Listener as an Event Handler Using Workbench
For more information, see Using the Workbench.
How to Configure a Descriptor Event Listener as an Event Handler Using Java
The DescriptorEventListener example shows a DescriptorEventListener that handles PostBuildEvent descriptor events. The Registering a DescriptorEventListener with the DescriptorEventManager example shows how to register this DescriptorEventListener with the Employee object's descriptor. Whenever the EclipseLink runtime performs a post-build operation on an instance of Employee, the runtime will dispatch a post build event to the corresponding DescriptorEventListener method on each registered event listener (in this case, it calls the postBuild method).
DescriptorEventListener
public class MyDescriptorEventListener extends DescriptorEventAdapter {

    public void postBuild(DescriptorEvent event) {
        // handler implementation
    }
}
Registering a DescriptorEventListener with the DescriptorEventManager
descriptor.getEventManager().addListener(new MyDescriptorEventListener());
Configuring Locking Policy
You can configure a descriptor with a locking policy that prevents one user writing over another user's work.
This table summarizes which descriptors support locking policies.
Descriptor Support for Locking Policy
| Descriptor | Optimistic Version Locking Policies |
Optimistic Field Locking Policies |
Pessimistic Locking Policy |
Using the Workbench |
Using Java |
|---|---|---|---|---|---|
|
Relational Descriptors 1 |
|||||
|
Object-Relational Data Type Descriptors |
|||||
|
EIS Descriptors 2 |
|||||
|
XML Descriptors |
1 Relational Class Descriptors only.
2 EIS Root Descriptors only.
We recommend that you use a locking policy. You should use a locking policy in any multiuser environment to prevent one user writing over another user's changes. Although locking can be particularly important if multiple servers or multiple applications access the same data, even in a single server application, the same locking issue still exists. In a multiple-server environment, locking is still relevant even if your application uses cache refreshing or cache coordination.
If you are building a three-tier application, in order to correctly lock an object, you must obtain the lock before the object is sent to client to be edited. The type of locking you choose has an influence on how you can achieve this (see Locking in a Three-Tier Application).
How to Configure Locking Policy UsingWorkbench
To specify a descriptor's locking policy, use this procedure:
- In the Navigator, select a relational or EIS root descriptor.If the Locking advanced property is not visible for the descriptor, right-click the descriptor and choose Select Advanced Properties > Locking from the context menu or from the Selected menu.
- Click the Locking tab.
Locking Tab for a Descriptor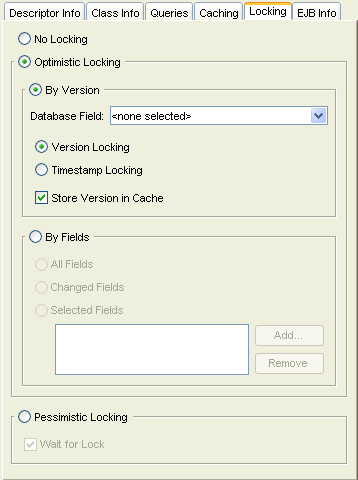
Locking Tab for an EIS Root Descriptor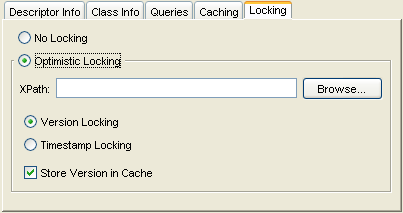
- Enter data in each field on the Locking tab.
Use this table to enter data in the following fields on the tab of the appropriate type:
| Field | Description |
|---|---|
| Optimistic Locking | Specify that the descriptor uses optimistic locking. |
| By Version | Specify to use optimistic locking, based on versioning. |
| Database Field |
Select the database field that contains the version value used for optimistic locking. This field appears for relational descriptors only. |
| XPath |
Click Browse to define the path to the element or attribute that stores the version value. This field appears for EIS root descriptors only.Ensure that the attribute's type corresponds to the type of locking policy you choose (numeric for Version Locking and timestamp for Timestamp Locking). |
| Version Locking | Specify that the descriptor uses numeric version locking. The version field (defined by the Database Field, for relational descriptors, or the XPath, for EIS root descriptors) must be a numeric type |
| Timestamp Locking | Specify that the descriptor uses time stamp version locking, based on time stamp. The version field (defined by the Database Field, for relational descriptors, or the XPath, for EIS root descriptors) must be a timestamp type. |
| Store Version in Cache |
Specify whether or not you want to store the version information in the cache. If you choose not to define a mapping for the version field, then you must enable this option to configure the descriptor to store the version value in the EclipseLink cache. If you choose to define a mapping for the version field, then you must disable this option in order to store the version value in the object. |
|
By Fields 1 |
Specify to use optimistic locking, based on database fields. These fields appear for relational descriptors only. |
| All Fields | Select all fields for optimistic locking. |
| Changed Fields | Select only the changed fields for optimistic locking. |
| Selected Fields | Click Add to select specific database fields for optimistic locking. |
| Pessimistic Locking |
Ignore this option as it is EJB CMP-specific. |
| Wait for Lock |
Ignore this option as it is EJB CMP-specific. |
1 You cannot use field locking with the AttributeChangeTrackingPolicy (see Attribute Change Tracking Policy).
How to Configure Locking Policy Using Java
This section describes the following:
Configuring an Optimistic Locking Policy
Use the ClassDescriptor method setOptimisticLockingPolicy to set an instance of the appropriate optimistic field locking policy:
- AllFieldsLockingPolicy
- ChangedFieldsLockingPolicy
- SelectedFieldsLockingPolicy
- VersionLockingPolicy
- TimestampLockingPolicy
Use the ClassDescriptor method getOptimisticLockingPolicy to get the selected locking policy type and configure it.
Configuring Optimistic Locking Policy Cascading
If you are using a VersionLockingPolicy, you can enable cascading to configure EclipseLink to automatically force a version field update on a parent object when its privately owned child object's version field changes. Use VersionLockingPolicy method setIsCascaded passing in a boolean of true to enable cascading, or false to disable cascading.
For more information, see Optimistic Version Locking Policies and Cascading.
Configuring Returning Policy
Using a ReturningPolicy, you can obtain field values from the data source when inserting or updating an object. EclipseLink uses the values that the data source returns to update the object attributes that map to these fields. You can specify which fields to return for inserts and updates. For insert fields, you can also specify whether or not to include the field value in the insert operation.
A ReturningPolicy is useful when the data source provides default or initial field values through defaults, triggers, or stored procedures. You can also use a ReturningPolicy to allow the data source to assign a sequence or primary key value.
Any object attribute that you do not configure in a descriptor's ReturningPolicy receives the default behavior: in the context of a unit of work, if the attribute has changed, its value is written to the database. If the SQL statement invokes a trigger or stored procedure that modifies the database field, the database generated value is not reflected by the object.
Use caution when deciding on whether or not to use a ReturningPolicy, as doing so may effect insert or update performance and is not compatible with batch writing (see How to Use Batch Writing for Optimization).
By default, you can use a ReturningPolicy with an Oracle Database, in which case, EclipseLink uses the Oracle RETURNING clause (see Using Workbench).
You can use a ReturningPolicy with a non-Oracle database if you configure your descriptor's insert or update query to use a stored procedure that returns the desired returned values as output parameters (see Using Java).
This table summarizes which descriptors support returning policy configuration.
Descriptor Support for Fetch Group Configuration
| Descriptor | Using Workbench |
Using Java |
|---|---|---|
|
Relational Descriptors |
||
|
Object-Relational Data Type Descriptors |
||
|
EIS Descriptors 1 |
||
|
XML Descriptors |
1 EIS Root Descriptors only.
How to Configure Returning Policy Using Workbench
To specify the return policy for a descriptor, use this procedure:
- Select a descriptor in the Navigator. Its properties appear in the Editor.If the Returning advanced property is not visible for the descriptor, right-click the descriptor and choose Select Advanced Properties > Returning from the context menu or from the Selected menu.
- Click the Returning tab in the Editor.
Returning Tab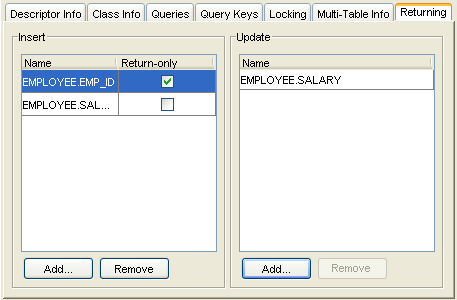
- Complete the insert and update policies of the Returning tab.
Use the following information to enter data in each field on the tab:
| Field | Description |
|---|---|
| Insert | These options apply to insert operations: |
| Name | Click Add to add a database field to this ReturningPolicy for insert operations. |
| Return-only |
When selected, EclipseLink only returns a value for this field; it will not include the field in the insert. When not selected, EclipseLink returns a value for this field and includes the value in the insert. |
| Update | These options apply to update operations: |
| Name | Click Add to add a database field to this ReturningPolicy for update operations |
To remove a database field from the descriptor's ReturningPolicy, select the field in the Insert or Update window and click Remove.
|
Note: If you are using Workbench, you cannot configure a returning policy for an attribute mapped with a transformation mapping (see Transformation Mapping). |
How to Configure Returning Policy Using Java
You use a ReturningPolicy to configure how EclipseLink handles returning with the attributes of an object on a field-by-field basis. This table describes the ReturnPolicy methods you use to tell EclipseLink how to handle a particular database field. Each method takes a String or a DatabaseField type parameter as field name.
Return Policy Methods
| Method | Applies to SQL Statements of Type... | Writes Current Value of Field to Database? | Returns Database- Generated Result? |
|---|---|---|---|
|
addFieldForInsert |
INSERT |
Yes |
Yes |
|
addFieldForInsertReturnOnly |
INSERT |
No |
Yes |
|
addFieldForUpdate |
UPDATE |
Yes |
Yes |
You configure a descriptor with a ReturningPolicy using ClassDescriptor method setReturningPolicy.
Configuring Instantiation Policy
The EclipseLink runtime instantiates new instances of a class according to the instantiation policy you configure on the class's descriptor.
This table summarizes which descriptors support an instantiation policy.
Descriptor Support for Instantiation Policy
| Descriptor | Using Workbench |
Using Java |
|---|---|---|
|
Relational Descriptors |
||
|
Object-Relational Data Type Descriptors |
||
|
EIS Descriptors |
||
|
XML Descriptors |
You can specify one of the following types of instantiation policy:
- Default: EclipseLink creates a new instance of a class by calling the class's default constructor.
- Method: EclipseLink creates a new instance of a class by calling a public static method that you define on the class descriptor.
- Factory: EclipseLink creates a new instance of a class by calling the appropriate methods on a separate class that you implement according to the Factory design pattern.
How to Configure Instantiation Policy Using Workbench
To set the instantiation policy for a descriptor, use this procedure:
- In the Navigator, select a descriptor.If the Instantiation advanced property is not visible for the descriptor, right-click the descriptor and choose Select Advanced Properties > Instantiation from the context menu or from the Selected menu.
- Click the Instantiation tab.
Instantiation Tab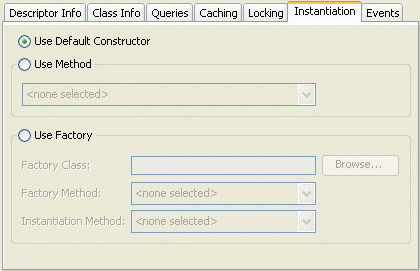
- Complete each field on the Instantiation tab.
Use the following information to enter data in each field on the tab:
| Field | Description |
|---|---|
| Use Default Constructor | Specify if the default constructor of the class instantiates a new instance. |
| Use Method | Specify a method to execute to create objects from the database. |
|
Select the name of a method to be executed to create objects from the database. The method must be a public, static method on the descriptor's class and must return a new instance of the object. |
| Use Factory | Specify an object factory method. |
| Factory Class | Select the class of the factory object that creates the new instances. |
| Factory Method | Select the method to be used to obtain a factory object. Choose <nothing> to use the default constructor. |
| Instantiation Method | Select the method to be called on the factory object to obtain a new instance that will be populated with data from the data source. |
How to Configure Instantiation Policy Using Java
Use one of the following ClassDescriptor methods to set the appropriate type of instantiation policy:
- useDefaultConstructorInstantiationPolicy
- useMethodInstantiationPolicy
- useFactoryInstantiationPolicy
Configuring Copy Policy
The EclipseLink unit of work feature must be able to produce an exact copy (clone) persistent objects. This table summarizes which descriptors support a copy policy.
| Descriptor | Using the Workbench |
Using Java |
|---|---|---|
|
Relational Descriptors |
||
|
Object-Relational Data Type Descriptors |
||
|
EIS Descriptors |
||
|
XML Descriptors |
EclipseLink supports the following two ways of copying objects:
- Instantiation policy: By default, EclipseLink creates a new copy of an object by using the currently configured instantiation policy (see Configuring Instantiation Policy).
- Method: EclipseLink creates a new copy of an object by calling a method on the object that you specify. For example, you can specify the object's clone method (or any other appropriate method on the object). Note that the clone method should return a shallow clone of the object.
How to Configure Copy Policy Using Workbench
To specify the copy policy for a descriptor, use this procedure:
- Select a descriptor in the Navigator. Its properties appear in the Editor.If the Copying advanced property is not visible for the descriptor, right-click the descriptor and choose Select Advanced Properties > Copying from the context menu or from the Selected menu.
- Click the Copying tab in the Editor.
Copying Tab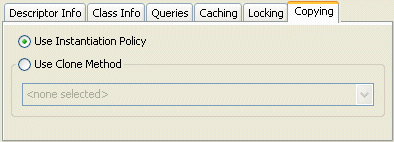
- Complete each field on the Copying tab.
Use the following information to enter data in each field on the tab:
| Field | Description |
|---|---|
| Use Instantiation Policy |
Creates a new instance of the object using the descriptor's instantiation policy (see Configuring Instantiation Policy). |
| Use Clone Method | Specifies whether or not to call the clone method of the object. Select a method from the list. |
How to Configure Copy Policy Using Java
Use one of the following ClassDescriptor methods to set the appropriate type of copy policy:
- useCloneCopyPolicy(): the object must provide a clone method
- useCloneCopyPolicy(java.lang.String cloneMethodName)
- useInstantiationCopyPolicy()
Configuring Change Policy
Use a change policy to specify how EclipseLink should track changes made to objects after you register them with a unit of work. This table summarizes which descriptors support a change policy.
| Descriptor | Deferred Change Detection Policy |
Object-Level Change Tracking Policy |
Attribute Change Tracking Policy |
Using the Workbench | Using Java |
|---|---|---|---|---|---|
|
Relational Descriptors 1 |
|||||
|
Object-Relational Data Type Descriptors |
|||||
|
EIS Descriptors 2 |
|||||
|
XML Descriptors |
1 Relational Class Descriptors only.
2 EIS Root Descriptors only.
By default, EclipseLink uses the deferred change detection policy.
For JPA entities or POJO classes that you configure for weaving, EclipseLink weaves value holder indirection for one-to-one mappings. If you want EclipseLink to weave change tracking and your application includes collection mappings (one-to-many or many-to-many), then you must configure all collection mappings to use transparent indirect container indirection only (you may not configure your collection mappings to use eager loading nor value holder indirection).
Mutable basic mappings affect the overhead of change tracking. EclipseLink can only weave an attribute change tracking policy for immutable mappings.
EclipseLink logs a warning message at the CONFIG log level if you try to weave a descriptor that does not support change policy.
EclipseLink supports alternative change policies (policies other than DeferredChangeDetectionPolicy) for attributes that use a subset of the mappings that EclipseLink supports.
For JPA applications deployed to OC4J EclipseLink automatically uses the attribute change tracking policy.
For more information, see the following:
- Unit of Work and Change Policy
- Change Policy Mapping Support
- Using Weaving
- Using EclipseLink JPA Weaving
- Using Method and Direct Field Access
- Mutability
How to Configure Change Policy Using Java
This section describes how to configure a descriptor with a change policy using Java, and how to implement persistent classes for those change policies that are intrusive. It includes information on configuring the following:
- Configuring Deferred Change Detection Policy
- Configuring Object Change Tracking Policy
- Configuring Attribute Change Tracking Policy
Configuring Deferred Change Detection Policy
The DeferredChangeDetectionPolicy provides good unit of work commit performance for a wide range of object change characteristics. It is the default change policy. For more information, see Deferred Change Detection Policy).
Because it is the default, you do not need to explicitly configure this policy.
To configure EclipseLink to use a DeferredChangeDetectionPolicy, create a descriptor amendment method (see Configuring Amendment Methods) that sets the change policy, as the Setting the ObjectChangeTrackingPolicy example illustrates.
Configuring Object Change Tracking Policy
The ObjectChangeTrackingPolicy provides improved unit of work commit performance for objects with few attributes, or with many attributes and many changed attributes. For more information, see Object-Level Change Tracking Policy.
For JPA applications deployed to an application server, for which EclipseLink provides integration (see Introduction to the Application Server Support), when you configure an entity’s descriptor with an ObjectLevelChangeTrackingPolicy, EclipseLink automatically generates code of a concrete subclass to implement the EclipseLink ChangeTracker interface at deploy time. Configuring the ObjectLevelChangeTrackingPolicy prevents EclipseLink from automatically applying an AttributeChangeTrackingPolicy (see Configuring Attribute Change Tracking Policy).
To configure EclipseLink to use an ObjectChangeTrackingPolicy, use this procedure:
- Create a descriptor amendment method (see Configuring Amendment Methods) that sets the change policy, as this example illustrates:
Setting the ObjectChangeTrackingPolicydescriptor.setObjectChangePolicy(new ObjectChangeTrackingPolicy());
- For plain Java objects, code each of your persistent classes to implement the ChangeTracker interface, as this example illustrates:
Implementing the ChangeTracker Interface for the ObjectChangeTrackingPolicypublic class Employee implements ChangeTracker { PropertyChangeListener listener; String firstName; public PropertyChangeListener getEclipseLinkPropertyChangeListener() { return this.listener; } public void setEclipseLinkPropertyChangeListener(PropertyChangeListener listener) { this.listener = listener; } ... public void setFirstName(String firstName) { propertyChange("firstName", getFirstName(), firstName); this.firstName = firstName; } ... public void propertyChange(String propertyName, Object oldValue, Object newValue) { if (listener != null) { if (oldValue != newValue) { listener.propertyChange( new PropertyChangeEvent(this, propertyName, oldValue, newValue)); } } } }
Configuring Attribute Change Tracking Policy
The AttributeChangeTrackingPolicy provides improved unit of work commit performance for objects with many attributes and few changed attributes. In general, this is the most efficient change policy. It is the default change policy for JPA applications. For more information, see Attribute Change Tracking Policy).
|
Note: You cannot use the AttributeChangeTrackingPolicy if you are using any instance of FieldsLockingPolicy (see Optimistic Field Locking Policies). |
When you deploy an EclipseLink-enabled JPA application, EclipseLink automatically configures your persistent classes to use the AttributeChangeTrackingPolicy and, using bytecode weaving, configures your persistence classes to implement the EclipseLink ChangeTracker interface. In this case, you do not need to explicitly configure this change policy.
To configure EclipseLink to use an AttributeChangeTrackingPolicy for plain Java objects or other application servers, use this procedure:
- Create a descriptor amendment method (see Configuring Amendment Methods) that sets the change policy, as this example illustrates:
Setting the DeferredChangeDetectionPolicydescriptor.setObjectChangePolicy(new AttributeChangeTrackingPolicy());
- Code each of your persistent classes to implement the ChangeTracker interface, as this example illustrates:
Implementing the ChangeTracker Interface for the AttributeChangeTrackingPolicypublic class Employee implements ChangeTracker { PropertyChangeListener listener; String firstName; public PropertyChangeListener getEclipseLink PropertyChangeListener() { return this.listener; } public void setEclipseLinkPropertyChangeListener(PropertyChangeListener listener) { this.listener = listener; } ... public void setFirstName(String firstName) { propertyChange("firstName", getFirstName(), firstName); this.firstName = firstName; } ... public void propertyChange(String propertyName, Object oldValue, Object newValue) { if (listener != null) { if (oldValue != newValue) { listener.propertyChange( new PropertyChangeEvent(this, propertyName, oldValue, newValue)); } } } }
Configuring a History Policy
If you want to use historical sessions (see Historical Sessions) to execute historical queries (see Historical Queries) against a historical schema of your own design, configure your descriptors with an EclipseLink HistoryPolicy that describes your historical schema.
If you are using an Oracle Database platform for Oracle9i Database Server (or later), you can query the historical versions of objects automatically maintained by the Oracle Database without the need for a history policy. For more information, see How to Configure Historical Sessions Using an Oracle Platform.
This table summarizes which descriptors support history policy configuration.
| Descriptor | How to Use Workbench | Using Java |
|---|---|---|
|
Relational Descriptors |
||
|
Object-Relational Data Type Descriptors |
||
|
EIS Descriptors |
||
|
XML Descriptors |
There are many ways to configure a historical database schema. EclipseLink supports several historical schema configurations that you can describe with a HistoryPolicy (see Historical Session Limitations).
Example Historical Schema
As shown in the Example Table for EMPLOYEE and Example History Table EMPLOYEE_HIST, a common approach is to define a special history table to store past versions of an object: one history table for each regular table that requires historical persistence. The history table typically has the same fields as the corresponding regular table plus fields (such as row start and end) used to define an interval that represents the life time of a particular version.
|
Note: EclipseLink assumes that the current version of an object corresponds to the historical table row whose row end field is NULL. |
EclipseLink will include the history tables described by a HistoryPolicy when you execute a historical query.
This table shows the schema for an EMPLOYEE table. The table currently contains one EMPLOYEE instance.
Example Table for EMPLOYEE
| EMP_ID | F_NAME | L_NAME | SALARY |
|---|---|---|---|
|
1 |
Jane |
Doe |
55000 |
This table shows one possible history table EMPLOYEE_HIST that stores historical versions of employees. The table contains the current EMPLOYEE (the version with a ROW_END value of NULL) and one historical version.
Example History Table EMPLOYEE_HIST
| EMP_ID | F_NAME | L_NAME | SALARY | ROW_START | ROW_END |
|---|---|---|---|---|---|
|
1 |
Jane |
Doe |
50000 |
29/08/2004 |
31/08/2004 |
|
1 |
Jane |
Doe |
55000 |
31/08/2004 |
NULL |
Because every record has a start and end interval, the history table can store multiple versions of the same object (with the same primary key). The unique identifier of a particular version is given by the existing primary key, plus the value of the start field. For example, in Example History Table EMPLOYEE_HIST, the unique identifier of the current version is given by (EMP_ID, START) = (1, 31/08/2004).
How to Configure a History Policy Using Java
This example shows how to describe the schema shown in Example Table for EMPLOYEE and Example History Table EMPLOYEE_HIST using the EclipseLink HistoryPolicy:
HistoryPolicy for One Table
HistoryPolicy policy = new HistoryPolicy();
policy.addStartFieldName("ROW_START");
policy.addEndFieldName("ROW_END");
policy.addHistoryTableName("EMPLOYEE", "EMPLOYEE_HIST");

// Assuming database triggers or stored procedures update history tables
policy.setShouldHandleWrites(false);

employeeDescriptor.setHistoryPolicy(policy);
You can specify more than one table with a HistoryPolicy as shown in this examle. In this example, all history tables have a start field named ROW_START but the EMPLOYEE_HIST and SALARY_HIST tables have different end fields. To avoid ambiguity, the end field names are prefixed with their respective history table names.
HistoryPolicy for Multiple Tables
HistoryPolicy policy = new HistoryPolicy();
policy.addStartFieldName("ROW_START");
policy.addEndFieldName("EMPLOYEE_HIST.ROW_END");
policy.addEndFieldName("SALARY_HIST.VALID_UNTIL");
policy.addHistoryTableName("EMPLOYEE", "EMPLOYEE_HIST");
policy.addHistoryTableName("SALARY", "SALARY_HIST");
// Assuming database triggers or stored procedures update history tables
policy.setShouldHandleWrites(false);

employeeDescriptor.setHistoryPolicy(policy);
Configuring Write Responsibility
Use HistoryPolicy method setShouldHandleWrites to specify whether or not EclipseLink is responsible for writing data to history tables. By default, setShouldHandleWrites is set to true.
Either the database or EclipseLink can be responsible for writing data to the history tables.
You can configure the database to write data to history tables by way of triggers or stored procedures that customize create, insert, and delete operations to modify both the regular table and the history table appropriately.
Configuring Wrapper Policy
EclipseLink lets you use wrappers (or proxies) in cases where the persistent class is not the same class that is to be presented to users.
For example, in the EJB specification prior to 3.0, the entity bean class (the class that implements javax.ejb.EntityBean) is persistent, but is hidden from users who interact with a class that implements javax.ejb.EJBObject (local or remote interface class). In this example, the EJBObject acts as a proxy (or wrapper) for the EntityBean.
In cases where such a wrapper is used, EclipseLink continues to make the class specified in the descriptor persistent, but returns the appropriate instance of the wrapper whenever a persistent object is requested.
This table summarizes which descriptors support a wrapper policy.
Descriptor Support for Wrapper Policy
| Descriptor | How to Use Workbench | Using Java |
|---|---|---|
|
Relational Descriptors |
||
|
Object-Relational Data Type Descriptors |
||
|
EIS Descriptors |
||
|
XML Descriptors |
Use a wrapper policy to tell EclipseLink how to create wrappers for a particular persistent class, and how to obtain the underlying persistent object from a given wrapper instance.
If you specify a wrapper policy, EclipseLink uses the policy to wrap and unwrap persistent objects as required:
- Wrapper policies implement the interface org.eclipse.persistence.descriptors.WrapperPolicy.
- A wrapper policy is specified by setting the wrapper policy for the EclipseLink descriptor.
- By default, no wrapper policy is used (the wrapper policy for a descriptor is null by default).
|
Note: Wrapper policies are advanced EclipseLink options. Using a wrapper policy may not be compatible with some Workbench features. |
Wrapper policies cannot be set using the Workbench and can be set only using Java code (see Using Java).
How to Configure Wrapper Policy Using Java
Use the ClassDescriptor method setWrapperPolicy to set the appropriate instance of WrapperPolicy.
Configuring Fetch Groups
By default, when you execute an object-level read query for a particular object class, EclipseLink returns all the persistent attributes mapped in the object's descriptor. With this single query, all the object's persistent attributes are defined, and calling their get methods returns the value directly from the object.
When you are interested in only some of the attributes of an object, it may be more efficient to return only a subset of the object's attributes using a fetch group.
Using a fetch group, you can define a subset of an object's attributes and associate the fetch group with either a ReadObjectQuery or ReadAllQuery query. When you execute the query, EclipseLink retrieves only the attributes in the fetch group. EclipseLink automatically executes a query to fetch all the attributes excluded from this subset when and if you call a get method on any one of the excluded attributes.
You can define more than one fetch group for a class. You can optionally designate at most one such fetch group as the default fetch group. If you execute either a ReadObjectQuery or ReadAllQuery query without specifying a fetch group, EclipseLink will use the default fetch group, unless you configure the query otherwise (see How to Configure Default Fetch Group Behavior).
You can use fetch groups in JPA projects for EJB objects, as well as for POJO classes. For POJO classes, use partial object querying (see Partial Object Queries).
Before using fetch groups, we recommend that you perform a careful analysis of system use. In many cases, the extra queries required to load attributes not in the fetch group could well offset the gain from the partial attribute loading. For more information about optimizing read performance, see Read Optimization Examples.
This table summarizes which descriptors support fetch group configuration.
| Descriptor | Using Workbench | Using Java |
|---|---|---|
|
Relational Descriptors |
||
|
Object-Relational Data Type Descriptors |
||
|
EIS Descriptors |
||
|
XML Descriptors |
For JPA entities or POJO classes that you configure for weaving, EclipseLink uses fetch groups to improve performance.
This section describes how to create a fetch group, store it in a descriptor, and optionally designate a fetch group as the default fetch group for its descriptor reference class.
For more information, see the following:
- Fetch Groups
- Fetch Groups and Object-Level Read Queries
- How to Configure Default Fetch Group Behavior
- Using Weaving
- Using EclipseLink JPA Weaving
How to Configure Fetch Groups Using Java
To configure a fetch group, Use a descriptor amendment method as this example shows.
Configuring a Fetch Group
//Create a FetchGroupManager for the descriptor

descriptor.setFetchGroupManager(new FetchGroupManager());
// Create a FetchGroup
FetchGroup group = new FetchGroup("nameOnly");
// Add attributes to FetchGroup. Alternatively, use
// FetchGroup method addAttributes, passing in a Set of String attribute names
group.addAttribute("firstName");
group.addAttribute("lastName");
// Add the FetchGroup to the FetchGroupManager
descriptor.getFetchGroupManager().addFetchGroup(group);
//Set the default fetch group
descriptor.getFetchGroupManager().setDefaultFetchGroup(group);
Each instance of FetchGroup that you store in a descriptor must be configured with a fetch group name that is unique for that descriptor (that is, each descriptor owns a set of named fetch groups).
When configuring fetch groups, note that the primary key fields and other required fields (such as inheritance type and optimistic lock version) are always included in all fetch groups.Fetch groups can include direct and relationship attributes. Including a relationship attribute in a fetch group does not cause the relationship to be joined or instantiated: joining and indirection are set independently of fetch groups.
After you add a fetch group to a descriptor, you can configure a ReadObjectQuery or ReadAllQuery query with this fetch group by name (nameOnly) or rely on EclipseLink to use this fetch group by default. For more information, see Using Queries with Fetch Groups.
Configuring a Descriptor Customizer Class
A descriptor customizer class is a Java class that implements the org.eclipse.persistence.internal.sessions.factories.DescriptorCustomizer interface and provides a default (zero-argument) constructor. You can use a descriptor customizer to customize a descriptor at run time on a loaded session before login occurs, similar to how you can use an amendment method (see Configuring Amendment Methods).
This table summarizes which sessions support customizer class configuration.
| Descriptor | How to Configure Customizer Class Using Workbench | Using Java |
|---|---|---|
|
Relational Descriptors |
||
|
Object-Relational Data Type Descriptors |
||
|
EIS Descriptors |
||
|
XML Descriptors |
For more information, see Descriptor Customization.
How to Configure Customizer Class Using Java
When using Java, create a customize class that implements the org.eclipse.persistence.internal.sessions.factories.DescriptorCustomizer interface. This example illustrates the creation of a descriptor customizer.
Creating a SessionCustomizer Class
import org.eclipse.persistence.internal.sessions.factories.DescriptorCustomizer;
import org.eclipse.persistence.descriptors.ClassDescriptor;

public class EmployeeDescriptorCustomizer implements DescriptorCustomizer {

    public void customize(ClassDescriptor descriptor) {
        descriptor.setReadOnly();
    }
}
Configuring Amendment Methods
Some EclipseLink descriptor features cannot be configured from the Workbench. To use these features, you must write a Java method to amend the descriptor after it is loaded as part of the project. This method must have the following characteristics:
- Be public static.
- Take a single parameter of type org.persistence.descriptors.structures.ClassDescriptor.
In the implementation of this method, you can configure advanced features of the descriptor using any of the public descriptor and mapping API.
This table summarizes which descriptors support amendment methods.
| Descriptor | Using the Workbench |
How to Use Java |
|---|---|---|
|
Relational Descriptors |
||
|
Object-Relational Data Type Descriptors |
||
|
EIS Descriptors |
||
|
XML Descriptors |
This section describes how to associate an amendment method with a descriptor.
For more information about how to implement an amendment method, see Amendment and After-Load Methods.
Alternatively, you can use a descriptor customizer class (see Configuring a Descriptor Customizer Class.
To customize a session, use a session customizer class (see Configuring a Session Customizer Class|Configuring a Session Customizer Class).
How to Configure Amendment Methods Using Workbench
To use an amendment method with a descriptor (after it is loaded as part of the project) use this procedure:
- Select a descriptor in the Navigator. Its properties appear in the Editor.If the After load advanced property is not visible for the descriptor, right-click the descriptor and choose Select Advanced Properties > After Load from context menu or from the Selected menu.
- Click the After Load tab in the Editor.
After Load Tab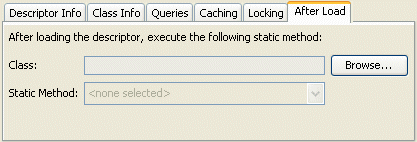
- Complete each field on the After Load tab.
| Field | Description |
|---|---|
| Class | Click Browse and choose the class of the method to execute. |
| Static Method | Use the Static Method list to choose the static method to execute at run time, after loading the descriptor. The method must be public static and take a single attribute of type org.eclipse.persistence.descriptors.ClassDescriptor. |

