Notice: This Wiki is now read only and edits are no longer possible. Please see: https://gitlab.eclipse.org/eclipsefdn/helpdesk/-/wikis/Wiki-shutdown-plan for the plan.
Acceleo/Quick Start
Quick Start
The goal of this document is to help you get started with Acceleo as fast as possible. No details, no explanations, just the facts!
We will assume you already have Acceleo installed in Eclipse, which you can download from the Eclipse download site.
First of all, switch to the Acceleo perspective, which will make everything easier. Open the "Window" menu, then Open Perspective > Other... and choose Acceleo.
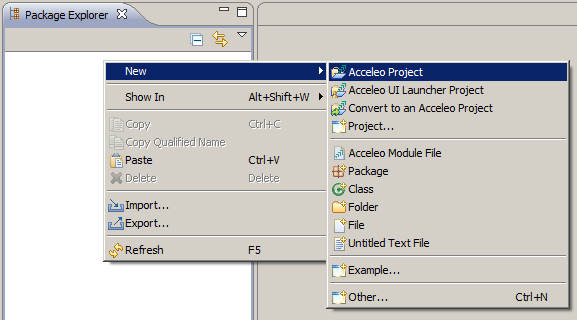
Create an Acceleo project, which will contain your first "Hello world" generator. Right-click in the package explorer, then select New > Acceleo Project.
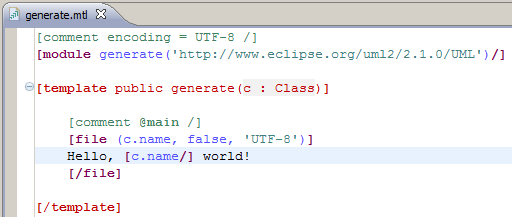
Call it org.eclipse.acceleo.helloworld or whatever name you like better, and click Next >. Click Finish on the next screen. By default, an Acceleo template called generate.mtl is created and opened.
Edit it so that it looks like the following (Just insert some text for the purpose of the demonstration):
Now you want to run this template. In order to run a template, you need to provide Acceleo with two pieces of information:
- The input model;
- The output folder.
Here we want to use a UML model, so we'll create one very quickly. Of course, models are usually produced by software designers, architects, or developers, and generally not by the same people that write Acceleo modules.
So, let's create a new project since there's no reason for our models to be in the same project as our generator (Actually, models and templates should be separated). Right-click in the package explorer, and select New > Project..., then Java Project.
Click on Next and enter the name of the project that will contain the model and the java code generated from this model. Something like org.eclipse.acceleo.test will be perfect! Do not switch to the java perspective when asked to.
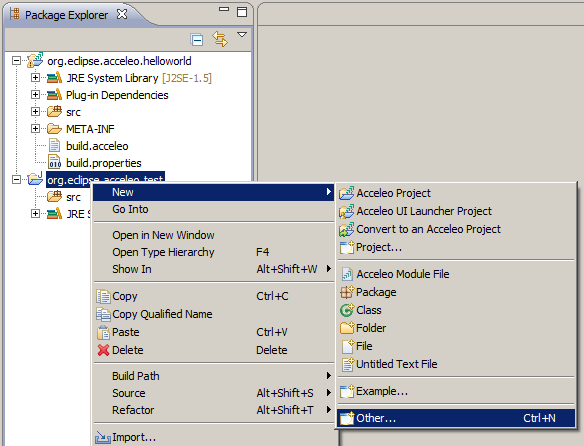
Now let's create our UML model. Right-click on the new project, and select New > Other....
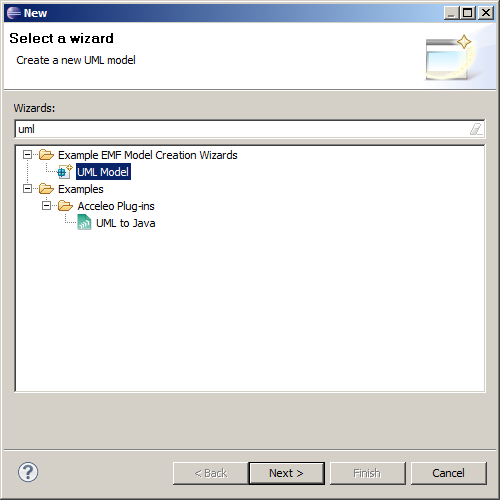
In the wizard's page, type "uml" in the top field to filter the choices, and select "UML Model". Click Next >.
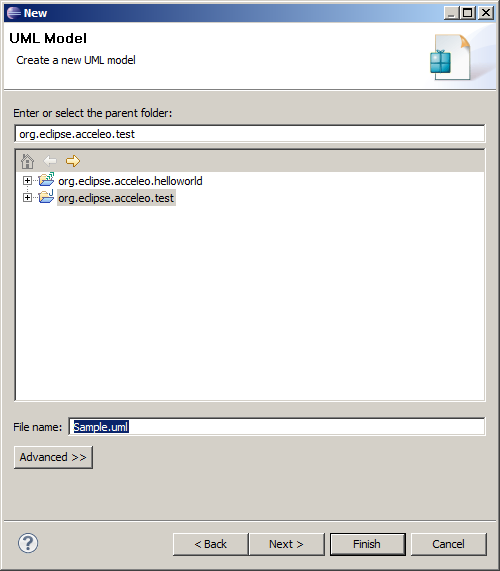
Give a name to the UML model to create, for instance Sample.uml. Click Next >.
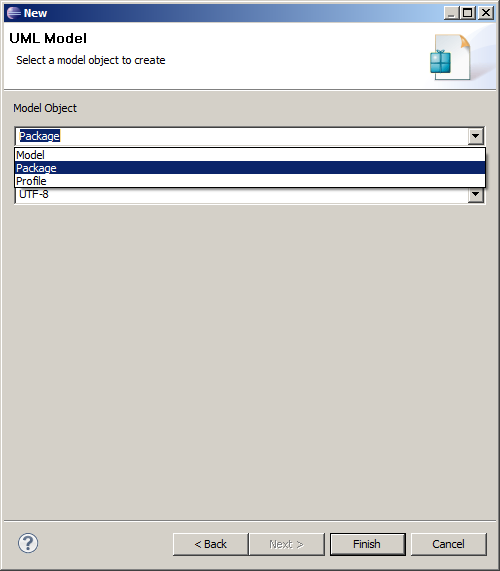
Select the root type to use for your model, here we will use "Package". This should create and open a new UML model.
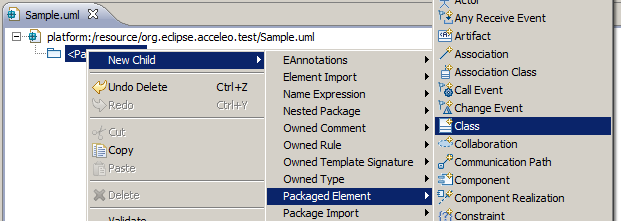
Now add one or more classes to the model. To do this, either you have a graphical UML editor such as topcased installed, in which case you can use it, or follow these instructions:
- Right-click on the root package and select New Child > Package Element > Class;
- Right-click on the class and select "Show Properties View";
- In the properties view, enter a name for the new class.
Repeat these steps to create several classes.
OK, this model is just a dummy to get you started. In real life, models will contain lots of information, but it's not our purpose here and now.
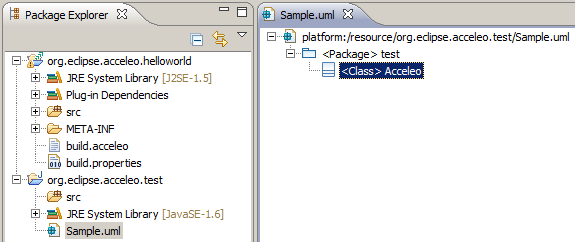
So you should now have a model that looks like this:
So let's run the generator on this model!
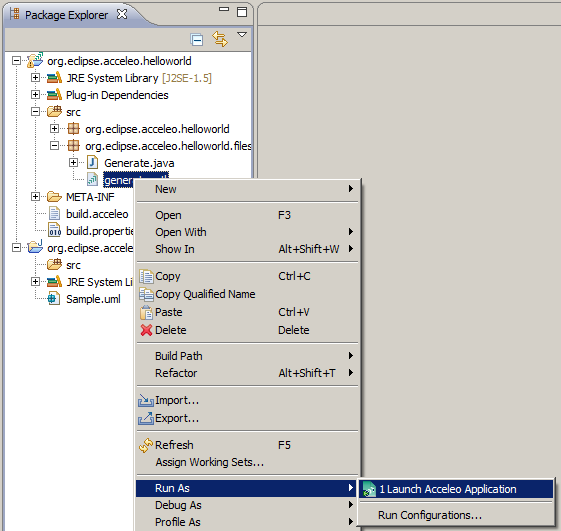
Right-click on the Acceleo module file (that is, the generate.mtl file) and select Run As > Launch Acceleo Application.
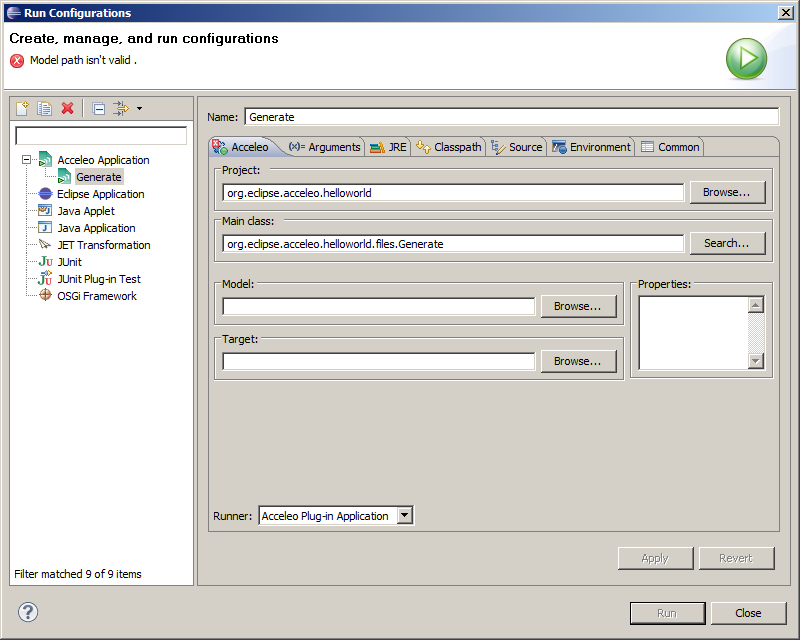
The Acceleo launch configuration page opens, and you need to provide the information mentionned earlier.
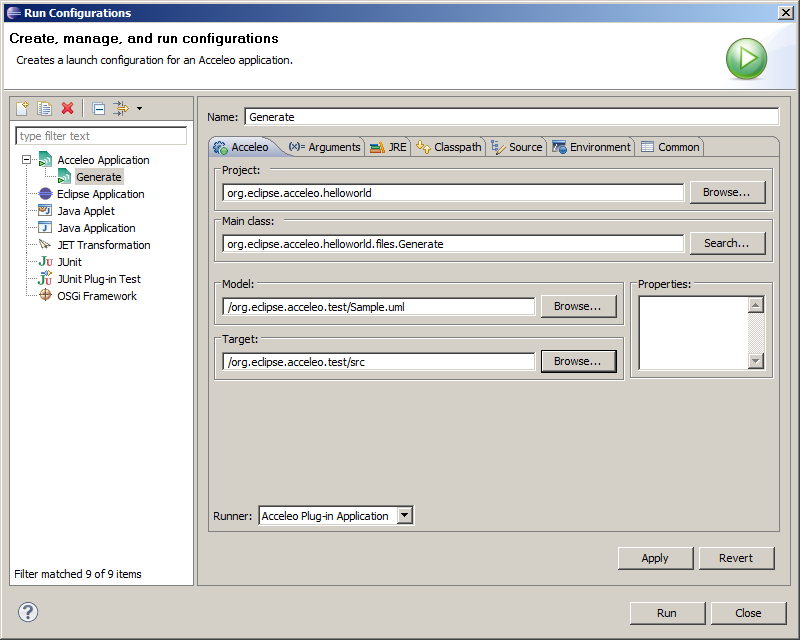
Use the Browse... buttons to simply select the model and the destination folder (you will need to use *.uml filter instead of the default *.xmi in order to locate your model file).
The launch configuration page should now look like this:
Click on the Run button. A file named "Acceleo" (or whatever name you used for your UML class) appears in the target folder.
You can either open it from the package explorer or from the Result view (on the bottom right of the screen). Here is its content:
It contains the text Hello, Acceleo world!, in which Acceleo has been dynamically extracted from the UML model (it's just the class name), while the rest of the text is statically written in the template itself.
Now it's time to experiment by yourself! At some point, you'll probably need to read the rest of the Acceleo documentation to further your comprehension but for now you know enough to get to know Acceleo by playing around with it a bit.
| Acceleo Portal | |
| Project | Project · Installation |
| Features | Acceleo Features · Runtime · Acceleo editor · Views & Perspective · Interpreter · Maven |
| User documentation | Getting Started · User Guide · Acceleo operations reference · OCL operations reference · Text Production Rules · Migration From Acceleo 2.x · Best Practices · Videos · FAQ |
| Developer documentation | Source code · How to contribute · Compatibility · MOFM2T specification · OCL specification |
| Community | Professional Support · Report a bug |

