Notice: This Wiki is now read only and edits are no longer possible. Please see: https://gitlab.eclipse.org/eclipsefdn/helpdesk/-/wikis/Wiki-shutdown-plan for the plan.
EDT:Tutorial: RUI With Database Lesson 10
Access a database with EGL Rich UI
| < Previous | Next > |
Lesson 10: Install Apache Tomcat
You can use Apache Tomcat to display the web page and to run the EGL-generated service.
Download and access the server
If you have IBM® WebSphere® Application Server installed, you can skip to the next lesson. In any case, you can download Apache Tomcat, if necessary, and make it available in the workbench.
To gain access to server:
- Locate the Servers view, which is by default at the lower
right of the workbench. EGL created an AJAX Test Server by default.
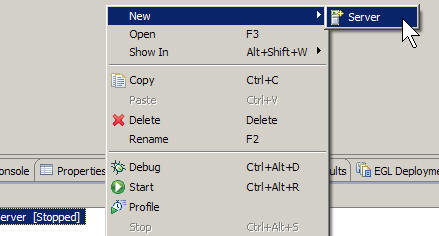
Right-click the empty space and click New > Server.

- In the Define a New Server window, expand Apache and click Tomcat v6.0 Server. Accept the default values for the other fields. Click Next.
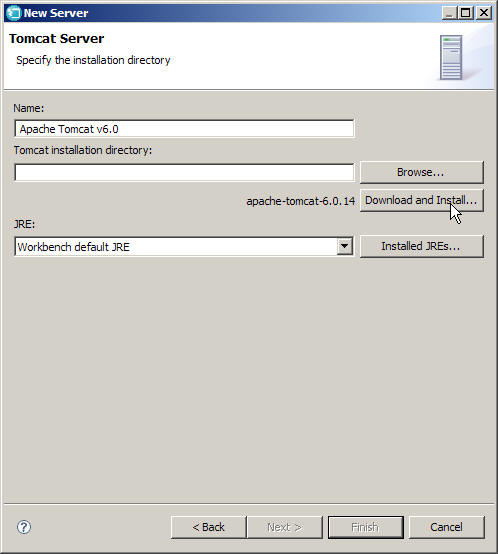
- In the Tomcat Server window, access
the open-source software either by using the Browse to
find an existing installation directory (for example, apache-tomcat-6.0.26)
on your machine; or click Download and Install.
If you found an existing installation directory, click Finish and skip the installation steps.

Accept the terms of the license agreement. Browse to a directory for the application files, such as C:\Program Files\Apache. While the workbench completes the installation, the Define a New Server window is displayed with the installation directory specified. Progress is shown at the lower right of the workbench. - When the installation is completed, click Finish.
- Start the server by highlighting the server
name and clicking the green Start icon at the
top of the Server view.

Lesson checkpoint
In this lesson, you completed the following tasks:
- Downloaded Apache Tomcat, if necessary
- Started the server.
In the next lesson, you deploy the application to a server and run it there.
| < Previous | Next > |
