Notice: This Wiki is now read only and edits are no longer possible. Please see: https://gitlab.eclipse.org/eclipsefdn/helpdesk/-/wikis/Wiki-shutdown-plan for the plan.
WTP/Build/WTP Developer Installation Quick Guide
Contents
A Quick Guide to Installing a WTP Build for Testing or as Development Target
Basics
WTP developers install WTP builds that are available at committers or downloads areas frequently for testing or using these as plugin development targets. Since each build has its own set of prerequisites, the installation process involves downloading WTP and its prereqs such as emf, gef, jem and eclipse sdk. To simplify this process I have created a scripts that uses the install scripst from the actual releng builder that was used to create a particular build. To use it create simple eclipse project or just copy these scripts into a folder and run "ant -f install.xml get". The script should do all the work for you.
To use these scripts you should have apache ant (v1.6 or better), a JDK (v1.4.2 ro higher), and CVS installed on your machine. They should be on your path.
First file you should create is the build.properties. You modify this file to change the build you want to install or where you want files to be installed etc. You should review these properties before each install:
baseos=win32
basews=win32
basearch=x86

#-------------------------------------------------
# Build Stream are one of R0.7, R1.0, R1.5, R2.0
#-------------------------------------------------
wtp.buildStream=R1.5

#-------------------------------------------------
# Build area is one downloads or committers
#-------------------------------------------------
wtp.buildArea=committers

#-------------------------------------------------
# label of the Build to install
# e.g. M-1.5.1-200607141912
#
# cvstag is a derived label that you must provide
# in order to automtaically access the correct
# maps and wtp builder
# it is "v"+"buildType"+"buildTimeStamp"
# e.g. vM200607141912
#-------------------------------------------------
wtp.buildLabel=M-1.5.1-200607141912
wtp.cvsTag=vM200607141912

#-------------------------------------------------
# This is the home dir for build tasks
#   i.e. downloads folder etc.
#-------------------------------------------------
build.home=C\:/dev/build-home

#-------------------------------------------------
# This is where the deriver will be installed
#   i.e. downloads folder etc.
#-------------------------------------------------
targetDir=${build.home}/drivers

#-------------------------------------------------
# This is the folder under build.home where the
# scripts will look for previosly doenloaded files
#   i.e. downloads folder etc.
#-------------------------------------------------
build.local.repository=downloads
ANT
Second file you should create is the ant script for installation, install.xml. You do not need to modify anything in this this file, just change the properties we described before:
<?xml version="1.0"?>
<!-- ======================================================================
    Properties that must be passed to this script can be found in
    build.properties

     ====================================================================== -->
<project name="wtp-installer" default="get">


	<property file="build.properties" />
	<property file="./tmp/releng/maps/dependencies.properties" />
	<property name="dependencyTargets" value="./tmp/releng.wtpbuilder/scripts/dependency/build.xml" />
	<property name="local.cache.dir" value="${build.home}/${build.local.repository}" />
	<property name="base.install.dir" value="${targetDir}/${wtp.buildLabel}" />

	<!-- We form these properties dynamically to download the latest build -->
	<property name="wtp.url" value="http://download.eclipse.org/webtools/${wtp.buildArea}/drops/${wtp.buildStream}/${wtp.buildLabel}" />
	<property name="wtp.releng.url" value="http://download.eclipse.org/webtools/downloads/drivers" />
	<property name="wtp.file" value="wtp-sdk-${wtp.buildLabel}.zip" />
	<property name="wtp.name" value="WTP sdk ${wtp.buildLabel}" />
	<property name="wtp.description" value="WTP sdk ${wtp.buildLabel}" />

	<target name="get" depends="releng">
		<delete dir="${base.install.dir}" failonerror="false" />
		<mkdir dir="./tmp" />
		<antcall target="releng" />
		<antcall target="getAndInstall">
			<param name="groupId" value="emf" />
		</antcall>
		<antcall target="getAndInstall">
			<param name="groupId" value="gef" />
		</antcall>
                <antcall target="getAndInstall">
			<param name="groupId" value="dtp" />
		</antcall>
		<antcall target="getAndInstall">
			<param name="groupId" value="eclipse" />
		</antcall>
		<antcall target="getAndInstall">
			<param name="groupId" value="wtp" />
		</antcall>

	</target>


	<target name="getAndInstall">
		<ant antfile="${dependencyTargets}" target="checkDependency">
			<property name="groupId" value="${groupId}" />
		</ant>
		<ant antfile="${dependencyTargets}" target="installDependency">
			<property name="groupId" value="${groupId}" />
			<property name="install.destination" value="${base.install.dir}" />
		</ant>
	</target>


	<target name="releng">

		<available file="./tmp/releng/maps/dependencies.properties" property="map.exists" />
		<available file="./tmp/releng.wtpbuilder/scripts/dependency/build.xml" property="releng.exists" />
		<antcall target="checkout-maps" />
		<antcall target="getwtpbuilder" />
	</target>

	<target name="checkout-maps" unless="map.exists">

		<cvs quiet="true" cvsRoot=":pserver:anonymous@dev.eclipse.org:/cvsroot/webtools" package="releng/maps/build.cfg" dest="./tmp" tag="${wtp.cvsTag}" />
		<cvs quiet="true" cvsRoot=":pserver:anonymous@dev.eclipse.org:/cvsroot/webtools" package="releng/maps/dependencies.properties" dest="./tmp" tag="${wtp.cvsTag}" />

	</target>

	<target name="getwtpbuilder" unless="releng.exists">
		<property file="./tmp/releng/maps/build.cfg" />
		<delete dir="./tmp/releng.wtpbuilder" failonerror="false" />
		<echo message="Version tag for releng.wtpbuilder is: ${wtpBuilderVersion}" />
		<cvs quiet="true" cvsRoot=":pserver:anonymous@dev.eclipse.org:/cvsroot/webtools" package="releng.wtpbuilder/scripts/dependency" dest="./tmp" tag="${wtpBuilderVersion}" />

	</target>


</project>
Proxy
If you are behind a proxy you may need to make a few changes to the install.xml script above. First, you will need to add your proxy settings to each of the cvs tasks. The proxy information is of the form:
- pserver;proxy=<host>;proxyport=<port>;proxyuser=<user>;proxypassword=<password>:anonymous@dev.eclipse.org:/home/webtools
So you can adjust the "cvsRoot" attribute of the cvs tags accordingly.
The other thing you may need to do is add a setproxy task to the get recipe. Let's say that your proxy is called "proxy" and its port is 82, then you could add:
<setproxy proxyhost="proxy" proxyport="82"/>
to the "get" target above. See http://ant.apache.org/manual/OptionalTasks/setproxy.html for setproxy options.
Getting started for new developers
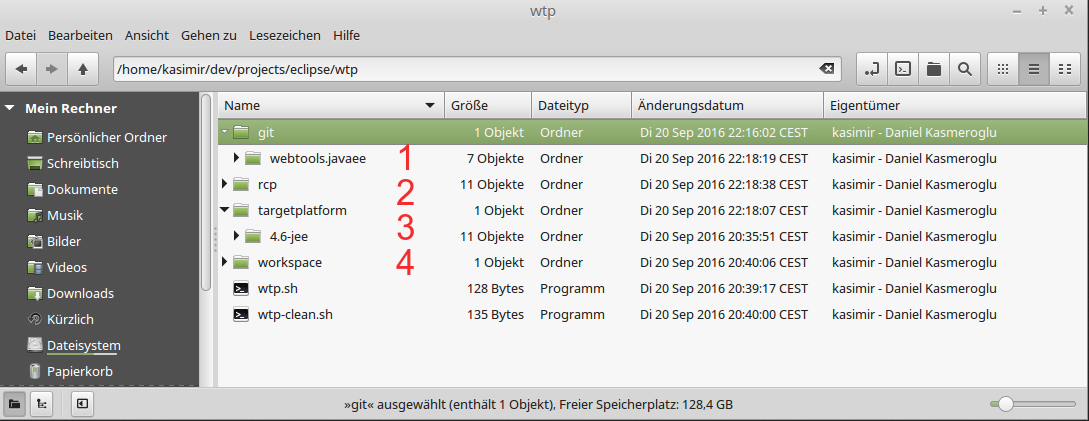
This chapter is of interest for all those developers whom are willing to participate in the development of the WTP project. It's meant to provide all information in order to get you ready for contributions. As a developer you're obviously free to setup your system as you like but for initial attempts we suggest to stick with this little guide as it had been tested. First of all here's a file system structure of a project setup (I'm using a base folder $BASEDIR "/home/kasimir/dev/projects/eclipse/wtp" for this):
1) $BASEDIR/git : This is a folder for all GIT repositories which are required for the development setup (some developers prefer a central location for GIT repositories whereas I prefer to keep everything in one place).
2) $BASEDIR/rcp : This is the Eclipse-IDE you're using for the development process. A good choice would be the RCP/RAP distribution https://www.eclipse.org/downloads/eclipse-packages/ (you can use a different package and add the RCP/RAP features as well).
3) $BASEDIR/targetplatform : Here you're placing the so called target platform. As you can see I've chosen the "Eclipse IDE for Java EE Developers" distribution. The target platform establishes the set of features/plugins you're developing against. Since the WTP is part of this distribution it's an obvious choice.
4) $BASEDIR/workspace : The workspace used by the RCP Eclipse IDE and some shell scripts to start the IDE.
Setup your target platform
Follow these steps in order to configure "$BASEDIR/targetplatform/4.6-jee" as the basis for your contributions:
- Since you need the Eclipse SDK within your targetplatform, you've got the following options:
- Run the "$BASEDIR/targetplatform/4.6-jee" and install the Eclipse SDK via an update site.
- Download the corresponding Eclipse SDK and place it nearby as f.e. "$BASEDIR/targetplatform/4.6-sdk". If you choose this solution you must later add this separate installation, too.
- Run your IDE $BASEDIR/rcp with the workspace $BASEDIR/workspace
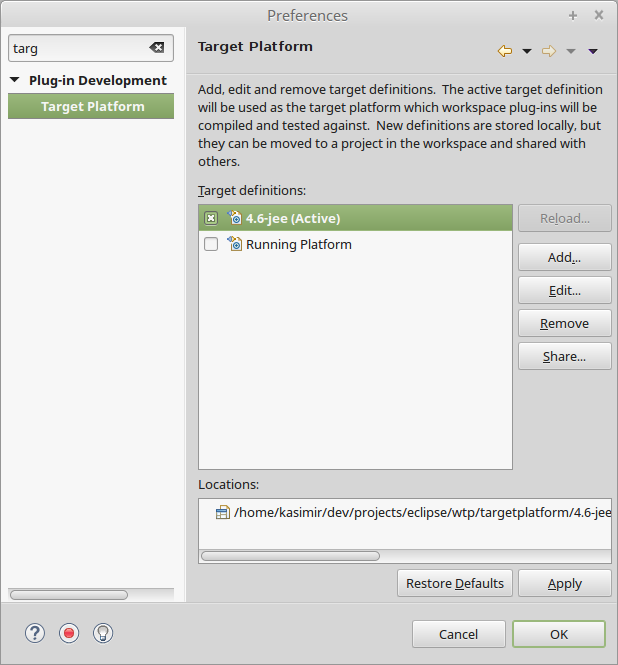
- Select the menu Window -> Preferences and enter Target to quickly find the settings:
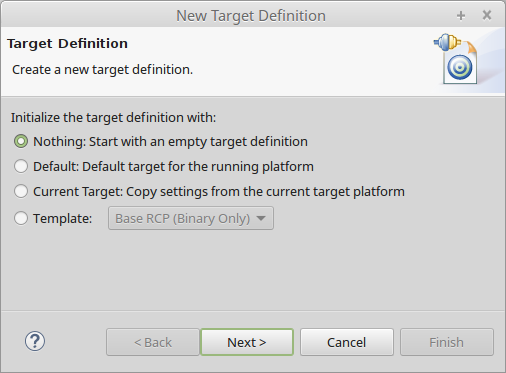
- Click Add which opens a sequence of dialogs to configure you're target platform. Start with an empty target definition:
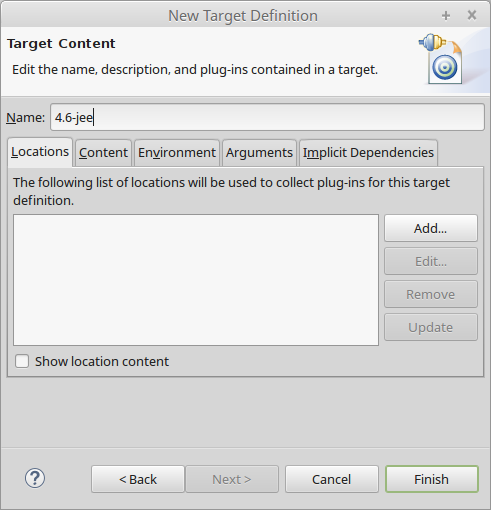
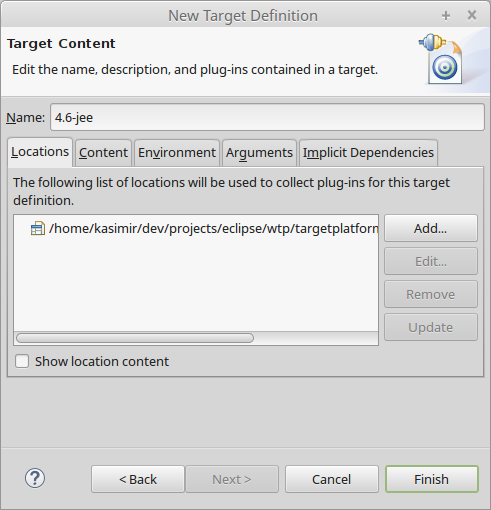
- Provide a name for the desired target platform. The name always should indicate what's the target is about. The name 4.6-jee clearly indicates the use of the Neon JEE package:
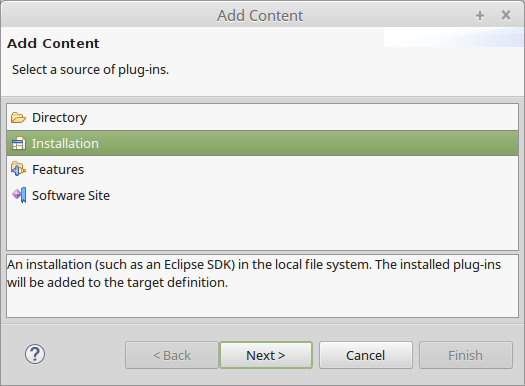
- There are plenty of ways to add plugins/features to a target definition. The easiest solution is to choose an installation so we can use the downloaded JEE package completely:
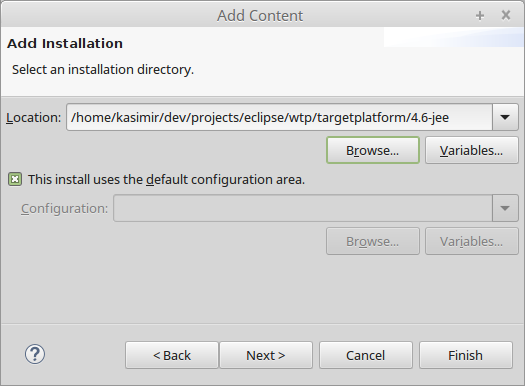
- We're just pointing to the JEE installation which is $BASEDIR/targetplatform/4.6-jee (in my concrete example: /home/kasimir/dev/projects/eclipse/wtp/targetplatform/4.6-jee). Remember that you might do this a second time if you've downloaded the SDK into a separate place as mentioned above.
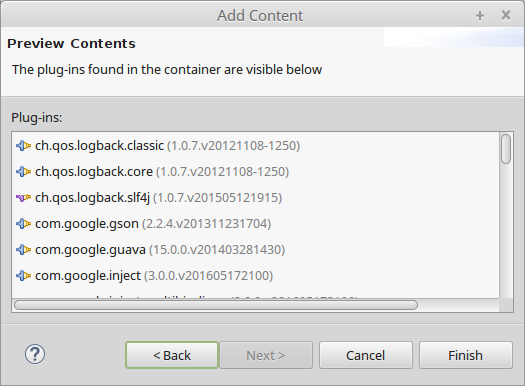
- This step shows all plugins from the installation that had been detected. These plugins become part of the target definition, so they're available throughout the development process.
- Finally it's up to you to provide additional settings, such as VM arguments and so on. Most of these settings are usually only of interest if you intend to build a distribution using a tool such as Maven Tycho.
- After finishing the dialog sequence you must activate the freshly generated target platform in order to use it.

