Notice: This Wiki is now read only and edits are no longer possible. Please see: https://gitlab.eclipse.org/eclipsefdn/helpdesk/-/wikis/Wiki-shutdown-plan for the plan.
Papyrus/Tester/RCPTT
Introduction
RCPTT is an Eclipse Project that provides a testing tool for Eclipse RCP application. RCPTT allows to run GUI tests based on ECL. Several functions as the "Record actions" make RCPTT easy to handle and use for beginners. After a bit of experience, it will be easy to understand the different commands and make more complex scripts.
A quick Start guide is available here : Getting Started with RCPTT:
The RCPTT "framework" has been put in place in Papyrus RT. Some tests are arleady created and could base as example.
How to use RCPTT
RCPTT Eclipse can be found Download RCPTT
This demo shows how to create a test for papyrus RT:RCPTT Demo for PapyrusRT
Good Practices
Here are some tips to have an homogeneous practice around RCPTT. This is a certain way to work, maybe not the best one. If you have other opinion, please share it here.
Root Structure
A way to organize Rcptt test for Papyrus is to do a RCPTT project by feature to test. For example in org.eclipse.papyrus.tools/rcptt/.
File:FolderAtRootTools.JPGTODO
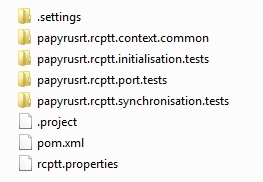
Another way is to only have one project as done in PapyrusRT. In the RCPTT root in org.eclipse.papyrus-rt\releng\rcptt of the project we should have the following elements:
Folder Structure
The structure of projects is different if you choose to have only one RCPTT project or several.
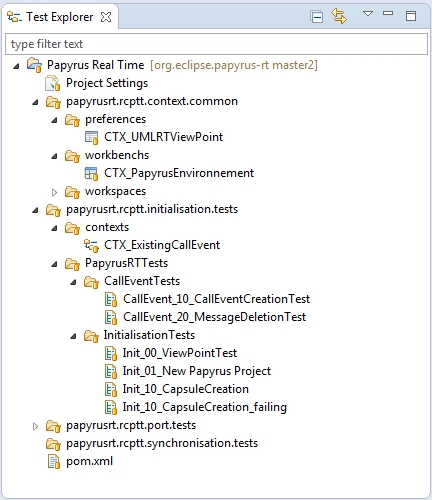
In the case as papyrusRT of one plugin, after importing the rcptt folder into the RCPTT eclipse IDE, the the tests created should respect architecture to make this folder easy to maintain.
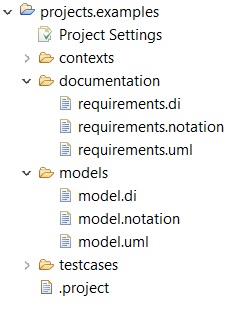
Another structure is also possible in case of several RCPTT plugin, with a folder for each type of files:
Project Properties file
rcptt.properties is shown as Project Settings file in the Test Explorer and contains Description, default contexts and default Validations.
Contexts
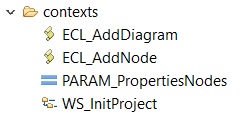
There are several type of contexts :
- Preferences contexts
- Like the UMLRTViewPoint
- Workbenchs contexts
- For exemple: Perspective to use
- Workspaces contexts
- To clear the workspace
- Inital projects to be used for the further tests
- Procedures contexts
- ECL procedures that will be used as common library for RCPTT test
Naming Convention
Contexts Name
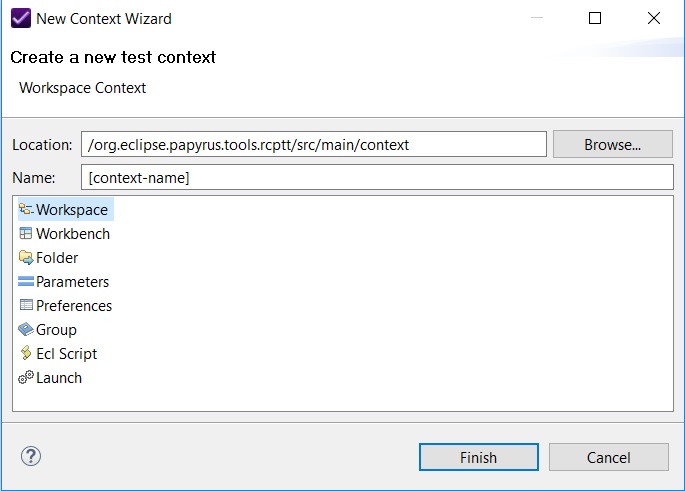
There are various types of contexts:
To identify them easily, the names of contexts should be prefixed by a tag according to the type of context file:
| Workspace | WS_[context-name].ctx |
| Workbench | WB_[context-name].ctx |
| Folder | FS_[context-name].ctx |
| Parameters | PARAM_[context-name].ctx |
| Preferences | PREF_[context-name].ctx |
| Group | GROUP_[context-name].ctx |
| ECL Script | ECL_[context-name].ctx |
| Launch | DEBUG_[context-name].ctx |
| Super Context | SUPER_[context-name].ctx |
Test Name
All tests are executed alphabetically and this should work as each test must be independant ! But in order to have a better overview during execution, it would be a good practice to regroup test by feature. For this reason here is a naming convention used as for now:
[FeatureName]_[XY]_[TestName]
- X = Type of the test (e.i.: 0: initialisation, 1: creation, 2: deletion, 3: modification , ...)
- Y = Number of this test of this type X
For Example:
CallEvent_15_CreateCallEventTest
Represents a test around CallEvent, 1 = creation , 5 = fifth test of Creation of CallEvent.
Workspace initialisation with model files
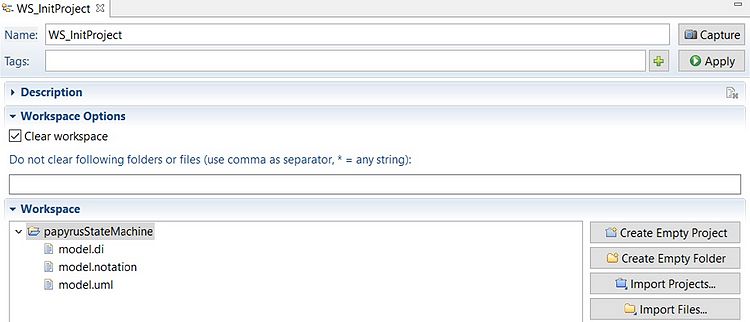
When you want to test Papyrus, you need to initialize your application’s workspace. For that you can use Papyrus model files.
First, export or copy model files of the papyrus project that you want use to start your tests and place them in a folder named //models// at the root of your rcptt project.
Then, create a new workspace context, open it and create an empty project. Once the project created, import files from the Papyrus model onto the created project.
Then, if you launch a test linked with your workspace context or if it is add by default in your project settings, the AUT’s workspace will be initialized with model files and creates a project with elements you need to start the test.
Super Contexts
Sometimes you have to execute the same tests with variant parameters, with super contexts it’s possible to launch the same script with different values.
For example if you want to use a procedure which create a node on a diagram:
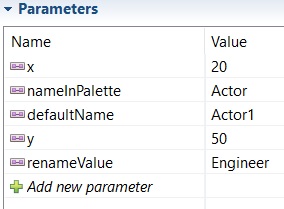
For each possible node, you create a parameter context which contains the node’s label in the palette and the coordinates of the node, for each value, the parameter’s name must be the same in each context.
Link all contexts to a super context of the same type as them and in the test, use the super context by using the parameters’ names in your test script.
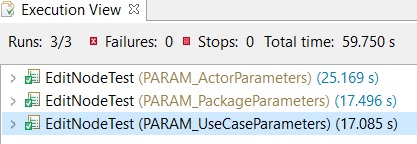
RCPTT will launch your test script for each context link to your super context.
The super context is execute with each context successively and give different parameters to your test and give you the possibility to test different elements with the same test.
Tag "ignore"
If one of your tests detects a bug on your AUT and fails, you can add to this test a tag "ignore" and you can configure the job which launch it so that it will skip this test.
Then, if your test is linked to a bug, you can add a comment in the bug's report to indicate the presence of the skipped test so that the tag will be removed once the anomaly corrected.
Generic procedures
- open
Description :
This function open the given model and the given diagram.
Parameters :
project : Label of project to open in Project Explorer. (String)
model : Label of model to open in Project Explorer. (String)
rootName : Label of the RootElement in Model Explorer. (String)
diagramName : Diagram’s label in Model Explorer. (String)
- add-diagram
Description :
This function add a diagram to the current model.
Parameters :
type : Type of diagram to create in creation menu. (String)
name : Name of the new diagram created. (String)
modelExplorerRootName : Name of the Model Explorer view. (String)
- add-node-from-palette
Description :
This function add a node on the given diagram by using the palette.
Parameters :
name : Label of the node to create in the palette. (String)
x : Abscissa of the node to create on the editor. (int)
y : Ordinate of the node to create on the editor. (int)
defaultName : Node’s default name in the model explorer. (String)
diagramName : Diagram’s label on the editor. (String)
rootName : Name of the RootElement. (String)
- remove-node
Description :
This function remove a node on the given diagram.
Parameters :
nameNode : Name of the node on the editor. (String)
diagramName : Diagram’s label on the editor. (String)
rootName : Name of the RootElement. (String)
- add-child
Description :
This function add a child to a parent node on the editor.
Parameters :
parentName : Name of the parent node on the editor. (String)
childName : Label of the element child to create in the palette. (String)
pathChildDefaultName : Path to Child’s default name in model explorer. (String)
rootName : Name of the RootElement. (String)
- remove-child
Description :
This function removes a node’s child on the editor.
Parameters :
parentName : Name of the parent node on the editor. (String)
childName : Name of the child to remove on the editor. (String)
diagramName : Diagram’s label on the editor. (String)
rootName : Name of the RootElement. (String)
- add-relation
Description :
This function creates a relation between two given nodes.
Parameters :
relation : Label of the relation in the palette. (String)
element1 : Name of the first node on the editor. (String)
element2 : Name of the second node on the editor. (String)
diagramName : Diagram’s label on the editor. (String)
rootName : Name of the RootElement. (String)
- rename-element
Description :
This function replaces node’s name by a new one.
Parameters :
pathOldName : path to node’s name to replace in model explorer. (String)
newName : New name of the node. (String)
pathNewName : Path to node’s new name in model explorer. (String)
diagramName : Diagram’s label on the editor. (String)
rootName : Name of the RootElement. (String)
- edit-combo
Description :
This function modify an element’s property which use a combo-box.
Parameters :
propertyTab : Label of tab which contains the combo-box to modify in view properties. (String)
propertyLabel : Label of property to modify in view properties. (String)
propertyValue : New value of the property to modify. (String)
pathNameElement : Path in model explorer of the element’s default name which have a property to modify. (String)
rootName : Name of the RootElement. (String)
- add-comment
Description :
This function add a comment on the given diagram.
Parameters :
x : Abscissa of the comment to create on the editor. (int)
y : Ordinate of the comment to create on the editor. (int)
textComment : Body of the comment to create. (String)
diagramName : Diagram’s label on the editor. (String)
editorRootName : Name of the root in editor. (String)
explorerRootName : Name of the root in model explorer. (String)
pathComment : Path to comment’s name in model explorer. (String)
- remove-comment
Description :
This function remove a comment of a given diagram.
Parameters :
explorerRootName : Name of the root in model explorer. (String)
pathComment : Path to comment’s name in model explorer. (String)
Open points
Naming Convention
- What should be that best naming convention to make the tests structured ?
Directory Structure
- How deep should be the test folder
Common Library
- How this library can be put in place (ECL, Java, ???)
- What will be added into this library ?
Industrialization
- Should we create a special Hudson job to run the RCPTT
- On which version of Papyrus should be based the AUT ?
- On which version of Papyrus RT should be based the AUT ?

