Notice: This Wiki is now read only and edits are no longer possible. Please see: https://gitlab.eclipse.org/eclipsefdn/helpdesk/-/wikis/Wiki-shutdown-plan for the plan.
PDE/API Tools/Resources
| API Tools | |
| Website | |
| Download | |
| Community | |
| Mailing List • Forums • IRC • mattermost | |
| Issues | |
| Open • Help Wanted • Bug Day | |
| Contribute | |
| Browse Source |
Contents
Articles
There are currently no articles.
Examples
Important Notes
There are a few things that should be noted prior to getting started with the examples.
- Whenever we refer to a "pattern" we are referring to a Java regular expression as defined here. Take note of escaping, etc, that is used when formulating your regular expression. If a invalid regular expression is given, the use scanner will report it back to you and abort.
- When using the Ant tasks from the command line you should always make sure the
eclipse.install.dirproperty points to the most recent Eclipse build available. This way you get all the latest and greatest versions of the tasks. The other reason to do this is that the build file (api-tasks.xml) uses the API tools core jar from that directory on the Ant classpath. - Any Ant tasks used from the command line must be called by their name as specified in the
ant-tasks.propertiesfile. This can cause some confusion for users who try out the Ant tasks in Eclipse and notice that the tasks are qualified withapitoolingbut they are not qualified in theant-tasks.propertiesfile. Consider the following example:
<project name="convert" basedir="." default="run">
<target name="run" depends="init">
	<apitooling.apiuse_reportconversion
	    xmlfiles="${report.loc}"
	    htmlfiles="${html.loc}"
	    debug="true"
	/>
    </target>
</project>
Will work just fine when run within Eclipse, but will fail with a build exception about the name apitooling.apiuse_reportconversion being unknown. If the qualification is removed like the following it will work just fine:
<project name="convert" basedir="." default="run">
<target name="run" depends="init">
	<apiuse_reportconversion
	    xmlfiles="${report.loc}"
	    htmlfiles="${html.loc}"
	    debug="true"
	/>
    </target>
</project>
Running an API use scan (IDE)
In the IDE API use scans can be run from the External tools dialog. The benefits of providing the scanning as an external tool are many, the foremost being: 1. you can create as many different configurations as you want for scanning different distributions of your products and 2. each configuration can have its own persisted settings.
Creating a new scan configuration
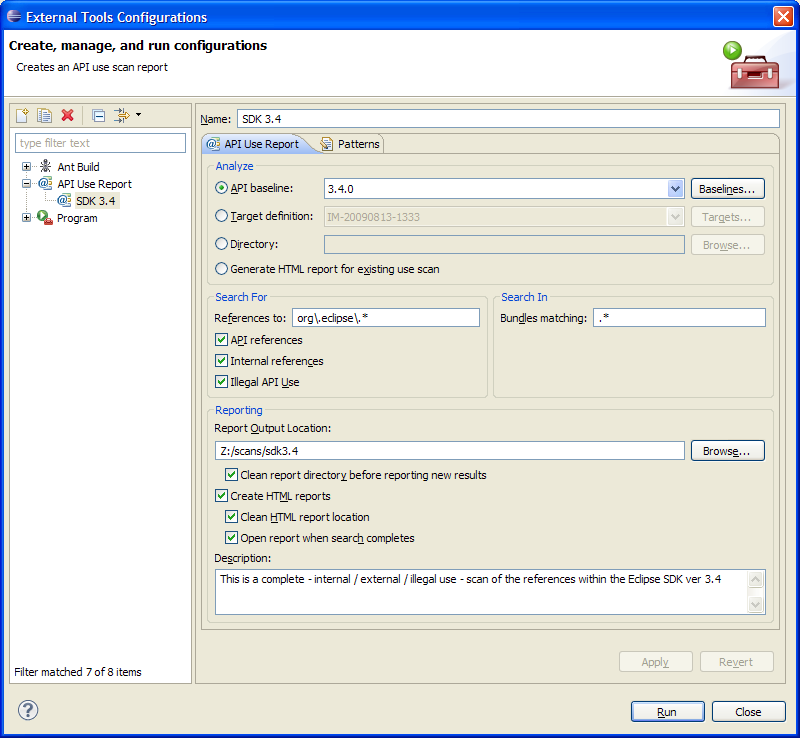
To create a new use scan configuration simply double-click the API Use Report configuration type.
Configuring the new use scan
There are a few items that are required for a use scan to run:
- You must select what you want to analyze, which can be either an API baseline, target definition or a directory of bundles. You can also select to only generate HTML for an existing report. You can only select one option, with each option allowing you to configure it. I.e. you can go to the API baselines preference page to edit existing baselines if you select analyzing an API baseline.
- You must specify where the scan results will be outputted. The UI allows you to browse for a desired location or you can enter it in manually. If the given report location does not exist it will be created for you.
There are more options that can be configured but are not required for a scan to complete, they include:
- Search for > References to - this field allows you to specify the name (or matching RegEx) of the bundle that you want to see references to. Consider the following example:
org\.eclipse.*
In this example we are saying that we want to see all references to any bundle that starts with the nameorg.eclipse.. - Search for > API references - this option allows you to scan for API references.
- Search for > Internal references - this option allows you to scan for internal references.
- Seatch for > Illegal API Use - this options allows you to scan for illegal API usage i.e. usage of restricted API members.
- Search in > Bundles matching - this field allows you to specify the name (or matching RegEx) of the bundle(s) that you want to scan for references from i.e. a search scope. Consider the following example:
.*
In this example we are saying that we want to search in all bundles whose name matches any character sequence. The same effect can be achieved leaving the field blank. Consider another example:com\.test.*
In this example only bundles whose name starts withcom.testwill be scanned for references. - Reporting > Clean report directory before reporting new results - this option allows you to clear out an existing report location prior to the scan reporting any results. It should be noted that this option will completely remove the specified report directory if it exists, with all child directories being recursively removed as well.
- Reporting > Create HTML reports - this option will convert all of the XML output into formatted HTML and place it in
<report location>\html - Reporting > Clean HTML report location - this option allows you to clear out an existing HTML location prior to creating new reports. It should be noted that this option will completely remove the specified HTML directory if it exists, with all child directories being recursively removed as well.
- Reporting > Open report when search completes - opens the HTML report when searching has completed.
- Reporting > Description - allows you to enter a human-readable description for the report
Running an API use scan (commandline)
Initial Setup
Before you can begin running any of the Ant tasks provided by API Tools you have to get a version of the org.eclipse.pde.api.tools bundle that provides the task(s) you want to run. In this example - to run the updated version of the use task - you will need to get a version from any build after August 24, 2009.
Next you will want to extract the api-tasks.properties file from org.eclipse.pde.api.tools jar found in the /scripts folder.
Lastly, you will want to extract the api-tasks.xml file, also located in the org.eclipse.pde.api.tools jar in the /scripts folder.
The Build File
The build file - api-tasks.xml - is fairly simple and has a plethora of comments to help you out. It performs 3 main tasks:
1. it builds the Ant classpath based on an Eclipse install
2. it extracts the apitooling-ant.jar from the org.eclipse.pde.api.tools jar
3. it runs whichever task you specify in the 'run' target
The three most import properties in the build file describe the base set up locations to be able to run any of the Ant tasks. They include:
- The Eclipse install location - this location is required so that the build can find all of the dependents of API tools and load them on the Ant classpath.
<property name="eclipse.install.dir" value=""/>
- The location to extract the
apitooling-antjar file to - this location is where the build will place the API tools jar required to run any of the Ant tasks.<property name="eclipse.lib.dir" value=""/>
- The location of the
ant-tasks.propertiesfile - this location is needed so that Ant can map task names back to the classes that implement them.<property name="task.props" value=""/>
Of the three tasks defined in the build file, only the run task need be modified. This task is the one that will actually run whichever API tools task you specify in it. For example if we want to run a use scan (which we do) the run task would look like the following:
<target name="run" depends="init">
    <apiuse
        location="${scope.loc}"
        report="${report.loc}"
        referencepattern="org\.eclipse.*"
        scopepattern=".*"
        considerinternal="true"
        debug="true"
    />
</target>
Where the properties used in the example are defined as:
<property name="report.loc" value="/eclipse/reports/xml"/>
<property name="scope.loc" value="/eclipse/product1/plugins"/>
Use Scan Buildfile
Now lets have a look at an entire build file that could be used to scan for internal reference to any bundle that starts with the name org.eclipse from a product named TestProduct. The example build file also includes HTML report generation.
<project name="apitask" basedir="." default="run">
    <property name="eclipse.install.dir" value="/eclipse/eclipse/plugins"/>
    <property name="eclipse.lib.dir" value="/eclipse/lib"/>
    <property name="task.props" value="/eclipse/lib/api-tasks.properties"/>
    <property name="report.loc" value="/eclipse/reports/xml"/>
    <property name="html.loc" value="/eclipse/reports/html"/>
    <property name="scope.loc" value="/TestProduct/plugins"/>

    <target name="init" depends="extract-apitoolingjar">
	<taskdef file="${task.props}">
	    <classpath>
	    <fileset dir="${eclipse.install.dir}">
	        <include name="*.jar"/>
	    </fileset>
	    <fileset dir="${eclipse.lib.dir}">
	        <include name="*.jar"/>
	    </fileset>
	    </classpath>
	</taskdef>
    </target>
    <target name="extract-apitoolingjar">
	<unjar overwrite="true" dest="${eclipse.lib.dir}">
	    <fileset dir="${eclipse.install.dir}">
	        <include name="org.eclipse.pde.api.tools_*.jar"/>
	    </fileset>
	    <patternset>
	        <include name="**/*.jar"/>
	    </patternset>
	</unjar>
	<move file="${eclipse.lib.dir}/lib/apitooling-ant.jar"
              overwrite="true" todir="${eclipse.lib.dir}"/>
	<delete dir="${eclipse.lib.dir}/lib/" includeemptydirs="true"/>
    </target>
    <target name="run" depends="init">
	<apiuse
    	    location="${scope.loc}"
	    report="${report.loc}"
	    referencepattern="org\.eclipse.*"
	    scopepattern=".*"
	    considerinternal="true"
	    debug="true"
	/>
	<apiuse_reportconversion
	    xmlfiles="${report.loc}"
	    htmlfiles="${html.loc}"
	    debug="true"
	/>
    </target>
</project>
Running The Buildfile
To actually run the build file you must have Ant available on the command line and then enter the following:
root%>ant -buildfile <build file name>
Generating Javadoc
The support of the Javadoc tags in source to help document your codes' usage is fantastic. That being said it might happen that you would like to generate the documentation for your bundle and have it include such tag information. By default this does not work, since the standard Javadoc doclet knows nothing about the API tools Javadoc tags. The following sections describe generating Javadoc for your bundle using the Generate Javadoc wizard within the Eclipse IDE and from the commandline.
Using the Wizard
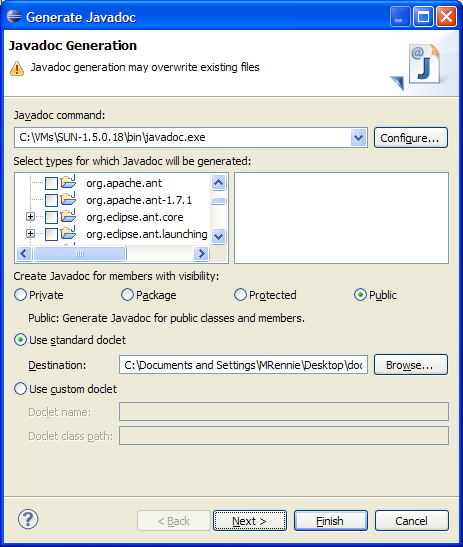
Eclipse contains a very nice wizard for generating Javadoc for your bundles. It can be found by using the Generate Javadoc command located in the Project main menu item.
Once the wizard starts you will have to locate the Javadoc executable (if not already specified) and select the bundles you wish to generate Javadoc for.
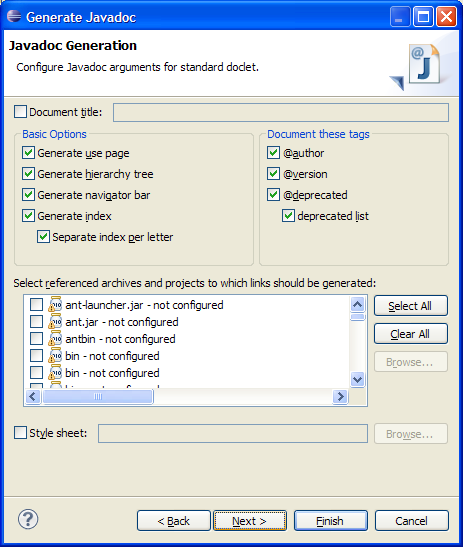
On the next page, you can configure additional options.
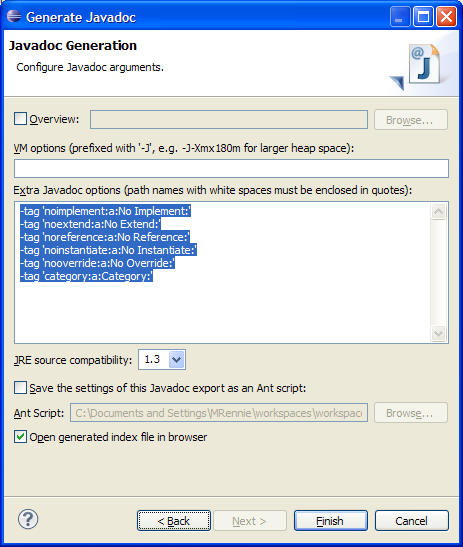
On the last page is where we need to tell the wizard about the custom API tools tags. In the Extra Javadoc options area you will want to enter the following tag definitions:
-tag 'noimplement:a:No Implement:'
-tag 'noextend:a:No Extend:'
-tag 'noreference:a:No Reference:'
-tag 'noinstantiate:a:No Instantiate:'
-tag 'nooverride:a:No Override:'
-tag 'category:a:Category:'
The wizard will then look like the following:
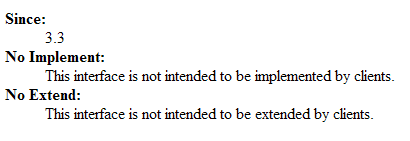
Once you press finish and the Javadoc tool completes you should see API tools tag restrictions appearing in your documentation like the following example:
Using the Commandline
As mentioned above you must tell Javadoc about the custom API tools tags. To do so in this case, it would be easiest to place
the tag definitions in a argfile and pass that to the javadoc command.
root%>javadoc @apitags
Where the apitags file would contain the following:
-tag 'noimplement:a:No Implement:'
-tag 'noextend:a:No Extend:'
-tag 'noreference:a:No Reference:'
-tag 'noinstantiate:a:No Instantiate:'
-tag 'nooverride:a:No Override:'
-tag 'category:a:Category:'
You will also have to specify where the source is and any extra parameter for javadoc to be able to complete. For a description of these and further information on using javadoc see the Sun Javadoc guide
Customizing the Custom Tags
In the previous examples we saw how to tell the Javadoc tool about the API tools custom tags. Since we have to explicitly tell the tools about the tags you are afforded some flexibility in how the tags appear in the final documentation. Consider the example given thus far:
-tag 'noimplement:a:No Implement:'
-tag 'noextend:a:No Extend:'
-tag 'noreference:a:No Reference:'
-tag 'noinstantiate:a:No Instantiate:'
-tag 'nooverride:a:No Override:'
-tag 'category:a:Category:'
If for whatever reason you do not want your documentation to say 'No Implement', you can further customize the tag definition(s) like the following:
-tag 'noimplement:a:Implementation Not Allowed:'
-tag 'noextend:a:Extensions Prohibited:'
etc...
Ant Tasks
API Tools provides a number of ant tasks to integrate the tooling into your build process. For more details see Ant Tasks.

