Notice: This Wiki is now read only and edits are no longer possible. Please see: https://gitlab.eclipse.org/eclipsefdn/helpdesk/-/wikis/Wiki-shutdown-plan for the plan.
Orion/Documentation/User Guide/Reference/Repositories page
Contents
Repositories page
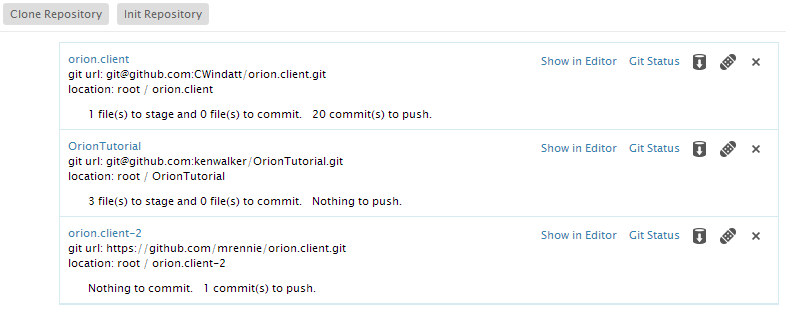
The Repositories page allows you to view and manage the Git repositories associated with your Orion account. When you visit this page you will see a list of all Git repositories you currently have cloned along with some basic information on staged files and commits. To see detailed information about a repository, click its name.
Beside each repository are buttons to Pull from the repository, Apply a patch and Delete the repository.
Adding repositories
Create a new empty repository by clicking Init Repository on the tool bar. Enter the folder where the repository should be created.

Click Clone Repository and enter a url to clone an existing Git repository. If the repository requires credentials to access or modify the repository a dialog will open where they can be entered.
Repository detailed view
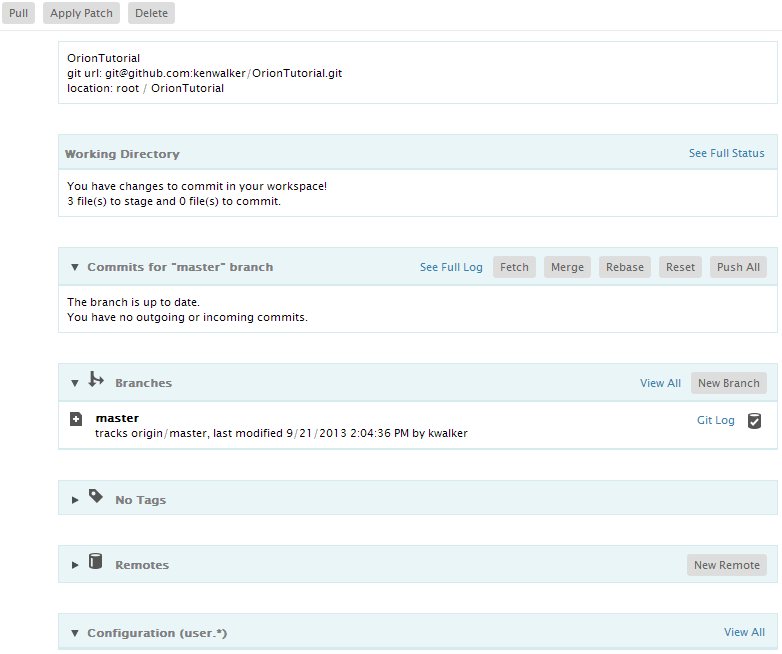
The detailed view displays all the usual Git repository details such as name and url. Additional sections on the page enumerate things like index state, incoming and outgoing commits, branches, and tags. You can open and close most sections on the page using the twistie icon adjacent to the section name. The branches and tags sections show you the most recently used items, but you can click the associated View All links to see full lists of anything.
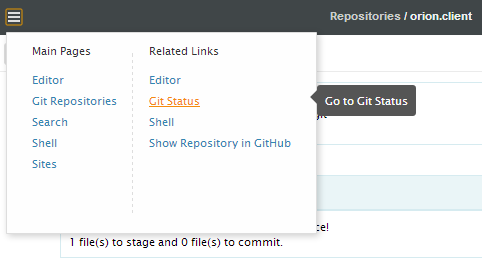
You can pull the latest content, apply a patch, or delete an existing repository from the main toolbar on the page. The Related Links menu allows you to navigate to other views on the repository, such as viewing the repository content on the Editor page or working with the repository changes on the Git Status page.
Submodules
Submodules can be added and manipulated from the repositories dropdown menu.
Cloning a repository with submodules
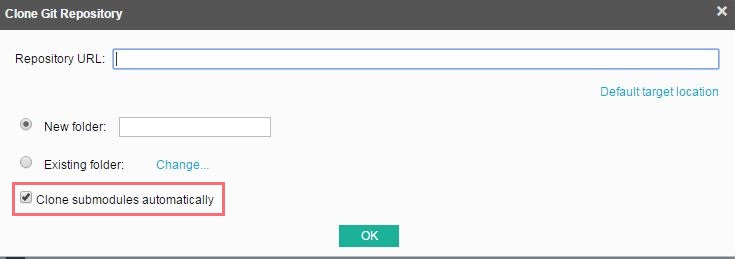
When cloning a repository containing submodules, the default setting will clone all submodules recursively. If you do not wish to do this, click the More button and deselect the clone submodules automatically option.
Adding submodules
To add a new submodules to an existing repository, click the add submodule button.
This will trigger a tooltip to provide the specified clone URL of the submodule you wish to add. Enter the clone URL in the input section and press the 'Enter' key or click the Submit button.
Note: Nested submodules need to be initalized.
Initializing submodules
When a submodule with a nested submodule is cloned, the nested submodule will not be initialized and display as an unknown repository in the repository dropdown menu, and as an empty folder in the editor.
To initialize a submodule, you can use the sync and update buttons in the repository dropdown menu, located in the immediate parent of the submodule. Click the sync button, then the update button.
Committing and Pushing submodule changes
If a change is made in a submodule, the change needs to be pushed to the submodule and all higher level repositories containing it. First, checkout the branch you wish to commit to, as the submodule will initially be in Detached Head state. Select the Reference dropdown and checkout the branch. Then, commit and push the changes as usual. These changes will then be reflected in the immediate parent. Note: There may be working directory changes reflected in parents other than the immediate parent of the changed submodule, but these cannot be committed until the changes are committed bottom up from the submodule.
Removing submodules
To remove a submodules, navigate to the repository dropdown menu and click the remove submodule button(trashcan icon) associated with the submodule you wish to remove.
This will also remove any nested submodules under the deleted submodule.
Branches
You can use the Branches section of the page to work with different branches.
Adding branches
Once a repository is created or cloned, the master branch is set as the current branch. You can create your own branch, work on it and merge it back to master. To create a new branch, click the New Branch button, type in the new branch name, and press the 'Enter' key or click the Submit button.
Actions on a local branch
Once a new branch is created, it is in the local repository but not in the remote yet. Next to each branch is a row of buttons as below. You can manage the branches using these actions.
You can navigate to the Log page to see details on the branch. From the actions next to the branch, the link Git Log will take you to the Git log page.
Setting the active branch using checkout
The active branch is the branch that contains your working copy. When you create a new branch, it is not automatically set as the active branch. Suppose you created this branch to start work on a new feature. From the actions next to the branch, click on the checkout icon to make the branch active.
Once a branch is checked out, it is shown as bold and highlighted with a star.
The active branch represents your working directory, and therefore the Git Status page will always reflect the status of the active branch.
Merging branches
Merging branches involves two branches: the branch whose actions you are working with, and your active branch. For example, clicking the Merge icon for your newly created branch will merge its content to your active branch. You can also merge from remote branches.
You can also merge branches in the Log page or Status page.
Rebasing commits
When you have been making commits in a topic branch, with the intention of pushing the code into a different branch, it is often useful to rebase those commits on another branch. Rebasing will make your commits appear as if the changes were made based on the code in another branch. Before rebasing, ensure all of your changes are committed to your topic branch and the branch you wish to rebase on is up to date.
Deleting a local branch
From the branch actions, click the delete icon to delete a local branch. A confirmation dialog will pop up, providing you a chance to confirm your decision.
Pushing a local branch
Once a branch is checked out, a list of recent commits for that branch will appear. Arrows next to the commits will indicate if the commits are incoming or outgoing. Click the See Full Log to open a full list of the commits to that branch. There are a variety of actions you can click to perform Git operations on the branch.
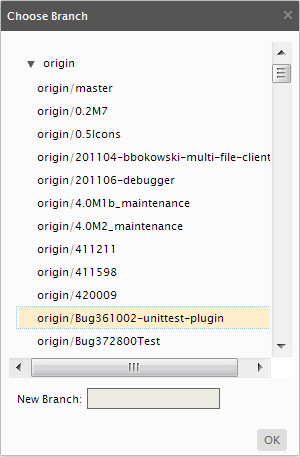
Clicking Push All will push all outgoing commits to the remote repository. For a newly created branch, you can choose an existing remote branch to push to, or more likely, create a new remote tracking branch for your work.
You can also push changes and create remote branches from the Log page or Status page.
Viewing remote branches
Clicking the View All link in the branches section of the page will show all of the branches for a repository, including the remote branches.
Updating the list of remote branches
When someone creates a new remote branch in a repository, the branch will not appear in the branch list for other users until the repository is fetched or pulled. For example, if you ask another developer to check out your "newFeature" branch, the branch will not appear if the repository hasn't been fetched or pulled since you created the branch.
You can click Pull in the main toolbar, and enter your credentials if required to access the repository. The remote branches will be updated.
Actions on a remote branch
Many of the actions on a remote branch are different from those on a local branch, but the Git Log and Merge actions are the same. The Git Log action will navigate to the same log page but with the remote branch content. (You can switch to the local branch content from the log page). All of the actions applicable to remote branches appear in the remote branch list, adjacent to the branch.
Checking out a remote branch
To work with the content of a remote branch, you need to check out the remote branch.
This will create a local branch if you don't already have one, and make that your active branch.
If you try to check out a remote branch that already has a local branch in your repository, you will get a warning message : "the local branch already exists". In this case, you should check out the local branch and fetch the remote, rather than check out the remote branch.
Working with a remote branch
When working with a remote branch, you can ensure you have the most current content by fetching the branch in the remote branches list. (You can also pull the repository from the main toolbar which will fetch all branch content.)
Once fetched, you can merge the content of the branch into your active branch. Using the merge button will merge all commits from the remote into the active branch. Using the squash button will squash all changes into a single commit and then merge them into your active local branch. Using the rebase button will rebase the changes in your active local branch on top of the content of the remote branch, so that your local commits will appear as if they were applied to the latest state of the remote branch..
If you are working exclusively with your active branch (and remote tracking branch), you can also use actions in Commits section to fetch, merge, rebase, and push changes as you work.
Resetting local index from a remote branch
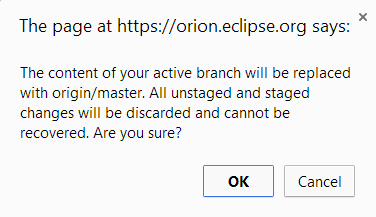
You can also replace the contents of a local branch with the state of the remote branch by using the reset command on the remote branch.
A dialog will pop up asking for confirmation.
Tags
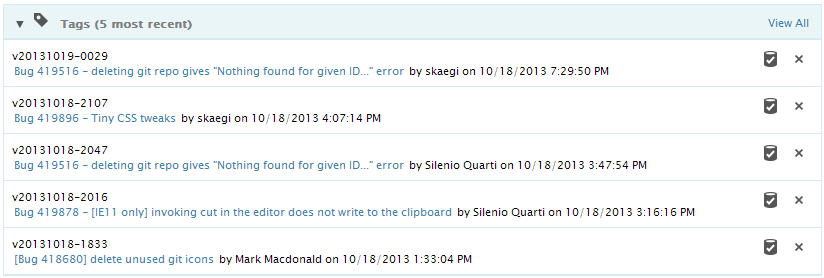
The Tags section will the list the most recent tags added to the repository. Clicking the View All link will open a list with all tags. Buttons beside each tag will Checkout the tag, creating a local branch and Delete the tag.
Remotes
The Remotes section of the repository page lists all the remotes you have set up for your repository. Actions beside each remote can Fetch from the remote or Delete it.
Clicking on New Remote will open a dialog where you can enter a name and url for the new remote.
Configuration
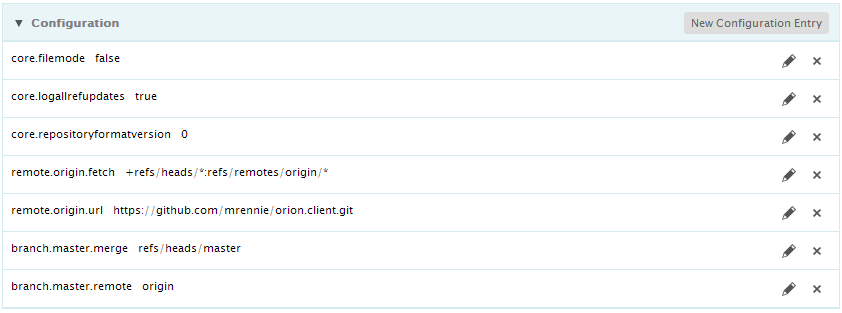
The Configuration section at the bottom of the repository page shows the configuration of the repository. On the main page you will see just user.*. To see the full list, click View All. From here you can add additional configuration properties to the repository and change or delete existing properties.

