Notice: This Wiki is now read only and edits are no longer possible. Please see: https://gitlab.eclipse.org/eclipsefdn/helpdesk/-/wikis/Wiki-shutdown-plan for the plan.
MDT/UML2/Getting Started with UML2
Copyright © 2004, 2014 International Business Machines Corp., CEA, and others.
Contents
- 1 Summary
- 2 Prerequisites
- 3 Introduction
- 4 Getting Started
- 5 Creating Models
- 6 Creating Packages
- 7 Creating Primitive Types
- 8 Creating Enumerations
- 9 Creating Enumeration Literals
- 10 Creating Classes
- 11 Creating Generalizations
- 12 Creating Attributes
- 13 Creating Associations
- 14 Saving Models
- 15 Conclusion
- 16 References
Summary
This article describes how to get started with the UML2 plug-ins for Eclipse. In particular, it gives an overview of how to create models (and their contents) both programmatically and by using the sample UML editor.
Kenn Hussey and James Bruck
Last Updated: January 21, 2014
Prerequisites
To start using UML2 (and to follow along with the example in this article), you must have Eclipse, EMF, and UML2 installed. You can either download the Modeling Tools Package or follow these steps:
- Download and run Eclipse.
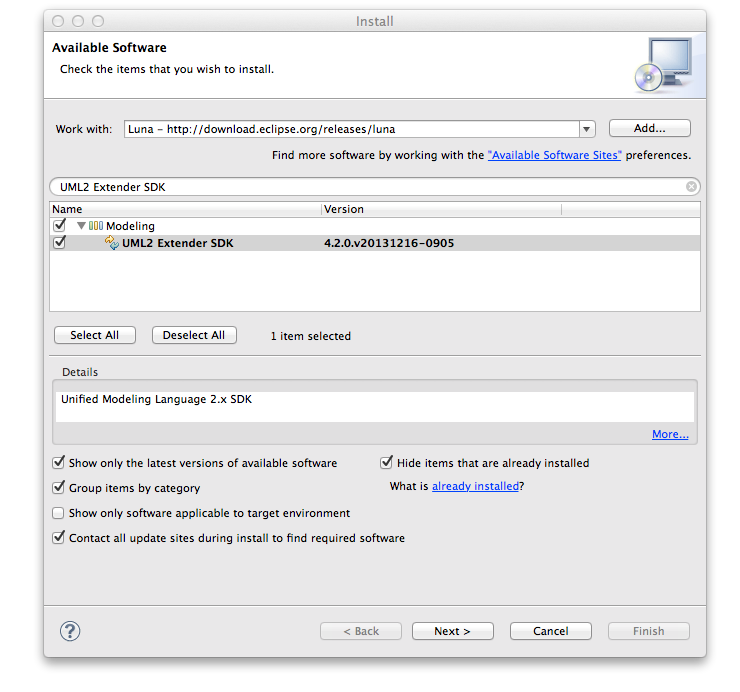
- Select the Help > Install New Software… menu item.
- Select a software site to work with, e.g., Luna - http://download.eclipse.org/releases/luna.
- Expand the Modeling tree item.
- Select UML2 Extender SDK and press the Next > button.
- Review the install details and press the Next > button.
- Accept the terms of the license agreement and press the Finish button.
- Restart Eclipse when prompted to do so.
At this stage, UML2 and all dependencies should be installed.
Introduction
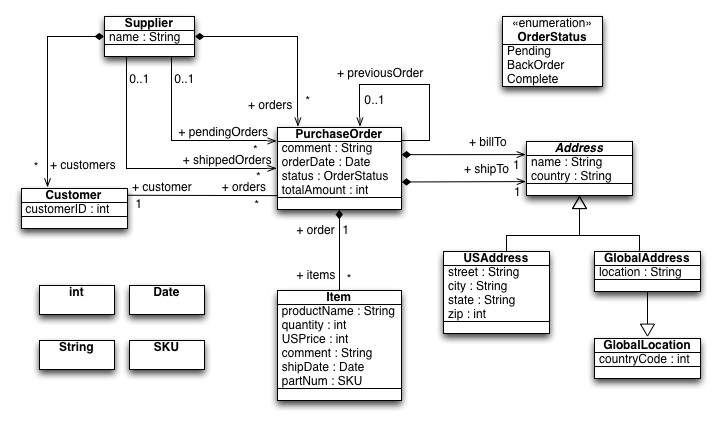
This article will walk you through the basics of creating models using UML2. Using a simple model (the ExtendedPO2 model, shamelessly “borrowed” from the EMF “bible” [1]) as an example, we’ll look at what’s involved in creating some of the more common elements that make up a model. For each type of element, we’ll first explain the creation process using the sample UML editor and then explore how to accomplish the same thing using Java code. The ExtendedPO2 model is shown below.
Getting Started
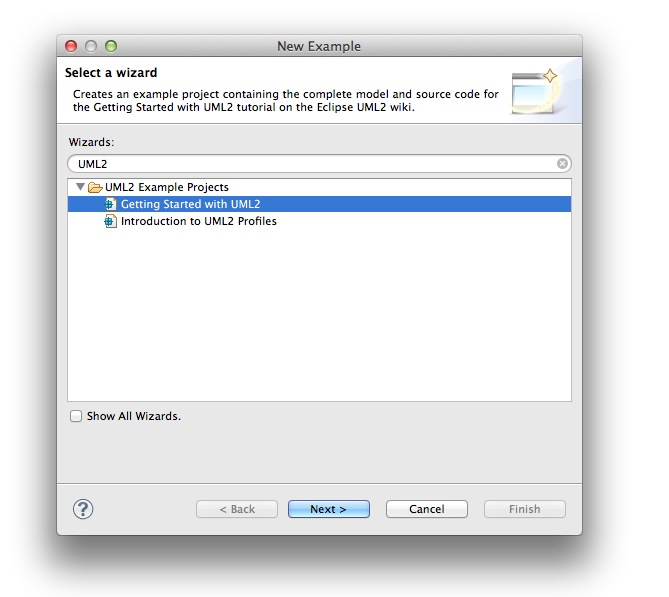
![]() Readers who don't want to follow every step of this tutorial may install a working solution from the New → Example... wizard, selecting the UML2 Example Projects → Getting Started with UML2 sample. This will be available when Enhancement 382342 is resolved and released in a UML2 build. This includes the finished model, complete source code, and a launch configuration that runs the stand-alone Java application which creates the model in the root folder of the example project.
Readers who don't want to follow every step of this tutorial may install a working solution from the New → Example... wizard, selecting the UML2 Example Projects → Getting Started with UML2 sample. This will be available when Enhancement 382342 is resolved and released in a UML2 build. This includes the finished model, complete source code, and a launch configuration that runs the stand-alone Java application which creates the model in the root folder of the example project.
Before getting started, you’ll need to create a simple project in your workspace. This project will serve as the container for the model that we’ll create using the UML editor. To create a simple project for this article, follow these steps:
- Select the Window > Open Perspective > Other… menu item.
- Select the Resource perspective and press the OK button.
- Select the File > New > Project... menu item.
- Select the Project wizard from the General category and press the Next > button.
- Enter a project name (e.g. “Getting Started with UML2”) and press the Finish button.
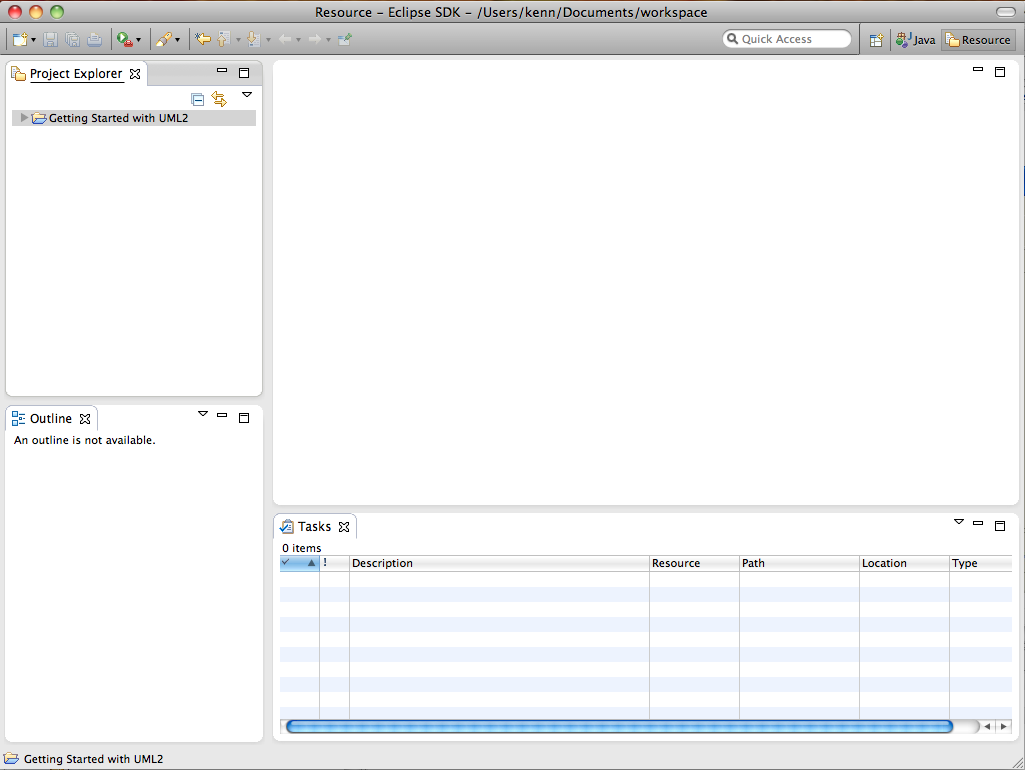
At this point your workspace should look something like this:
OK, that should be enough to get us going with the UML editor. Now, to follow along with the programmatic approach to creating models, we’ll assume that you’ve created a class (named, say, “GettingStartedWithUML2”) in which you can write some code to construct our sample model. The code snippets we’ll show assume you’ve defined the following utility methods to give the user information on the program’s status:
    public static boolean DEBUG = true;

    protected static void out(String format, Object... args) {
        if (DEBUG) {
            System.out.printf(format, args);
            if (!format.endsWith("%n")) {
                System.out.println();
            }
        }
    }

    protected static void err(String format, Object... args) {
        System.err.printf(format, args);
        if (!format.endsWith("%n")) {
            System.err.println();
        }
    }
A static debug flag can be used to enable or disable verbose information printed to the system’s output stream. Errors will always be printed to the system’s error stream.
All right, then! In each of the following subsections, we’ll look at how to create a different kind of UML element, starting with models.
Creating Models
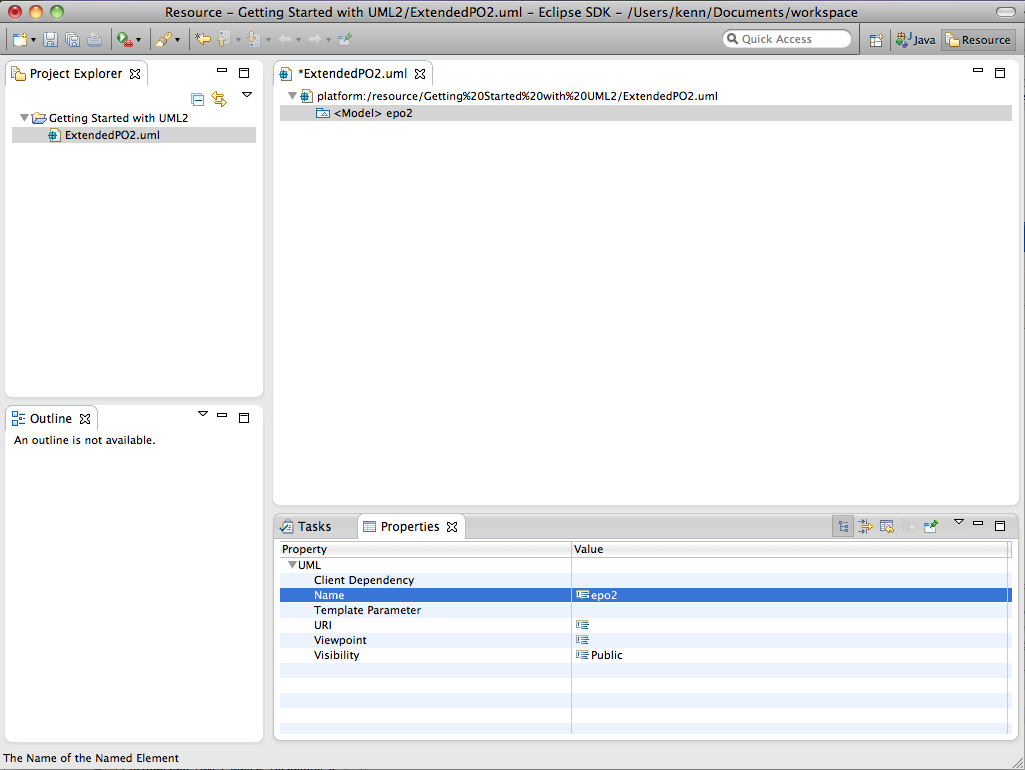
At the root of a typical UML model is a model element. It contains a (hierarchical) set of elements that together describe the physical system being modeled. To create a model using the UML editor, follow these steps:
- Select a project (e.g., Getting Started with UML2) in the Project Explorer view and select the File > New > Other... menu item.
- Select the UML Model wizard from the Example EMF Model Creation Wizards category and press the Next > button.
- Enter a file name (e.g., “ExtendedPO2.uml”) and press the Next > button.
- Select Model for the model object and press the Finish button.
- Select the Window > Show View > Properties menu item.
- Select the <Model> element in the UML editor.
- Enter a value (e.g., “epo2”) for the Name property in the Properties view.
At this point your workspace should look something like this:
Let’s look at how to perform the same task using Java code. The code snippet below shows a method that programmatically creates and returns a model with a specified name.
    protected static Model createModel(String name) {
        Model model = UMLFactory.eINSTANCE.createModel();
        model.setName(name);

        out("Model '%s' created.", model.getQualifiedName());

        return model;
    }
First, we ask the UML factory singleton to create a model, and we set its name. Then, we output information to let the user know that the model has been successfully created. Finally, we return the model. You’ll notice most, if not all, of the code snippets in this article will follow this pattern – create the element (and set some properties on it), inform the user, and return it.
![]() All named elements (a model is a type of named element) have a “simple” name and a qualified name. The qualified name is the “simple” name prefixed with the “simple” names of all of the named element’s containing namespaces. Note that the qualified name of a named element is only defined if all of its containing namespaces have non-empty “simple” names.
All named elements (a model is a type of named element) have a “simple” name and a qualified name. The qualified name is the “simple” name prefixed with the “simple” names of all of the named element’s containing namespaces. Note that the qualified name of a named element is only defined if all of its containing namespaces have non-empty “simple” names.
OK, let’s see this method in action. For example, we could create a model named ‘epo2’ as follows:
Model epo2Model = createModel("epo2");
Creating Packages
A package is a namespace for its members (packageable elements), and may contain other packages. A package can import either individual members of other packages, or all of the members of other packages. To create a package using the UML editor, follow these steps:
- Select a package (e.g., <Package> epo2) in the UML editor.
- Select the New Child > Nested Package > Package option from the context menu.
- Enter a value (e.g., “bar”) for the Name property in the Properties view.
We don’t actually need to create a package because our sample model doesn’t contain any &emdash; except of course for the root package (i.e., the model). That’s right: a model is a type of package.
Let’s look at how to perform the same task using Java code. The code snippet below shows a method that programmatically creates and returns a package with a specified name in a specified nesting package.
    protected static org.eclipse.uml2.uml.Package createPackage(org.eclipse.uml2.uml.Package nestingPackage, String name) {
        org.eclipse.uml2.uml.Package package_ = nestingPackage.createNestedPackage(name);

        out("Package '%s' created.", package_.getQualifiedName());

        return package_;
    }
Here, instead of asking the factory to create the package for us, we’re making use of one of the factory methods in the UML2 API. In UML2, a factory method exists for every feature that can contain other elements (i.e., every containment feature). In addition, more convenient factory methods exist for commonly created types (like packages). In this case, the package has a feature (packagedElement) that can contain packageable elements, so we could obtain the Ecore class of the type of (packageable) element we want to create (i.e., Package) from the UML Ecore package singleton, and pass it to the createPackagedElement(String, EClass) factory method. Instead, we use the more convenient createNestedPackage(String) factory method which implicitly creates a package and accepts the desired package name as an argument. Behind the scenes, the package will create a nested package, set its name, and add the package to its list of packaged elements.
OK, let’s see this method in action. For example, we could create a package named ‘bar’ in nesting package ‘foo’ as follows:
org.eclipse.uml2.uml.Package barPackage = createPackage(fooPackage, "bar");
Creating Primitive Types
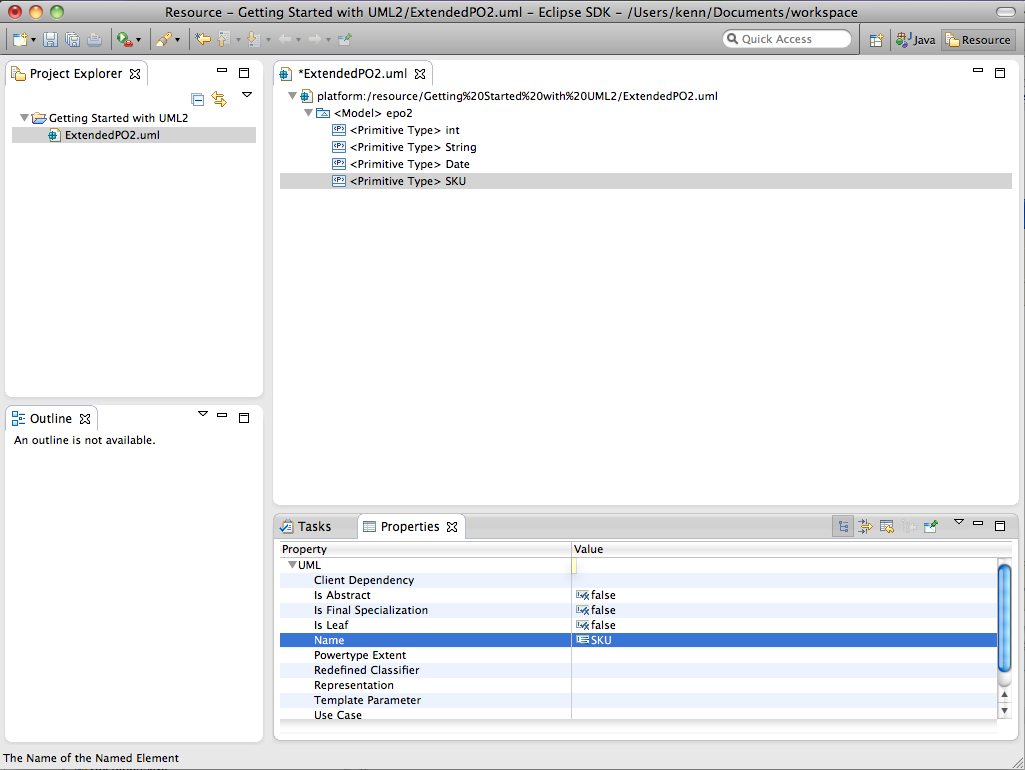
A primitive type defines a predefined data type, without any relevant substructure. Primitive types used in UML™ itself include Boolean, Integer, Real, String, and UnlimitedNatural. To create a primitive type using the UML editor, follow these steps:
- Select a package (e.g., <Model> epo2) in the UML editor.
- Select the New Child > Owned Type > Primitive Type option from the context menu.
- Enter a value (e.g., “int”) for the Name property in the Properties view.
![]() Create the remaining primitive types from the ExtendedPO2 model using the UML editor.
Create the remaining primitive types from the ExtendedPO2 model using the UML editor.
At this point your workspace should look something like this:
Let’s look at how to perform the same task using Java code. The code snippet below shows a method that programmatically creates and returns a primitive type with a specified name in a specified package.
    protected static PrimitiveType createPrimitiveType(org.eclipse.uml2.uml.Package package_, String name) {
        PrimitiveType primitiveType = package_.createOwnedPrimitiveType(name);

        out("Primitive type '%s' created.", primitiveType.getQualifiedName());

        return primitiveType;
    }
Here we call the createOwnedPrimitiveType(String) convenience factory method to ask the package to create a primitive type with the specified name as one of its packaged elements.
OK, let’s see this method in action. For example, we could create a primitive type named ‘int’ in model ‘epo2’ as follows:
PrimitiveType intPrimitiveType = createPrimitiveType(epo2Model, "int");
![]() Write code to programmatically create the remaining primitive types from the ExtendedPO2 model.
Write code to programmatically create the remaining primitive types from the ExtendedPO2 model.
Creating Enumerations
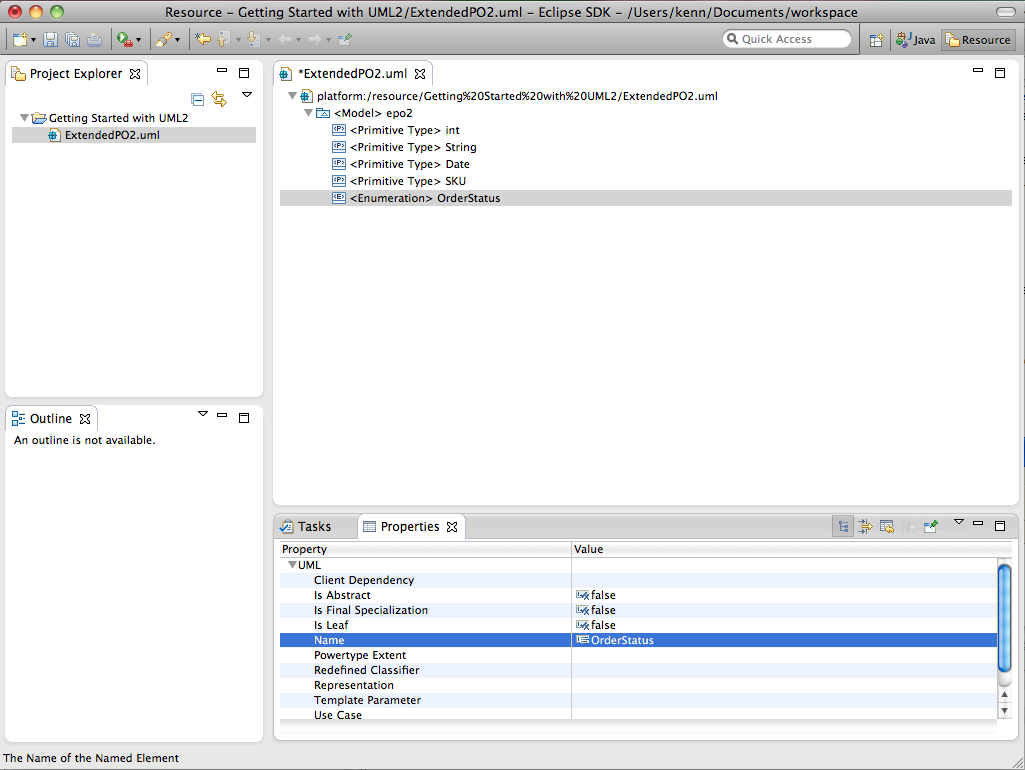
An enumeration is a kind of data type whose instances may be any of a number of user-defined enumeration literals. To create an enumeration using the UML editor, follow these steps:
- Select a package (e.g., <Model> epo2) in the UML editor.
- Select the New Child > Owned Type > Enumeration option from the context menu.
- Enter a value (e.g., “OrderStatus”) for the Name property in the Properties view.
At this point your workspace should look something like this:
Let’s look at how to perform the same task using Java code. The code snippet below shows a method that programmatically creates and returns an enumeration with a specified name in a specified package.
    protected static Enumeration createEnumeration(org.eclipse.uml2.uml.Package package_, String name) {
        Enumeration enumeration = package_.createOwnedEnumeration(name);

        out("Enumeration '%s' created.", enumeration.getQualifiedName());

        return enumeration;
    }
Here we call the createOwnedEnumeration(String) convenience factory method to ask the package to create a primitive type with the specified name as one of its packaged elements.
OK, let’s see this method in action. For example, we could create an enumeration named ‘OrderStatus’ in model ‘epo2’ as follows:
Enumeration orderStatusEnumeration = createEnumeration(epo2Model, "OrderStatus");
Creating Enumeration Literals
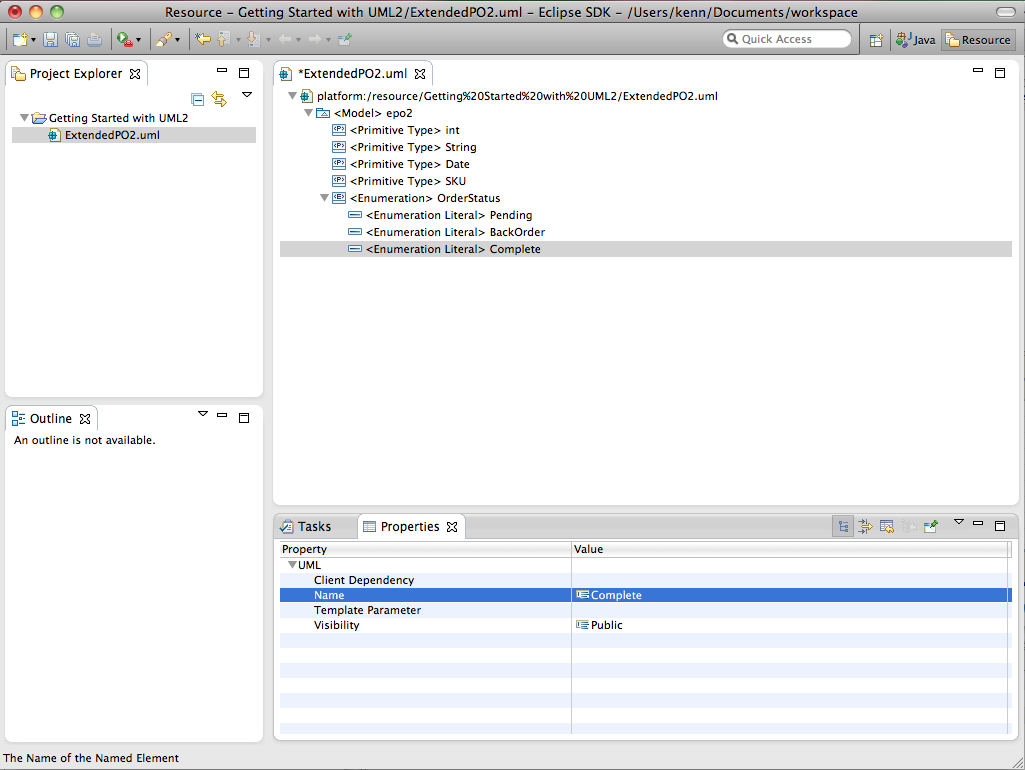
An enumeration literal is a user-defined data value for an enumeration. To create an enumeration literal using the UML editor, follow these steps:
- Select an enumeration (e.g., <Enumeration> OrderStatus) in the UML editor.
- Select the New Child > Owned Literal > Enumeration Literal option from the context menu.
- Enter a value (e.g., “Pending”) for the Name property in the Properties view.
![]() Create the remaining enumeration literals from the ExtendedPO2 model using the UML editor.
Create the remaining enumeration literals from the ExtendedPO2 model using the UML editor.
At this point your workspace should look something like this:
Let’s look at how to perform the same task using Java code. The code snippet below shows a method that programmatically creates and returns an enumeration literal with a specified name in a specified enumeration.
    protected static EnumerationLiteral createEnumerationLiteral(Enumeration enumeration, String name) {
        EnumerationLiteral enumerationLiteral = enumeration.createOwnedLiteral(name);

        out("Enumeration literal '%s' created.", enumerationLiteral.getQualifiedName());

        return enumerationLiteral;
    }
Here we call a createOwnedLiteral(String) convenience factory method to ask the enumeration to create an enumeration literal with the specified name as one of its owned literals.
OK, let’s see this method in action. For example, we could create an enumeration literal named ‘Pending’ in enumeration ‘OrderStatus’ as follows:
createEnumerationLiteral(orderStatusEnumeration, "Pending");
![]() Write code to programmatically create the remaining enumeration literals from the ExtendedPO2 model.
Write code to programmatically create the remaining enumeration literals from the ExtendedPO2 model.
Creating Classes
A class is a kind of classifier whose features are attributes (some of which may represent the navigable ends of associations) and operations. To create a class using the UML editor, follow these steps:
- Select a package (e.g., <Model> epo2) in the UML editor.
- Select the New Child > Owned Type > Class option from the context menu.
- Enter a value (e.g., “Supplier”) for the Name property in the Properties view.
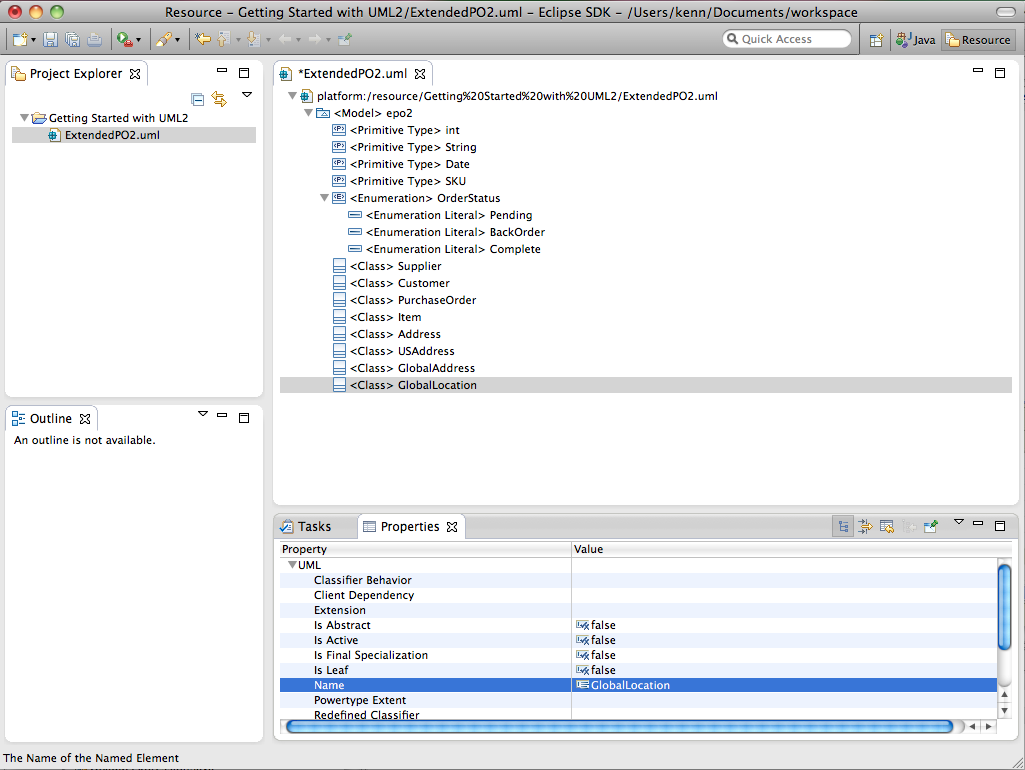
![]() Create the remaining classes from the ExtendedPO2 model using the UML editor.
Create the remaining classes from the ExtendedPO2 model using the UML editor.
At this point your workspace should look something like this:
Let’s look at how to perform the same task using Java code. The code snippet below shows a method that programmatically creates and returns a(n) (abstract) class with a specified name in a specified package.
    protected static org.eclipse.uml2.uml.Class createClass(org.eclipse.uml2.uml.Package package_, String name, boolean isAbstract) {
        org.eclipse.uml2.uml.Class class_ = package_.createOwnedClass(name, isAbstract);

        out("Class '%s' created.", class_.getQualifiedName());

        return class_;
    }
Here we call the createOwnedClass(String, boolean) convenience factory method to ask the package to create a class with the specified name as one of its packaged elements, and set the isAbstract attribute of the class based on the specified boolean argument.
![]() You may have noticed that we have been fully qualifying references to the Package and Class interfaces. This is recommended so that these types are not confused with java.lang.Class and java.lang.Package, which are imported implicitly in Java.
You may have noticed that we have been fully qualifying references to the Package and Class interfaces. This is recommended so that these types are not confused with java.lang.Class and java.lang.Package, which are imported implicitly in Java.
OK, let’s see this method in action. For example, we could create a non-abstract class named ‘Supplier’ in model ‘epo2’ as follows:
org.eclipse.uml2.uml.Class supplierClass = createClass(epo2Model, "Supplier", false);
![]() Write code to programmatically create the remaining classes from the ExtendedPO2 model.
Write code to programmatically create the remaining classes from the ExtendedPO2 model.
Creating Generalizations
A generalization is a taxonomic relationship between a specific classifier and a more general classifier whereby each instance of the specific classifier is also an indirect instance of, and inherits the features of, the general classifier. To create a generalization using the UML editor, follow these steps:
- Select a classifier (e.g., <Class> USAddress) in the UML editor.
- Select the New Child > Generalization > Generalization option from the context menu.
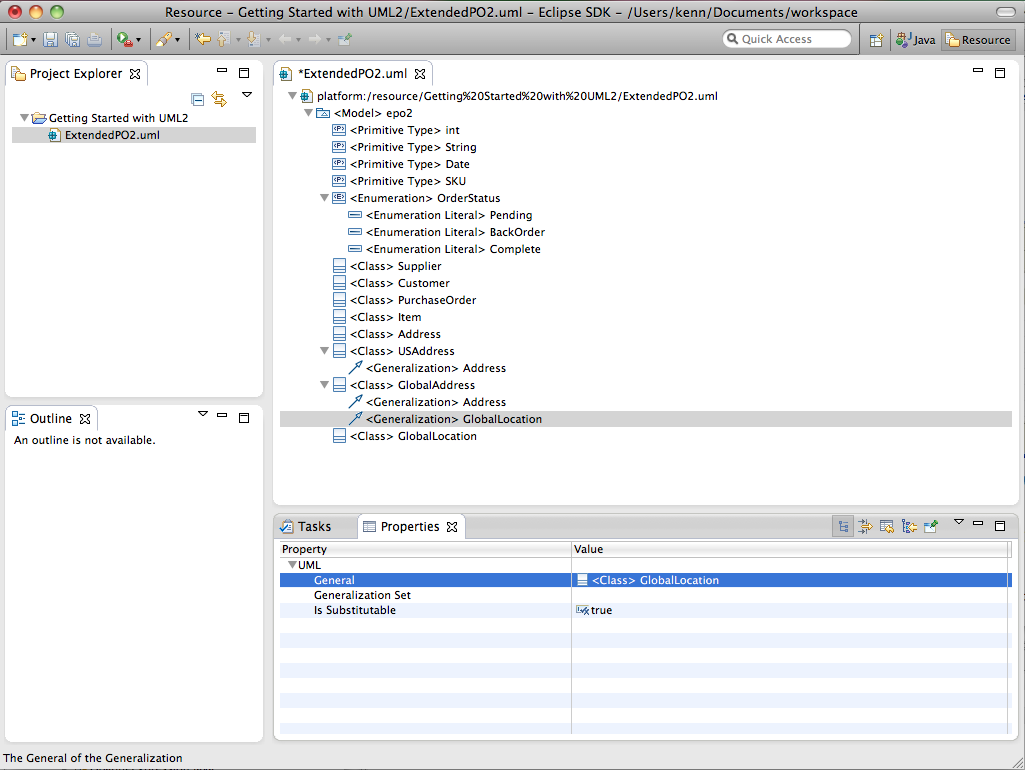
- Select a value (e.g., epo2::Address) for the General property in the Properties view.
![]() Create the remaining generalizations from the ExtendedPO2 model using the UML editor.
Create the remaining generalizations from the ExtendedPO2 model using the UML editor.
At this point your workspace should look something like this:
Let’s look at how to perform the same task using Java code. The code snippet below shows a method that programmatically creates and returns a generalization between specified specific and general classifiers.
    protected static Generalization createGeneralization(Classifier specificClassifier, Classifier generalClassifier) {
        Generalization generalization = specificClassifier.createGeneralization(generalClassifier);

        out("Generalization %s --|> %s created.", specificClassifier.getQualifiedName(), generalClassifier.getQualifiedName());

        return generalization;
    }
Here we call a convenience factory method on the specific classifier that creates a generalization as one of its children and sets the general classifier to the specified argument.
OK, let’s see this method in action. For example, we could create a generalization between specific class ‘USAddress’ and general class ‘Address’ as follows:
createGeneralization(usAddressClass, addressClass);
![]() Write code to programmatically create the remaining generalizations from the ExtendedPO2 model.
Write code to programmatically create the remaining generalizations from the ExtendedPO2 model.
Creating Attributes
When a property is owned by a classifier it represents an attribute; in this case is relates an instance of the classifier to a value or set of values of the type of the attribute.
![]() The types of Classifier that can own attributes in UML2 include Artifact, DataType, Interface, Signal, and StructuredClassifier (and their subtypes).
The types of Classifier that can own attributes in UML2 include Artifact, DataType, Interface, Signal, and StructuredClassifier (and their subtypes).
To create an attribute using the UML editor, follow these steps:
- Select a classifier (e.g., <Class> Address) in the UML editor.
- Select the New Child > Owned Attribute > Property option from the context menu.
- Enter a value (e.g., "name”) for the Name property in the Properties view.
- Select a value (e.g., epo2::String) for the Type property in the Properties view.
- Enter a value (e.g., 0) for the Lower property in the Properties view.
![]() Lower and upper values for multiplicity elements (like properties) are represented as value specifications (first-class objects) in UML™ 2.x. The default value for lower and upper bounds is 1, unless a child value specification exists, in which case its value is used. Specifying a value for the lower or upper property will create a child value specification if none exists, or update its value if one does. Note that, to be treated as a bound, the lower value must be an integer and the upper value must be an unlimited natural.
Lower and upper values for multiplicity elements (like properties) are represented as value specifications (first-class objects) in UML™ 2.x. The default value for lower and upper bounds is 1, unless a child value specification exists, in which case its value is used. Specifying a value for the lower or upper property will create a child value specification if none exists, or update its value if one does. Note that, to be treated as a bound, the lower value must be an integer and the upper value must be an unlimited natural.
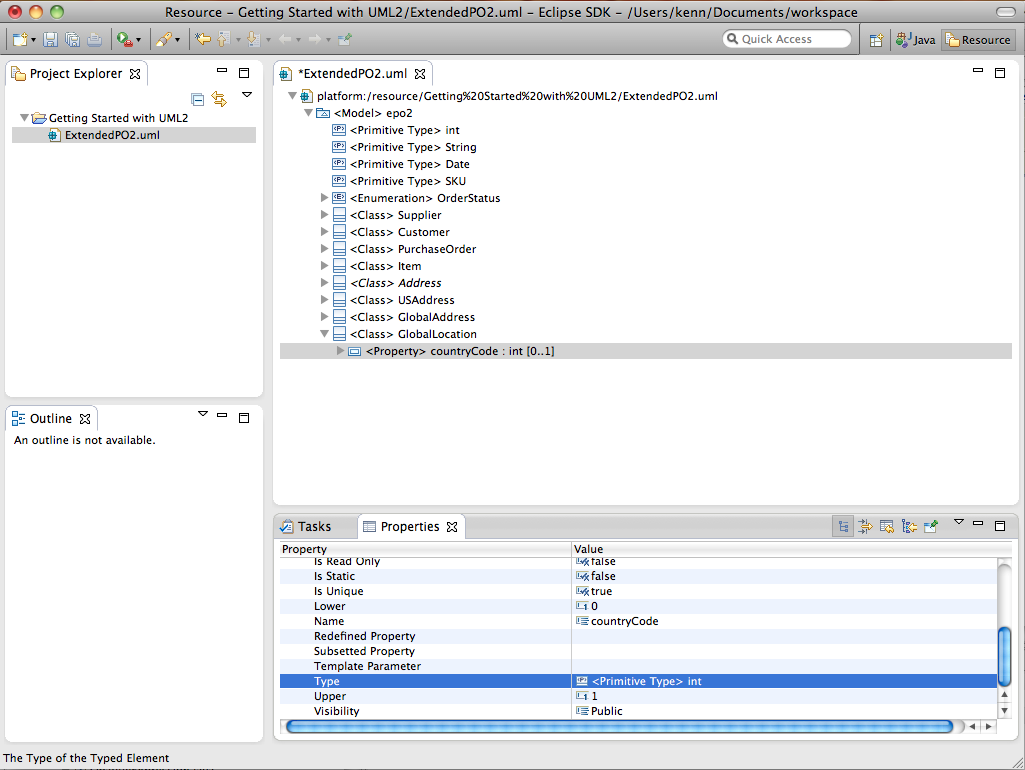
![]() Create the remaining attributes from the ExtendedPO2 model using the UML editor.
Create the remaining attributes from the ExtendedPO2 model using the UML editor.
At this point your workspace should look something like this:
Let’s look at how to perform the same task using Java code. The code snippet below shows a method that programmatically creates and returns an attribute with a specified upper bound, lower bound, type, and name in a specified class.
    protected static Property createAttribute(org.eclipse.uml2.uml.Class class_, String name, Type type, int lowerBound, int upperBound) {
        Property attribute = class_.createOwnedAttribute(name, type, lowerBound, upperBound);

        out("Attribute '%s' : %s [%s..%s] created.", //
            attribute.getQualifiedName(), // attribute name
            type.getQualifiedName(), // type name
            lowerBound, // no special case for multiplicity lower bound
            (upperBound == LiteralUnlimitedNatural.UNLIMITED)
                ? "*" // special case for unlimited bound
                : upperBound);

        return attribute;
    }
Here we call a createOwnedAttribute(String, Type, int, int) convenience factory method to ask the class to create a property as one of its owned attributes, set the type of the attribute to the specified type, and set the lower and upper bounds of the attribute (the factory method indirectly creates a literal integer and literal unlimited natural, respectively, and sets their values to the specified integer values).
![]() The LiteralUnlimitedNatural.UNLIMITED constant represents the unlimited value for upper bounds (-1), as it does in EMF; when setting this value in the Properties view, an asterisk (‘*’) can alternatively be specified.
The LiteralUnlimitedNatural.UNLIMITED constant represents the unlimited value for upper bounds (-1), as it does in EMF; when setting this value in the Properties view, an asterisk (‘*’) can alternatively be specified.
OK, let’s see this method in action. For example, we could create an attribute with multiplicity 0..1 of type ‘String’ named ‘name’ in class ‘Supplier’ as follows:
createAttribute(supplierClass, "name", stringPrimitiveType, 0, 1);
![]() Write code to programmatically create the remaining attributes from the ExtendedPO2 model.
Write code to programmatically create the remaining attributes from the ExtendedPO2 model.
Creating Associations
An association specifies a semantic relationship that can occur between two or more typed instances; its ends are represented by properties, each of which is connected to the type of the end. When a property is owned by an association it represents a non-navigable end of the association, in which case the type of the property is the type of the association end.
![]() The notion of association end navigability was separated from that of ownership in the UML™ 2.0 specification, so a property that is owned by an association isn’t necessarily non-navigable as of UML2 2.0.
The notion of association end navigability was separated from that of ownership in the UML™ 2.0 specification, so a property that is owned by an association isn’t necessarily non-navigable as of UML2 2.0.
To create an association using the UML editor, follow these steps:
- Select a package (e.g., <Model> epo2) in the UML editor.
- Select the New Child > Owned Type > Association option from the context menu.
- Enter a value (e.g., “A_orders_supplier”) for the Name property in the Properties view.
- Select the association (e.g., <Association> A_orders_supplier) in the UML editor.
- Select the New Child > Owned End > Property option from the context menu.
- Select a value (e.g., epo2::Supplier) for the Type property in the Properties view.
- Select a class (e.g., <Class> Supplier) in the UML editor.
- Select the New Child > Owned Attribute > Property option from the context menu.
- Select a value (e.g., Composite) for the Aggregation property in the Properties view.
- Select a value (e.g., epo2::A_orders_supplier) for the Association property in the Properties view.
- Enter a value (e.g., "orders") for the Name property in the Properties view.
- Select a value (e.g., epo2::PurchaseOrder) for the Type property in the Properties view.
- Enter a value (e.g., 0) for the Lower property in the Properties view.
- Enter a value (e.g., *) for the Upper property in the Properties view.
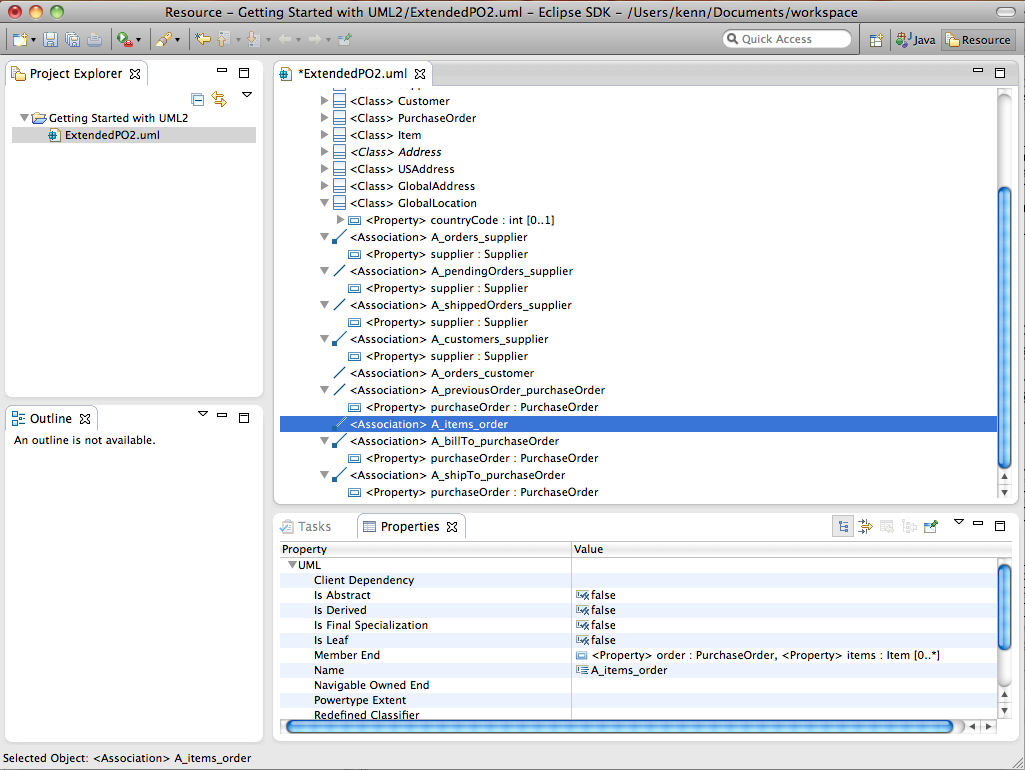
![]() Create the remaining associations from the ExtendedPO2 model using the UML editor.
Create the remaining associations from the ExtendedPO2 model using the UML editor.
At this point your workspace should look something like this:
Let’s look at how to perform the same task using Java code. The code snippet below shows a method that programmatically creates and returns an association between two specified types, with ends that have the specified upper bounds, lower bounds, role names, aggregation kinds, and navigabilities.
    protected static Association createAssociation(Type type1, boolean end1IsNavigable, AggregationKind end1Aggregation, String end1Name, int end1LowerBound, int end1UpperBound,
            Type type2, boolean end2IsNavigable, AggregationKind end2Aggregation, String end2Name, int end2LowerBound, int end2UpperBound) {

        Association association = type1.createAssociation(end1IsNavigable, end1Aggregation, end1Name, end1LowerBound, end1UpperBound,
            type2, end2IsNavigable, end2Aggregation, end2Name, end2LowerBound, end2UpperBound);

        out("Association %s [%s..%s] %s-%s %s [%s..%s] created.", //
            UML2Util.isEmpty(end1Name)
                // compute a placeholder for the name
                ? String.format("{%s}", type1.getQualifiedName()) //
                // user-specified name
                : String.format("'%s::%s'", type1.getQualifiedName(), end1Name), //
            end1LowerBound, // no special case for this
            (end1UpperBound == LiteralUnlimitedNatural.UNLIMITED)
                ? "*" // special case for unlimited upper bound
                : end1UpperBound, // finite upper bound
            end2IsNavigable
                ? "<" // indicate navigability
                : "-", // not navigable
            end1IsNavigable
                ? ">" // indicate navigability
                : "-", // not navigable
            UML2Util.isEmpty(end2Name)
                // compute a placeholder for the name
                ? String.format("{%s}", type2.getQualifiedName()) //
                // user-specified name
                : String.format("'%s::%s'", type2.getQualifiedName(), end2Name), //
            end2LowerBound, // no special case for this
            (end2UpperBound == LiteralUnlimitedNatural.UNLIMITED)
                ? "*" // special case for unlimited upper bound
                : end2UpperBound);

        return association;
    }
Here we call a convenience factory method on the first end type that creates an association (and its ends) between it and another type as one of its siblings (i.e. as a child of its package namespace) and with the specified upper bounds, lower bounds, role names, aggregation kinds, and navigabilities. The owners of the association ends (properties) are based on the specified navigabilities – navigable ends are owned by the end type if allowed, otherwise they are owned by the association; non-navigable ends are owned by the association.
![]() The NamedElement.SEPARATOR constant represents the standard separator (::) used in qualified names.
The NamedElement.SEPARATOR constant represents the standard separator (::) used in qualified names.
OK, let’s see this method in action. For example, we could create a unidirectional composition (composite association) between classes ‘Supplier’ and ‘PurchaseOrder’ in model ‘epo2’ as follows:
    createAssociation(supplierClass, true, AggregationKind.COMPOSITE_LITERAL, "orders", 0, LiteralUnlimitedNatural.UNLIMITED,
         purchaseOrderClass, false, AggregationKind.NONE_LITERAL, "", 1, 1);
![]() Write code to programmatically create the remaining associations from the ExtendedPO2 model.
Write code to programmatically create the remaining associations from the ExtendedPO2 model.
Saving Models
Now that we’ve spent all this time creating a model, we’d better save our work. When we created our model using the UML model wizard, a UML resource was created for us, so now all that needs to be done is to serialize the contents of our model as XMI to our file on disk (i.e., ExtendedPO2.uml). To save a model using the UML editor, follow these steps:
- Select the File > Save menu item.
It’s that simple. Programmatically, we have a bit more work to do because so far, we’ve been creating our model in a vacuum, i.e. without a containing resource. The code snippet below shows a method that saves a specified package to a resource with a specified URI.
    protected static void save(org.eclipse.uml2.uml.Package package_, URI uri) {
        // Create a resource-set to contain the resource(s) that we are saving
        ResourceSet resourceSet = new ResourceSetImpl();

        // Initialize registrations of resource factories, library models,
        // profiles, Ecore metadata, and other dependencies required for
        // serializing and working with UML resources. This is only necessary in
        // applications that are not hosted in the Eclipse platform run-time, in
        // which case these registrations are discovered automatically from
        // Eclipse extension points.
        UMLResourcesUtil.init(resourceSet);

        // Create the output resource and add our model package to it.
        Resource resource = resourceSet.createResource(uri);
        resource.getContents().add(package_);

        // And save
        try {
            resource.save(null); // no save options needed
            out("Done.");
        } catch (IOException ioe) {
            err(ioe.getMessage());
        }
    }
Here we create a resource set and a resource with the specified URI, add the package to the resource’s contents , and ask the resource to save itself using the default options. If an exception occurs, we notify the user via our handy utility method.
![]() The above example uses the UMLResourcesUtil.init(...) API introduced in UML2 4.0.0 for Juno. As commented in the code snippet, this is not required in code running in the Eclipse Platform run-time, as in that case these registrations are discovered automatically from extension points.
The above example uses the UMLResourcesUtil.init(...) API introduced in UML2 4.0.0 for Juno. As commented in the code snippet, this is not required in code running in the Eclipse Platform run-time, as in that case these registrations are discovered automatically from extension points.
OK, let’s see this method in action. For example, we could save the ‘epo2’ model to a resource with URI ‘ExtendedPO2.uml’ (relative to a URI passed in as an argument) as follows:
save(epo2Model, URI.createFileURI(args[0]).appendSegment("ExtendedPO2").appendFileExtension(UMLResource.FILE_EXTENSION));
![]() The UMLResource.FILE_EXTENSION constant represents the file extension for UML resources (.uml). Note that the UMLResource interface contains a number of constants that you will find useful when working with UML resources.
The UMLResource.FILE_EXTENSION constant represents the file extension for UML resources (.uml). Note that the UMLResource interface contains a number of constants that you will find useful when working with UML resources.
Conclusion
Congratulations! If you’ve made it this far, you’ve successfully created a simple model programmatically and/or using the UML editor. There’s a whole lot more that could be said, but the purpose of this article was just to get you started. Stay tuned for more articles on how to develop tools with UML2.
For more information on UML2, visit the home page or join a discussion in the forum.
The Papyrus Project provides graphical support for UML, SysML and MARTE models. See the Papyrus User Guide for further information.
References
[1] F. Budinsky, D. Steinberg, E. Merks, R. Ellersick, and T. J. Grose. Eclipse Modeling Framework. Pearson Education, Inc., Boston, MA, 2003.

