Notice: This Wiki is now read only and edits are no longer possible. Please see: https://gitlab.eclipse.org/eclipsefdn/helpdesk/-/wikis/Wiki-shutdown-plan for the plan.
MDT-UML2Tools How To Use UML Profiles
Contents
Introduction
UML cannot cover needs of all possible domains. Standard UML metamodel has to be augmented in order to meet requirements of a particular domain. That's why Profile mechanism was created - a way to create a lightweight extension of Standard UML.
Summary
Here is the workflow of creating and using UML profile:
Create Profile
Create Profile Definition Diagram
First, create Profile Definition Diagram using wizard 'Profile Definition Diagram' from 'UML 2.1 Diagrams' located in File > New > Other > ... menu item.
Profile is a root element of the created diagram.
Key elements of Profile Definition diagram are:
- Profile
- Stereotype
- Metaclass
- Extension link
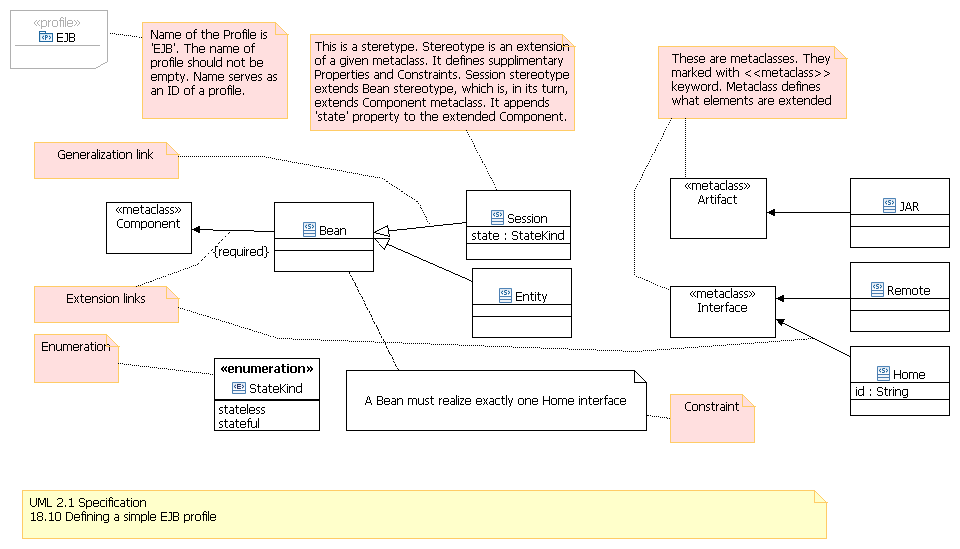
Zipped diagram is here
Define Profile
When profile is completely finished, it's time to define it. This is obligatory step in our workflow, because it saves defined profile as a static Ecore structure in the UML model, it allows subsequent use of profile content.
In order to define a profile in UML2 Tools call action "Profile > Define" from the context menu of the profile diagram:

Register Profile
Adding profile to the registry simplifies profile application later. The step can be omitted.
Profiles are registered in plugin descriptor (plugin.xml file) using 'org.eclipse.uml2.uml.dynamic_package' extension point. The plugin should be deployed to the platform later.
For example, UML Standard profile is registered this way:
  <extension
     point="org.eclipse.uml2.uml.dynamic_package">
    <profile uri="http://www.eclipse.org/uml2/schemas/Ecore/5" location="platform:/plugin/org.eclipse.uml2.uml.resources/profiles/Ecore.profile.uml#_0"/>
  </extension>
Use Profile
Apply Profile
In order to allow to apply the stereotypes defined in the profile to elements in the model, profile should be applied.
To Apply profile call 'Apply Profile> [Profile Name]' action from the context menu of the diagram:

What profiles appears in the drop-down list in the 'Apply Profile' action? Only those profiles that had been registered (see #Register Profile) or profiles from loaded resources(see #Load resource). To make the particular profile appear in the list, register it or load corresponding *.profile.uml resource.
Load resource
In order to load resource defining profile:
- Call 'Load resource...' action from the context menu of the diagram.
- In the displayed wizard choose 'Browse Workspace...' button.
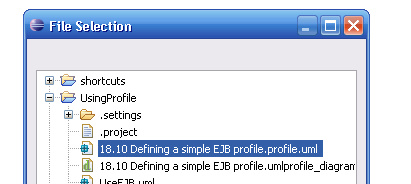
- Choose needed resource, file containing profile ends with 'profile.uml' :
Apply Stereotype
The final step in creating extended element is applying a stereotype. Stereotypes can be applied to both nodes and links. Create an element of the extended metaclass, in the context menu of the newly-created element call 'ApplyStereotype>[name of stereotype]':
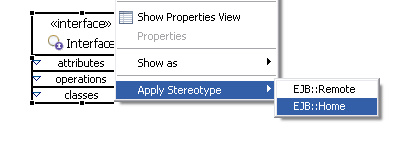
Now element is extended.
Apply stereotype using label in-place editor
Another way to apply a stereotype is to use stereotype label in-place editor. Select stereotype label and type comma-separated list of stereotypes. Added to the list stereotypes will be applied, if a stereotype was removed from the list, it will be un-applied:

Extended element
The extended element is labeled with a name of the applied stereotype in the guillemets:
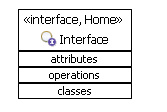
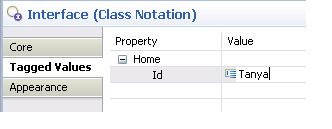
Tagged values (properties of the applied stereotype) will be shown and editable in the 'Tagged Values' tab of the Properties View:
For more information about working with Profile reference Introduction_to_UML2_Profiles tutorial.


