Notice: This Wiki is now read only and edits are no longer possible. Please see: https://gitlab.eclipse.org/eclipsefdn/helpdesk/-/wikis/Wiki-shutdown-plan for the plan.
How scenarios are structured
Scenario Structure
At the beginning of a simulation, STEM allows decorators such as population models, population initializers, and disease models to initialize themselves. For instance, when a disease model is initialized, it creates the disease model labels necessary to track the state of the disese in a population. A disease model depends on the population model labels created by a population model to be able to create the disease model labels. Furthermore, a population model depends on the existance of static population labels, created either by a population initializers or by dragging population data into your model from the STEM library.
Consequently, the order of initialization becomes important, and the order is controlled by nesting models inside models. Decorators that are deeper in the model tree are initialized before decorators higher up in the tree. See Figure 1 for an example. Deepest in the tree is a population initializer that creates the static population labels needed by the demographic population model one level up. The demographic population model subdivides the population into subgroups needed by the disease model in the level above.
In summary, the order is population initializers before population models, population models before disease models, and disease models before infectors/inoculators.
Download the Templates
This tutorial shows users how to compose a basic disease model scenario and a basic foodborne disease scenario using a project containing prepared templates. Please begin by downloading the template scenario project from the download page unzip it and import it into your workspace.
Template for a Basic Scenario with a Human Disease
In this tutorial you will:
- Add a geographic model to the GeographicModelGroup model node
- Create a human population model
- Add the population model to the PopulationModelLevel model node
- Create a disease model
- Add the disease model to the DiseaseModelLevel model node
- Create an initializer for the disease
- Add the initializer to the scenario
- Create a time sequencer and add it to the scenario
- Run your scenario
Define the Geography
The instructions below show how to add the geography for a single country. If you want
to add multiple countries, remember, you need to also add the common border edges
that connect the two countries. These may be found in the library of Graphs.
The edges joining two countries are listed in the folder of the country whose ISO code
comes first alphabetically (so DEU comes before FRA and the edges connecting France and
Germany are in the DEU folder).
After you successfully download, extract, and import the scenario (archive file Templates.zip), open the 'Templates project'
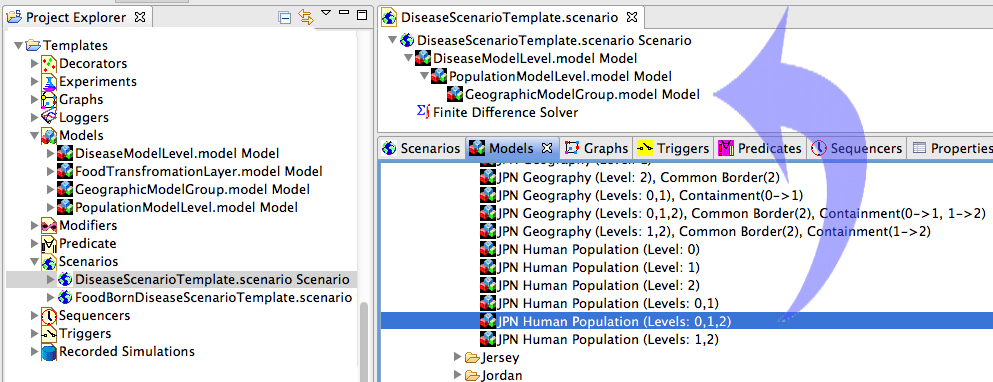
in the designer perspective. Double click on the Disease Model scenario and you should see a series of empty nested project (see Figure 2). The nested models within the scenario are named to make it easy to see what elements should be added to each model. In Figure 2 we navigated to the libraries of prebuilt models. The Models Tab contains folders with geographic information by country. In this example we pick Japan, and the prebuilt model with admin 0,1,2 data including the Human population data.
Figure 3 shows the scenario with all models expanded. The data for Japan has been dragged into the project named Geographic Model Group
Create and Add a PopulationModel
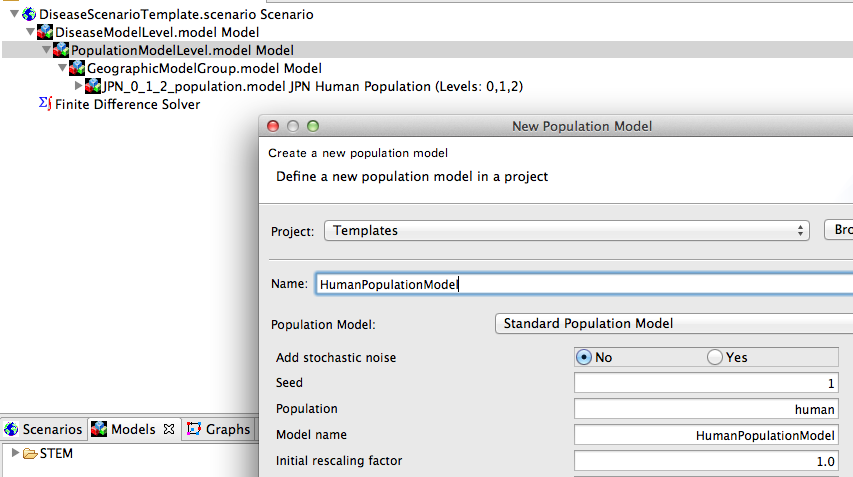
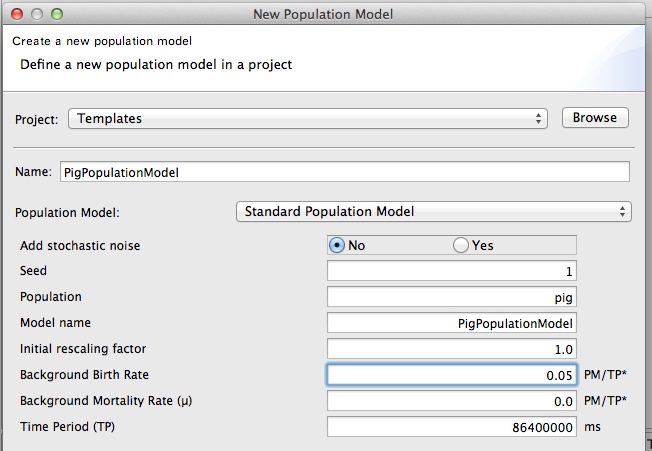
Create a new population model (figure 4) and drag it to the model PopulationModelLevel. Figure 5 shows the population model in the PopulationModelLevel. The GeographicModelGroup has been collapsed for clarity (but it still contains the model of Japan).
Create and Add a DiseaseModel
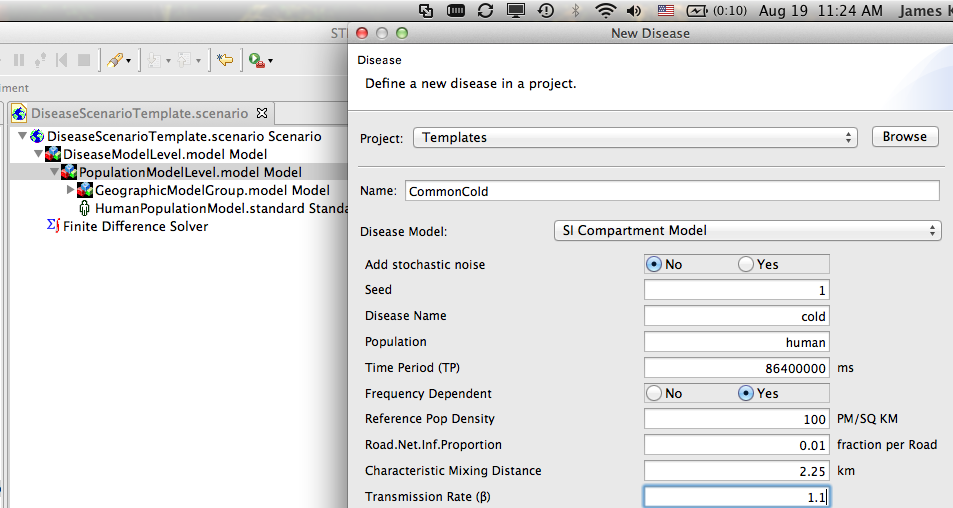
Create a new disease model (Figure 6) and drag it into the model DiseaseModelLevel. REMEMBER: You need to set the transmission rate and define the other epidemiological parameters for your disease. The default transmission rate is zero so if you don't change this your disease will not spread.
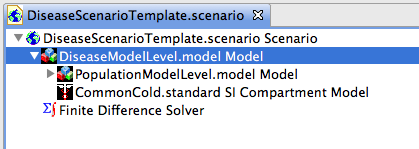
Figure 7 shows the DiseaseModelLevel with the disease model added. The PopulationModelLevel model has been collapsed for clarity (but it still contains the GeographicModelGroup).
Initialize the Scenario
In order to run a simulation, models must be initialized. This is the difference between a Model and a Scenario. The model DiseaseModelLevel contains a disease model for the common cold but no members of the human population have actually been given a cold. This is done in the Scenario.
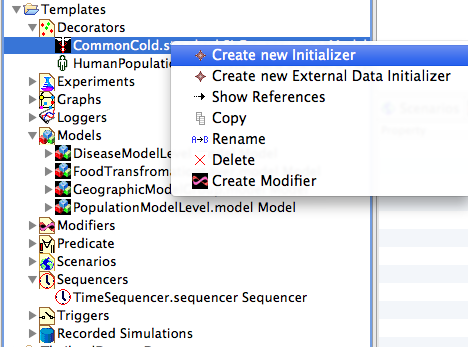
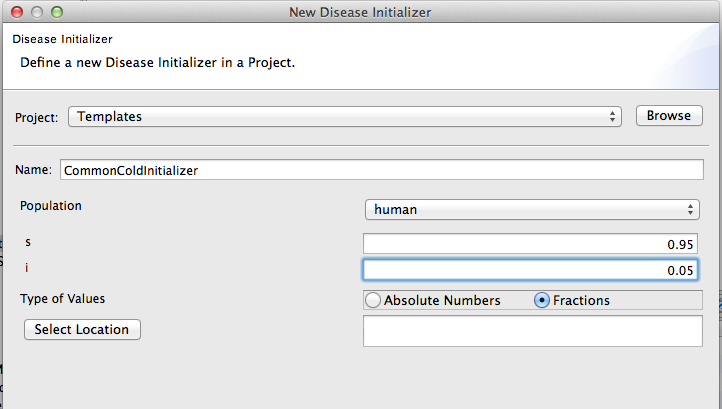
Figure 8 shows the Templates project in the Project Explorer view. To create an initializer (the most flexible decorator to use in order to set initial conditions for the disease state), open the decorators folder. Right click on the disease model, and click on Create new initializer. The new initializer dialog allows the user to define the initial state of every compartment in a single step. NOTE that in Figure 8 we have chosen to initialize by fraction of the population instead of by population count.
The disease model initializer will appear in the decorators folder. Drag it into the scenario. You must then create a new sequencer and drag that into the scenario as well.
Figure 10 shows the disease model initializer after it has been dragged into the scenario.
The models within the scenario have been collapse for clarity (but the nested models are still there). Both the disease model initializer and the sequencer are shown.
Create a Sequencer
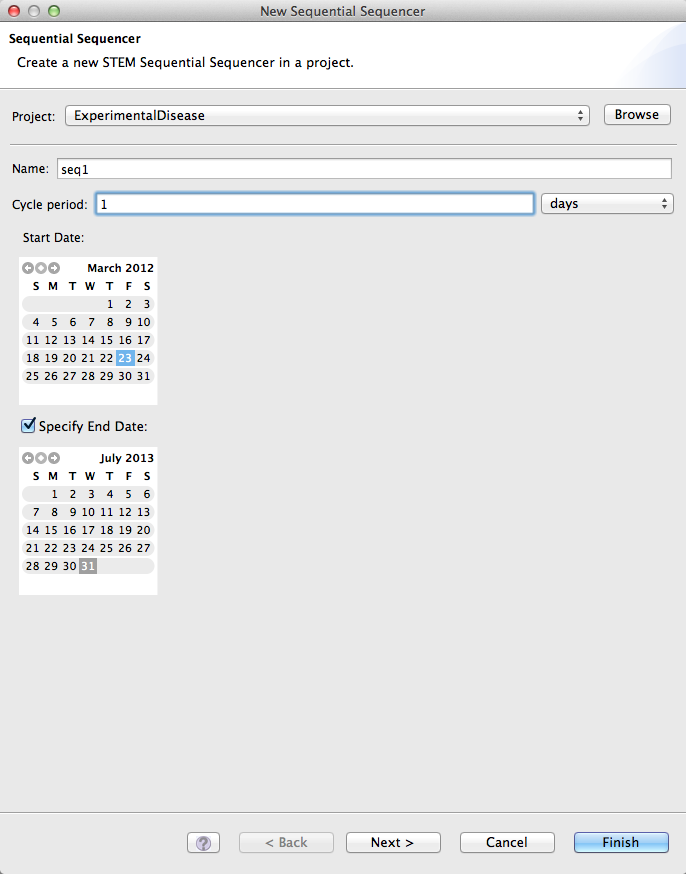
Next, create a new time sequencer. Under “New->Sequential Sequencer” you can create a sequencer that specifies the temporal increments upon which the evolution of your scenario will be based.
Then drag the sequencer into your scenario.
Template for a Food Borne Disease Scenario
The second scenario template provided in the templates project contains nested models to show how a food borne disease scenario should be structured.
Food Borne Scenario Exercise
As an exercise try the following steps.
- Start with an empty templates project (backup and delete your version above and re-extract the zip file)
- Add a geographic model to the GeographicModelGroup model node
- STEM does not provide basic census data for animals like pig or pork. You need to initialize them. The simplest way to do this is to create a PopulationInitializer for pig and for pork.
- Drag the two PopulationInitializers into the GeographicModelGroup
- Create a population model for pig (see Figure 12)
- Create a population model for pork
- Add both population models to the PopulationModelLevel model node
- Create two diseases. One for pig and one for pork. For now, use the Salmonella model. The disease names can be SalmonellaPig and SalmonellaPork. The first should affect population pig, and the second should affect population pork.
- Add both disease models to the DiseaseModelLevel model node
- Create an initializer for both the diseases
- Add the initializers to the scenario
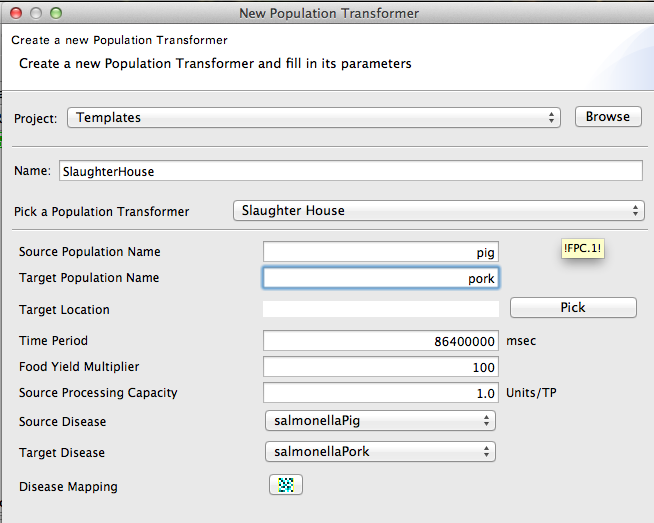
- Define a slaughterhouse as (shown in Figure 13). This maps pigs to pork and the diseases of pigs to diseases of pork.
- Add the slaughterhouse to the scenario
- Create a time sequencer
- Add the time sequencer to the scenario
- Run your scenario
Define a Geography
To define your geography, please follow the same steps you used for the simple disease model.
Create a Model of Non-Human Populations
STEM does not provide basic census data for animals like pig or food like pork. You need to initialize them. The simplest way to do this is to create a PopulationInitializer for pig and for pork. Please see the page on Initializing_a_Population for instructions on how to do this. The population initializer appears in the decorators folder and must get dragged to your GeographicModelGroup node.
Figure 13 shows creation of a new population model. If your population model is for something other than human (our default), please be sure to change the default ModelName from HumanPopulationModel to (e.g.) something like PigPopulationModel. Here we define the population pig.
Create a Slaughterhouse
A SlaughterHouse is a special type of transformation decorator in STEM. It maps a food source population to food and also maps diseases of the source to diseases in the food.
Figure 14 shows the dialog for creating a new slaughterhouse. This maps pigs to pork and Salmonella in pigs to Salmonella in pork.
Create and Add a Time Sequencer to the Scenario
Next, create and add a time sequencer to your scenario. Using "New->Sequential Sequencer" (see Figure 11 above under Human Disease), you can specify the temporal increments in your model, including start and end dates and the cycle period (in days). These parameters will define the evolution of your scenario.
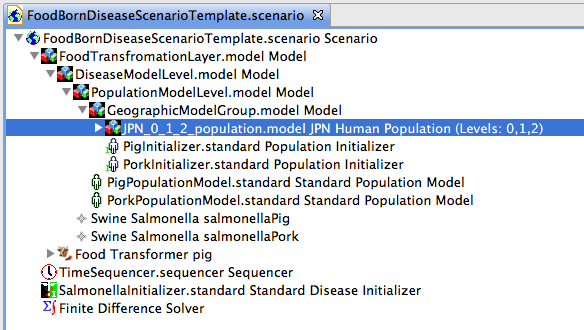
The Completed Template
Figure 15 shows how your finished scenario should be structured. All nested models are shown expanded. Each model contained by another models must contain everything the higher level model requires to run.


