Notice: This Wiki is now read only and edits are no longer possible. Please see: https://gitlab.eclipse.org/eclipsefdn/helpdesk/-/wikis/Wiki-shutdown-plan for the plan.
Common Build Infrastructure/Update Site
By default, all the features built by PDE will be exposed on your p2 repo / update site in a single default category.
However, it's possible that you may have nested features and do not need to expose them all, or you may want more than one category.
So, to control what features will be seen in the Update UI, you can use a category.xml file to define a template for your site.xml. Here's an example:
<?xml version="1.0" encoding="UTF-8"?>
<site pack200="true">
	<!--
	This template will expand any embedded Ant properties using <expandproperties/>

	For any feature id="org.eclipse.foo", set version="${org.eclipse.foo.version}" and
		url="features/org.eclipse.foo_${org.eclipse.foo.version}"

	if "${buildAlias}" == "${buildID}"
		${category.name} == "${zipPrefix} ${version} ${buildID}"
	else
		${category.name} == "${zipPrefix} ${buildAlias} ${buildID}"
	-->

        <!-- ${category.name} -->
        <category-def label="${category.name}" name="${category.name}">
                <description>
${category.name}: contains individual runtimes and an all-in-one feature (runtimes, sources, docs, and examples).
                </description>
        </category-def>

        <feature id="org.eclipse.gef.all" version="${org.eclipse.gef.all.version}" url="features/org.eclipse.gef.all_${org.eclipse.gef.all.version}.jar" patch="false">
                <category name="${category.name}"/>
        </feature>

        <feature id="org.eclipse.draw2d" version="${org.eclipse.draw2d.version}" url="features/org.eclipse.draw2d_${org.eclipse.draw2d.version}.jar" patch="false">
                <category name="${category.name}"/>
        </feature>
        <feature id="org.eclipse.gef" version="${org.eclipse.gef.version}" url="features/org.eclipse.gef_${org.eclipse.gef.version}.jar" patch="false">
                <category name="${category.name}"/>
        </feature>
        <feature id="org.eclipse.zest" version="${org.eclipse.zest.version}" url="features/org.eclipse.zest_${org.eclipse.zest.version}.jar" patch="false">
                <category name="${category.name}"/>
        </feature>
</site>
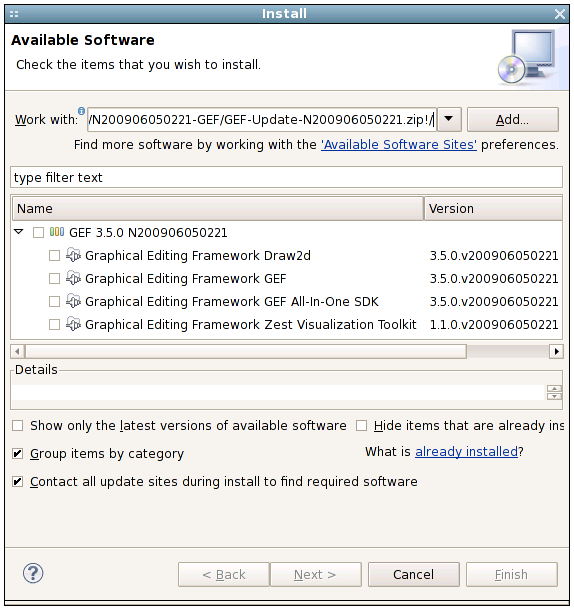
With only 4 features exposed, the result is as follows:
Converting from Automated Build
It's pretty simple to convert the site.xml file that your build creates into a custom category file. This is a nice way to do it as you can be sure not to miss anything.
- Grab the site.xml file from your built Update Site zip.
- Copy it into your project.releng project.
- Edit it using the Site Manifest Editor to edit default category, create new categories and move built features where you want them.
- Open with text editor and Find and Replace using the following regexp's:
- Find:
url="features/(.*)_(.*).jar" id="(.*)" version="(.*)"
- Replace:
url="features/$1_\${$1.version}.jar" id="$1" version="\${$1.version}"
- Find:
- Rename to category.xml
- You'll probably want to delete the top level build feature from the site features.
- You can let the user know what sort of build they're getting but without too much information by adding a line to build.properties like buildTypeQualifier=(Interim) and for your category.xml file doing something like:(I'm not completely certain that leaving version info off won't cause issues somewhere. --Milesparker.gmail.com 00:07, 10 September 2009 (UTC))
<category name="My Project ${buildTypeQualifier}"/>
See Also
- bug 272991 - Support user-defined site.xml for p2 metadata generation in Update zip
- GEF category.xml example

