Notice: This Wiki is now read only and edits are no longer possible. Please see: https://gitlab.eclipse.org/eclipsefdn/helpdesk/-/wikis/Wiki-shutdown-plan for the plan.
AM3/How Install New AM3 From CVS
Contents
Installation of the new AM3 (ATLAS MegaModel Management) prototype from SVN
Install Eclipse, EMF and ATL
In order to use these AM3 plugins (ATLAS MegaModel Management), you need Eclipse, EMF and ATL. These plugins have been tested with Eclipse 3.4, EMF 2.4 and ATL 2.0 and are compatible. You can download Eclipse here: http://www.eclipse.org/downloads/, EMF here: http://www.eclipse.org/emf/ and ATL here: http://www.eclipse.org/m2m/atl/.
Note that, you can also install ATL from its sources by following the process explained in the "How Install ATL From CVS" Wiki page.
Configuration of SVN access
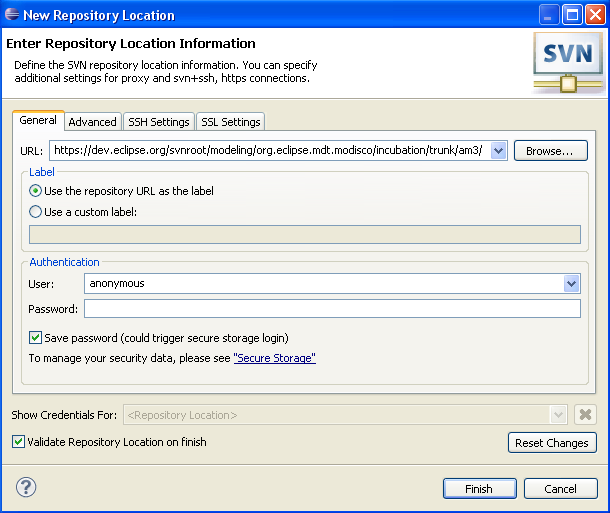
You should go to the SVN Repository view (you should first do Window -> Open Perspective in order to open the SVN Repository Exploring perspective). Then you should add a new repository location. The required parameters are the followings:
You do not need a password.
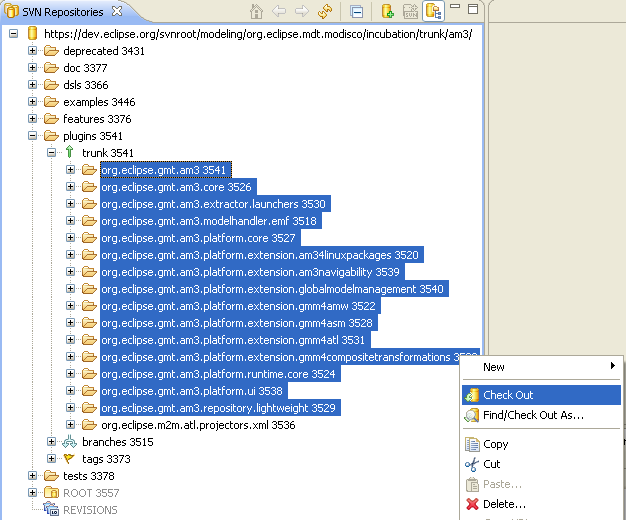
Then, you can go to plugins -> trunk. You can now select the projects as shown on the screenshot and check them out into your workspace (this action is available in the context menu).
Configuration of AM3
Now, you need to go to the Plug-in perspective.
AM3 is ready to be tested. Just open the "Plug-in Development perspective" and launch a Run-time workbench (Click on Run -> Run as -> Run-time workbench).
You are ready to use the new AM3 prototype.


